Введение
This guide for the Hover-1 Maverick guides users in replacing the motherboard in their device. The motherboard is crucial within the hoverboard. It controls all functions and acts as a medium for communication between parts in the device. Symptoms of having a faulty motherboard include the device being unable to balance, unable to hold a charge, has flashing lights, or has trouble powering on. Users need to disconnect the battery and the wires in order to replace the motherboard.
Выберете то, что вам нужно
-
-
Remove the twenty 15mm Phillips #1 screws from the shell of the hoverboard.
-
Open the shell.
-
-
-
Disconnect the battery to prevent any electrical currents from coming through the wires.
-
-
-
-
Remove the four 8mm Phillips #1 screws.
-
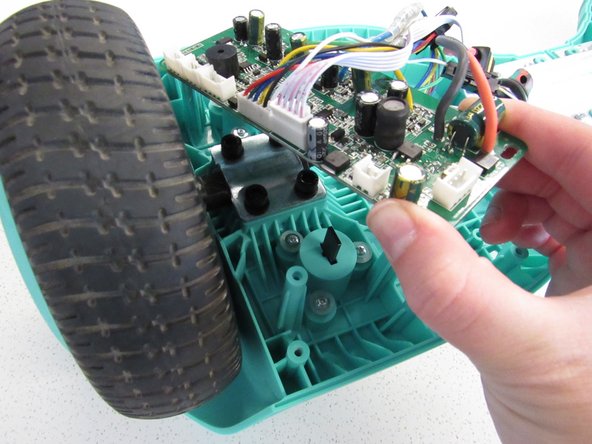
Remove the motherboard from the device.
-
Repeat for the other motherboard.
-
To reassemble your device, follow these instructions in reverse order.
To reassemble your device, follow these instructions in reverse order.
Отменить: Я не выполнил это руководство.
2 участников успешно повторили данное руководство.


