Эта версия возможно содержит некорректные исправления. Переключить на последнюю проверенную версию.
Выберете то, что вам нужно
-
Этот шаг не переведен. Помогите перевести
-
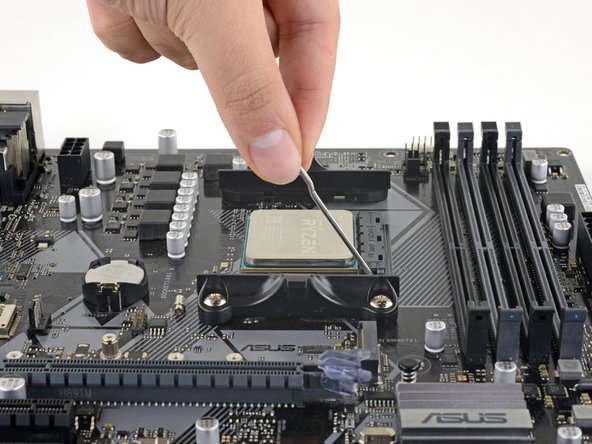
Assess the damage and the amount of bent pins by gripping the CPU by the edges and peering down the straight rows of pins to check for abnormalities.
-
Check each row—from both directions—so you have a good idea of which areas you need to work on. For example, look down the pins north to south as well as east to west.
-
-
Этот шаг не переведен. Помогите перевести
-
Gently slide the utility blade between two rows of pins.
-
If bent pins block the blade's path, gently bend them upright using the sharp corner of the blade, going one at a time.
-
-
Этот шаг не переведен. Помогите перевести
-
Once the blade can make it down a full row, tilt the blade side to side to straighten the pins on each flanking row.
-
-
Этот шаг не переведен. Помогите перевести
-
Rotate the CPU 90˚ and slide the blade down a row in the opposite direction.
-
As you push the blade along the row, rock it back and forth, straightening pins along the way.
-
-
-
Этот шаг не переведен. Помогите перевести
-
If you're really in a pinch, you can modify a pair of tweezers to have a slightly curled tip.
-
Be careful using too much force—the long pencil body will give you more leverage than you realize.
-
-
Этот шаг не переведен. Помогите перевести
-
Repeat the last four steps until all rows are as straight as possible.
-
-
Этот шаг не переведен. Помогите перевести
-
On your motherboard, lift the socket locking arm out around the locking clip and up to its vertical position.
-
-
Этот шаг не переведен. Помогите перевести
-
Match the corner of the CPU with a gold triangle to the corner of the motherboard socket that also has a triangle.
-
Grip the CPU by its edges and align it over the socket.
-
-
Этот шаг не переведен. Помогите перевести
-
Lower the CPU into the socket, ensuring that all pins fall into their matching holes.
-
If the pins don't find their holes immediately, or if only one side goes in, remove the CPU and check its pins again.
-
-
Этот шаг не переведен. Помогите перевести
-
Once the pins on your CPU are straight enough to allow it to be installed into the socket, close the locking arm by pulling it down, around the locking tab.
-
-
Этот шаг не переведен. Помогите перевести
-
Without touching the CPU, repeat the locking/unlocking process on the socket four to five more times.
-
That's it! Close the socket's locking arm and proceed with your PC build.
-


Отменить: Я не выполнил это руководство.
24 участников успешно повторили данное руководство.


14 Комментариев
Thanks so much!
Ce tutoriel est aussi valable pour les sockets Intel à “matrice de pastilles” (Land Grid Array) sauf que dans le cas d’un socket LGA les pins à relever seront sur le socket plutôt que sur le processeur, mais le principe est le même, j’ai pu sauver une carte mère avec un socket LGA 1155 comme ça.
Exemple de socket LGA ou les pins sont bien visibles : https://upload.wikimedia.org/wikipedia/c...
Les pins sur les sockets sont très petits, mais avec une pincette de précision (visible dans ce tutoriel) comme celle d’iFixit c’est faisable.
It's a valuable guide for those who get into trouble with bent CPU pins.
I have encountered and dealt with such a problem several times. It's not an easy task.
This guide gives readers the knowledge and tool to fix the struggle problem. Especially, step-by-step instruction with clear photos will encourage readers to overcome the problem.
Thank U :) I’ll fix it.
using a razor blade is brilliant. worked perfectly