Эта версия возможно содержит некорректные исправления. Переключить на последнюю проверенную версию.
Выберете то, что вам нужно
-
Этот шаг не переведен. Помогите перевести
-
Use a pry bar to remove the pre-existing damaged wood pieces.
-
Start with the riser first.
-
-
Этот шаг не переведен. Помогите перевести
-
Use a pry bar to remove the pre-existing damaged wood pieces.
-
Remove the treads on the stairs.
-
-
Этот шаг не переведен. Помогите перевести
-
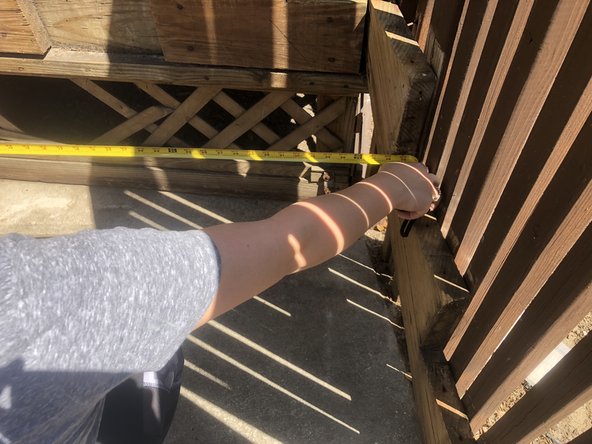
Use a measuring tape to measure the foundation where the new steps will be placed.
-
-
Этот шаг не переведен. Помогите перевести
-
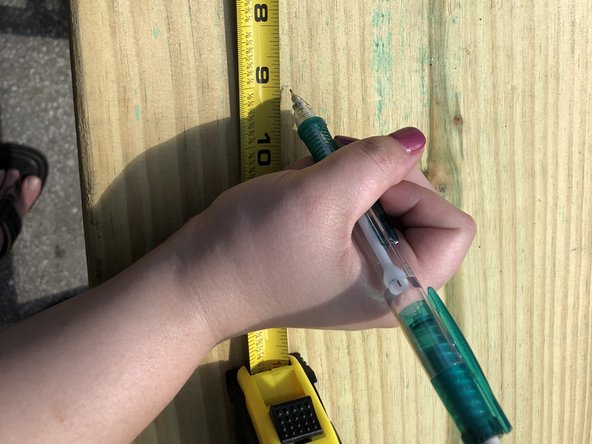
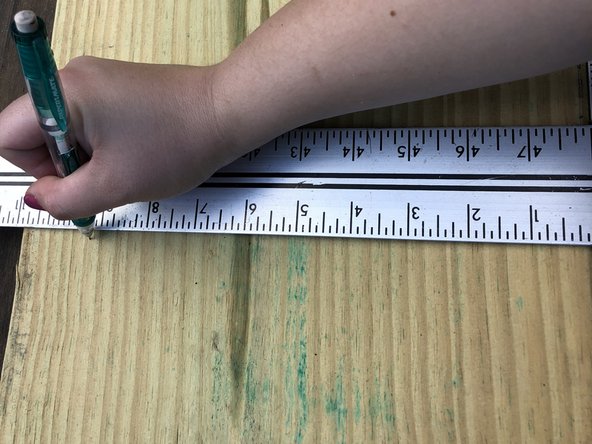
Mark your measurements on both ends of your new weather treated wood using a measuring tape and a pencil.
-
-
-
Этот шаг не переведен. Помогите перевести
-
Place the new piece of wood onto the end of a sturdy table.
-
-
Этот шаг не переведен. Помогите перевести
-
Use a circular saw to cut across the straight line marked on the new piece of wood.
-
-
Этот шаг не переведен. Помогите перевести
-
Place the new piece of wood (riser) on the steps to ensure that it fits.
-
Use a leveler to make sure that it is level.
-
-
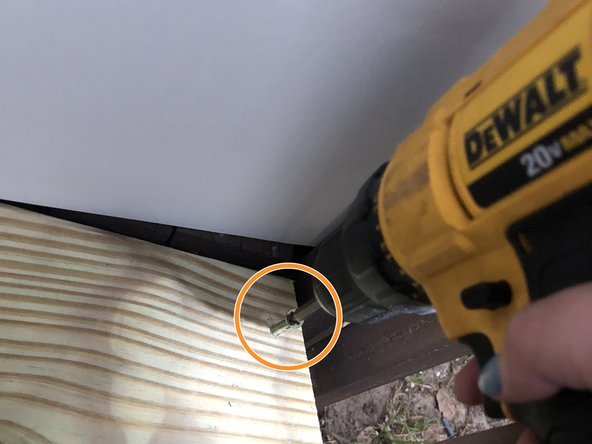
Этот шаг не переведен. Помогите перевести
-
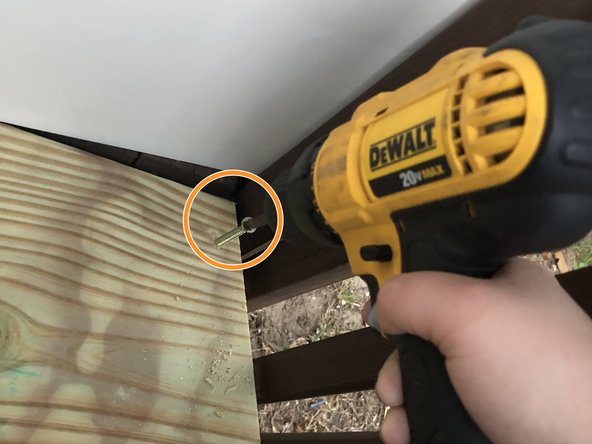
Secure your wood piece (riser) into place using a drill and galvanized screws.
-
Create two pilot holes with the correct drill bit.
-
Secure the wood (riser) into place by drilling 2" galvanized Phillips head screws into the pilot holes.
-
-
Этот шаг не переведен. Помогите перевести
-
Make sure your wood piece (tread) fits into place and is level.
-
-
Этот шаг не переведен. Помогите перевести
-
Secure your wood piece (tread) into place using a drill and galvanized screws.
-
Create three pilot holes with the correct drill bit.
-
Secure the wood (tread) into place by drilling 2" galvanized Phillips head screws into the pilot holes.
-


Отменить: Я не выполнил это руководство.
Еще один человек закончил это руководство.
Команда

USF Sarasota-Manatee, Team S1-G1, Stewart Spring 2018 Участник USF Sarasota-Manatee, Team S1-G1, Stewart Spring 2018
USFSM-STEWART-S18S1G1
15 членов
Автор 25 руководств