Эта версия возможно содержит некорректные исправления. Переключить на последнюю проверенную версию.
Выберете то, что вам нужно
-
Этот шаг не переведен. Помогите перевести
-
Lay the broken chair such that the crack is parallel to the floor.
-
-
Этот шаг не переведен. Помогите перевести
-
Clean the surface of the crack with the dampened rag to remove all dust and debris.
-
Repeat on all sides of the crack (edges and backside).
-
-
Этот шаг не переведен. Помогите перевести
-
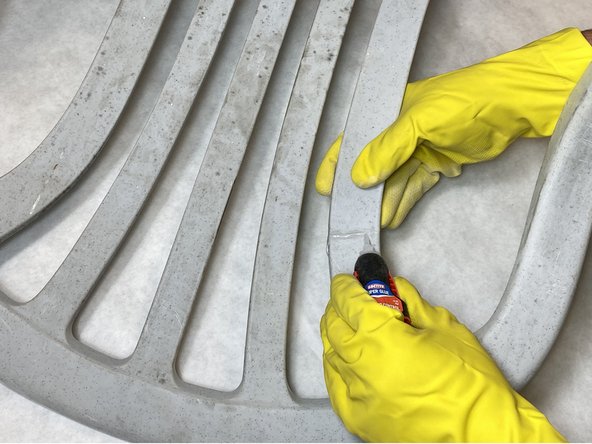
Apply glue between the crack.
-
Then apply glue across the surface of the crack.
-
-
-
Этот шаг не переведен. Помогите перевести
-
Hold the two glued pieces together for 30 seconds to allow the glue to bind to the chair.
-
-
Этот шаг не переведен. Помогите перевести
-
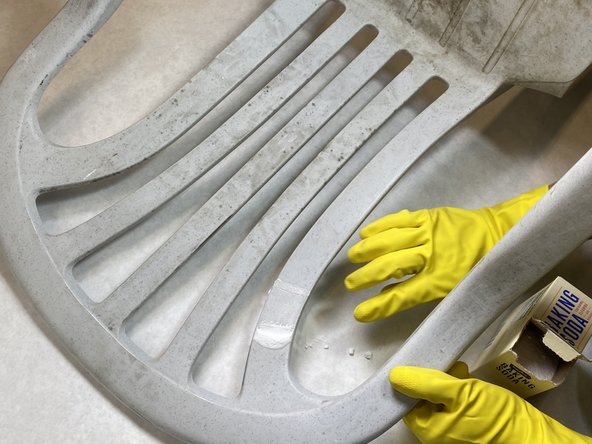
Pour baking soda over the crack until the glue is completely covered under a layer of baking soda.
-
-
Этот шаг не переведен. Помогите перевести
-
Use your finger to distribute the baking soda in order to cover all parts of the crack.
-
-
Этот шаг не переведен. Помогите перевести
-
After ten minutes, brush away some of the un-glued baking soda to check if the glue is solid.
-
-
Этот шаг не переведен. Помогите перевести
-
Flip the chair over.
-
Repeat the procedure on the backside of the crack starting from step 4 and ending with step 8.
-
-
Этот шаг не переведен. Помогите перевести
-
Remove excess baking soda from both the front and back side of the crack.
-
Use water or isopropyl alcohol to remove fine grains around the repair site.
-
-
Этот шаг не переведен. Помогите перевести
-
Sand off any excess layers of glue on both the front and backside of the chair using coarse sandpaper.
-


Отменить: Я не выполнил это руководство.
5 участников успешно повторили данное руководство.
Команда

UC Davis, Team S2-G7, Andersen Winter 2020 Участник UC Davis, Team S2-G7, Andersen Winter 2020
UCD-ANDERSEN-W20S2G7
3 членов
Автор 5 руководств
2 Комментариев
Do you push the baking soda down into the glue (or into the crack), or just spread evenly on the surface?
What glue did you use?