Перейти к основному содержанию

How to Fix Stick Drift for a PlayStation Dualsense Controller V1

Выберете то, что вам нужно

  1. How to Fix Stick Drift for a PlayStation Dualsense Controller V1, How to Fix Stick Drift for a PlayStation Dualsense Controller V1: шаг 1, изображение 1 из 3 How to Fix Stick Drift for a PlayStation Dualsense Controller V1, How to Fix Stick Drift for a PlayStation Dualsense Controller V1: шаг 1, изображение 2 из 3 How to Fix Stick Drift for a PlayStation Dualsense Controller V1, How to Fix Stick Drift for a PlayStation Dualsense Controller V1: шаг 1, изображение 3 из 3
    • Insert an opening tool into the bottom right corner of the controller.

    • Lift upwards with the opening tool.

    • Continue using the opening tool to pry up the inner sides of the black rim.

    • Repeat on the opposite side.

  2. How to Fix Stick Drift for a PlayStation Dualsense Controller V1: шаг 2, изображение 1 из 3 How to Fix Stick Drift for a PlayStation Dualsense Controller V1: шаг 2, изображение 2 из 3 How to Fix Stick Drift for a PlayStation Dualsense Controller V1: шаг 2, изображение 3 из 3
    • Lift the black cover upwards to remove.

  3. How to Fix Stick Drift for a PlayStation Dualsense Controller V1: шаг 3, изображение 1 из 2 How to Fix Stick Drift for a PlayStation Dualsense Controller V1: шаг 3, изображение 2 из 2
    • Insert the opening tool below the L1 button and pry the button away from the controller.

  4. How to Fix Stick Drift for a PlayStation Dualsense Controller V1: шаг 4, изображение 1 из 2 How to Fix Stick Drift for a PlayStation Dualsense Controller V1: шаг 4, изображение 2 из 2
    • Insert the opening tool below the R1 button and pry the button away from the controller.

  5. How to Fix Stick Drift for a PlayStation Dualsense Controller V1: шаг 5, изображение 1 из 2 How to Fix Stick Drift for a PlayStation Dualsense Controller V1: шаг 5, изображение 2 из 2
    • Detach the two middle clips using the opening tool or your fingers.

  6. How to Fix Stick Drift for a PlayStation Dualsense Controller V1: шаг 6, изображение 1 из 2 How to Fix Stick Drift for a PlayStation Dualsense Controller V1: шаг 6, изображение 2 из 2
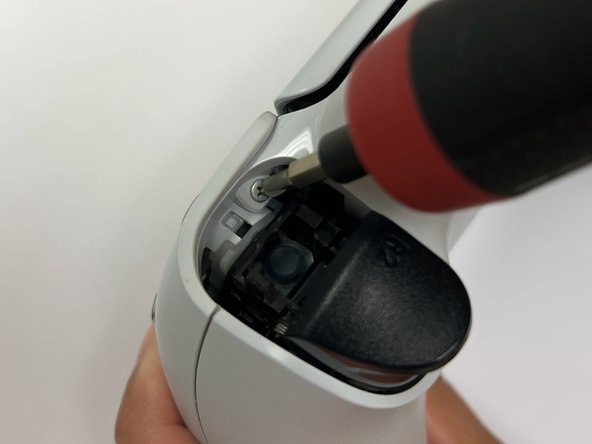
    • Remove the top right and left 6.4 mm screws using a Phillips #00 screwdriver.

  7. How to Fix Stick Drift for a PlayStation Dualsense Controller V1: шаг 7, изображение 1 из 2 How to Fix Stick Drift for a PlayStation Dualsense Controller V1: шаг 7, изображение 2 из 2
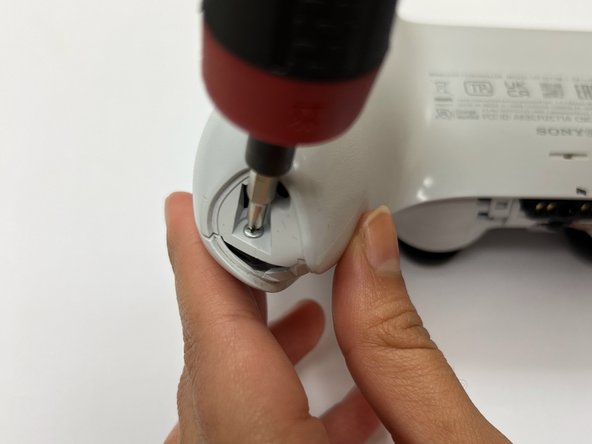
    • Remove the bottom right and left 6.4 mm screws using a Phillips #00 screwdriver.

  8. How to Fix Stick Drift for a PlayStation Dualsense Controller V1: шаг 8, изображение 1 из 2 How to Fix Stick Drift for a PlayStation Dualsense Controller V1: шаг 8, изображение 2 из 2
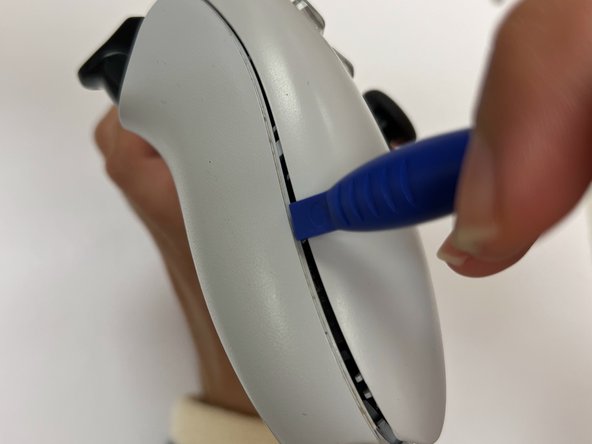
    • Insert the opening tool in between the sides to open the case.

  9. How to Fix Stick Drift for a PlayStation Dualsense Controller V1: шаг 9, изображение 1 из 2 How to Fix Stick Drift for a PlayStation Dualsense Controller V1: шаг 9, изображение 2 из 2
    • With both hands, pull apart the white bottom case to remove.

  10. How to Fix Stick Drift for a PlayStation Dualsense Controller V1: шаг 10, изображение 1 из 3 How to Fix Stick Drift for a PlayStation Dualsense Controller V1: шаг 10, изображение 2 из 3 How to Fix Stick Drift for a PlayStation Dualsense Controller V1: шаг 10, изображение 3 из 3
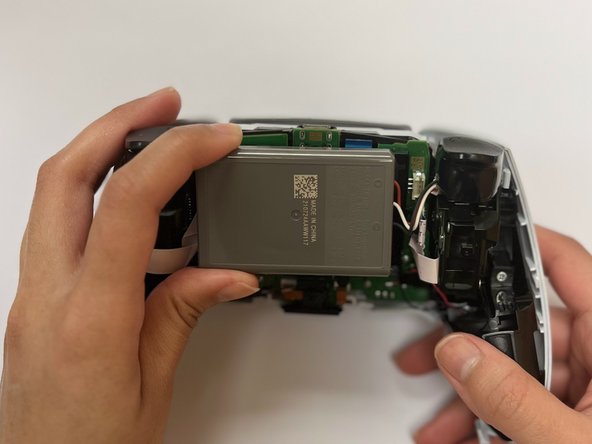
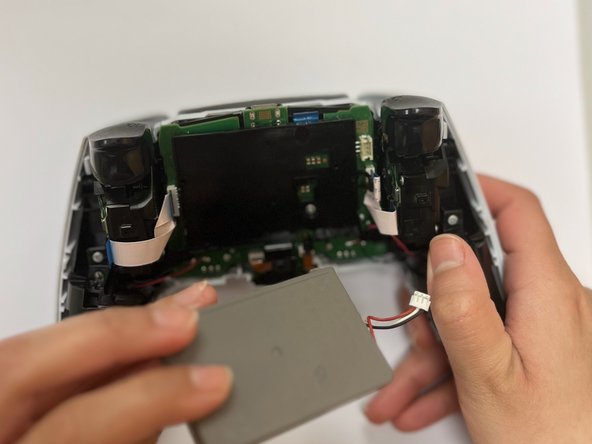
    • Using a pair of tweezers or your fingers, disconnect the battery from the motherboard.

  11. How to Fix Stick Drift for a PlayStation Dualsense Controller V1: шаг 11, изображение 1 из 3 How to Fix Stick Drift for a PlayStation Dualsense Controller V1: шаг 11, изображение 2 из 3 How to Fix Stick Drift for a PlayStation Dualsense Controller V1: шаг 11, изображение 3 из 3
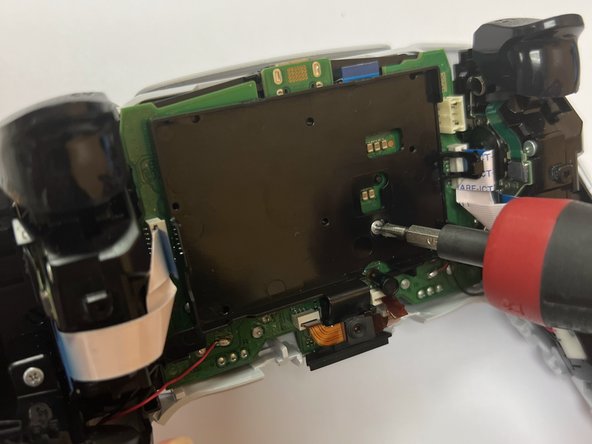
    • Use tweezers or your fingers to pull the orange ribbon.

    • Remove the 6.4 mm screw using a Phillips #00 screwdriver.

    • Lift the battery bracket.

  12. How to Fix Stick Drift for a PlayStation Dualsense Controller V1: шаг 12, изображение 1 из 3 How to Fix Stick Drift for a PlayStation Dualsense Controller V1: шаг 12, изображение 2 из 3 How to Fix Stick Drift for a PlayStation Dualsense Controller V1: шаг 12, изображение 3 из 3
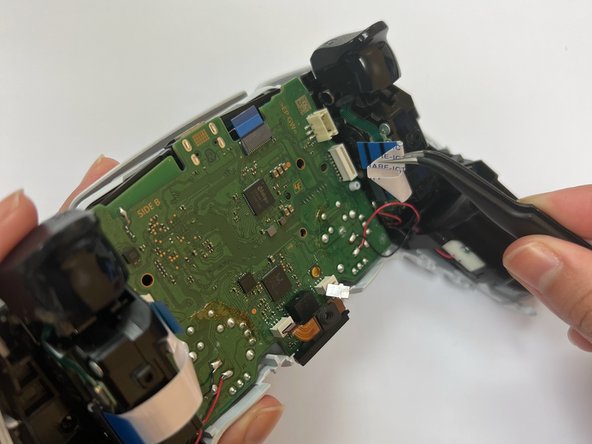
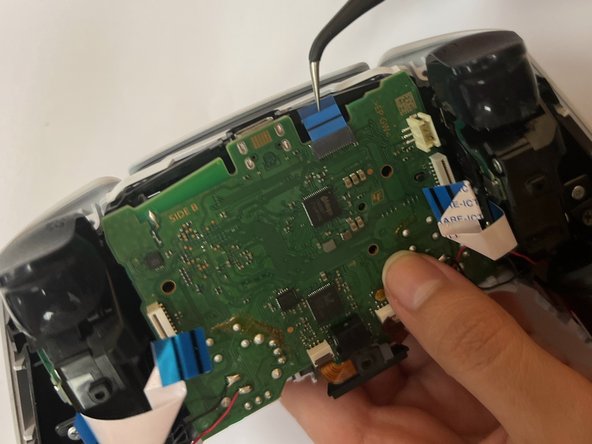
    • Use tweezers or your fingers to detach the four ribbons from the motherboard.

  13. How to Fix Stick Drift for a PlayStation Dualsense Controller V1: шаг 13, изображение 1 из 2 How to Fix Stick Drift for a PlayStation Dualsense Controller V1: шаг 13, изображение 2 из 2
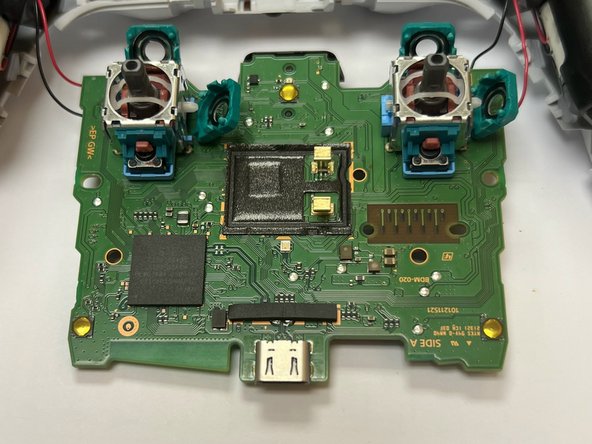
    • Guide the joysticks through the front case and lift the motherboard.

  14. How to Fix Stick Drift for a PlayStation Dualsense Controller V1: шаг 14, изображение 1 из 3 How to Fix Stick Drift for a PlayStation Dualsense Controller V1: шаг 14, изображение 2 из 3 How to Fix Stick Drift for a PlayStation Dualsense Controller V1: шаг 14, изображение 3 из 3
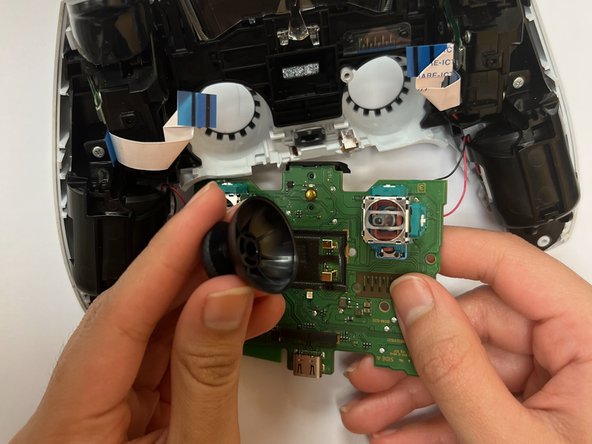
    • Remove the joystick covers by pulling straight off.

  15. How to Fix Stick Drift for a PlayStation Dualsense Controller V1: шаг 15, изображение 1 из 3 How to Fix Stick Drift for a PlayStation Dualsense Controller V1: шаг 15, изображение 2 из 3 How to Fix Stick Drift for a PlayStation Dualsense Controller V1: шаг 15, изображение 3 из 3
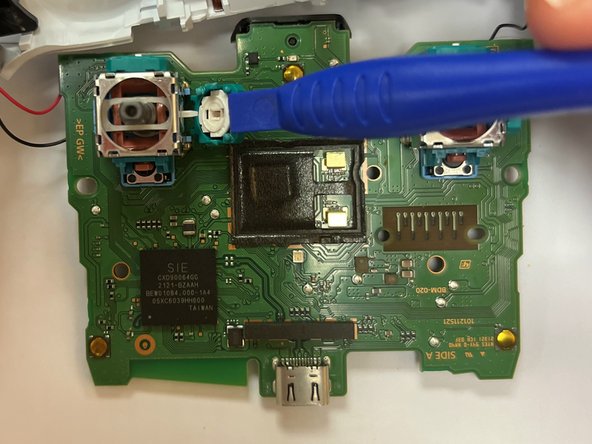
    • Use the opening tool to snap open the green tabs.

  16. How to Fix Stick Drift for a PlayStation Dualsense Controller V1: шаг 16, изображение 1 из 3 How to Fix Stick Drift for a PlayStation Dualsense Controller V1: шаг 16, изображение 2 из 3 How to Fix Stick Drift for a PlayStation Dualsense Controller V1: шаг 16, изображение 3 из 3
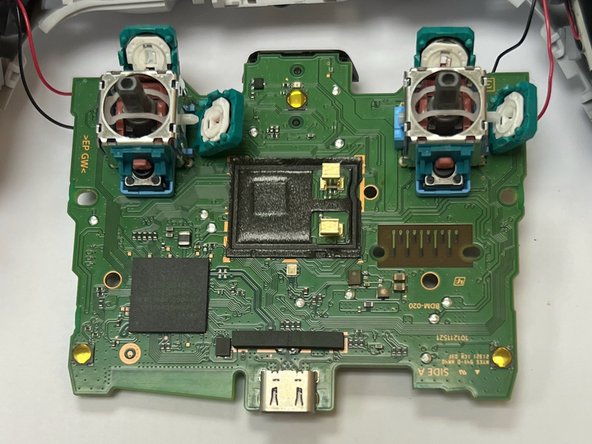
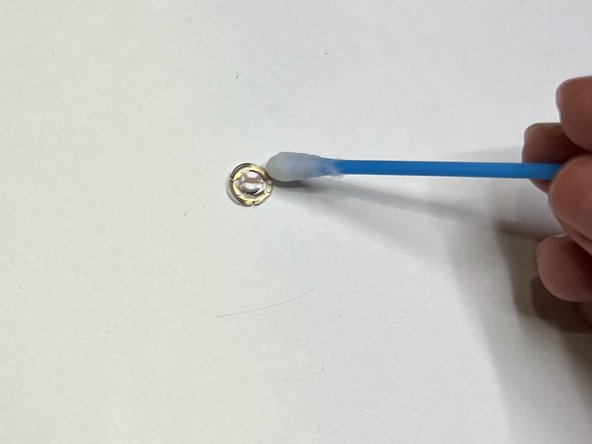
    • Use tweezers to remove the wiper disks.

  17. How to Fix Stick Drift for a PlayStation Dualsense Controller V1: шаг 17, изображение 1 из 2 How to Fix Stick Drift for a PlayStation Dualsense Controller V1: шаг 17, изображение 2 из 2
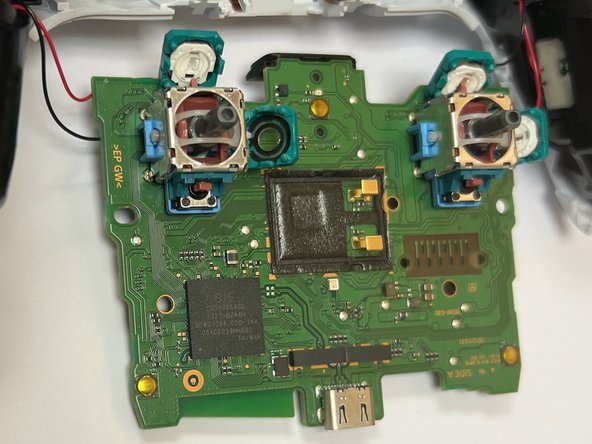
    • Using a cotton tip with 99.8% isopropyl alcohol, clean around the black rims of the green tabs and the wiper disks.

Заключение

To reassemble your device, follow these instructions in reverse order.

11 участников успешно повторили данное руководство.

Yadsari

Участник с: 11/01/23

578 Репутация

1 руководство автора

Команда

CSU Los Angeles, Team 4-8, Kershman Fall 2023 Участник CSU Los Angeles, Team 4-8, Kershman Fall 2023

CSULA-KERSHMAN-F23S4G8

1 член

Автор 5 руководств

5 Комментариев

Just cleaning the carbon track on the potentiometer is not really a long term fix for stick drift. Better fixes would be to either replace the photometers or to replace the complete stick with a hall-effect joy stick.

David Fear - Ответить

Do you have a link?

Nora -

I did it, sadly cleaning wasn't enough. So I guess I'll have to replace something.

Riedweg Guillaume - Ответить

There is now a real fix for this, hall effect mod by Jun Zheng. About $25 per pair of mods. Check out the guys YouTube, link to his AliExpress store in his video description. Just use the guide here for disassembly. https://youtube.com/@junZeng-520?si=UYbf...

Alex Lao - Ответить

Upon reassembly I get the three orange blinks error. Research says there’s a ribbon connection error, is that right? I went through steps again and checked all connections, but no change. Have I short circuited something? Would replacing the potentiometer even fix it at this point? Have I damaged a ribbon? (There is no visible damage).

joe lewis - Ответить

Добавить комментарий

Просмотр статистики:

За последние 24часов: 119

За последние 7 дней: 739

За последние 30 дней: 2,741

За всё время: 10,328