Введение
Use this guide to fix the broken clicker in your Razer Naga Trinity gaming mouse.
Each mouse has a fixed maximum number of clicks. When the mouse is used for a long time, the clicker of the mouse will have problems. At this time, you will need to manually disassemble the mouse for maintenance.
Make sure you do not use too much force; the parts inside the mouse are sometimes very easy to damage.
This guide is not only applicable to this model,—other mice can also be repaired with this guide, but the internal structure may be different.
Выберете то, что вам нужно
-
-
Remove the three pads from the bottom of the mouse.
-
Remove the four screws beneath the pads using a JIS #1 screwdriver.
-
-
-
Press the top of mouse and pull back to disconnect the mouse shell.
-
Pull out the cord that connects the RGB button.
-
-
-
Remove the right shell.
-
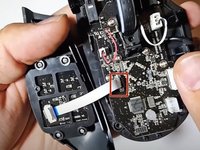
Disconnect the cable connecting the left shell to the mouse.
-
Remove the left shell.
-
-
-
-
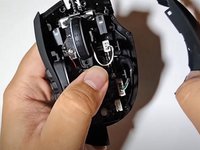
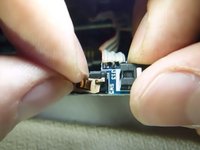
Insert the open safety pin to lift one side latch slightly.
-
Repeat for the other side.
-
-
-
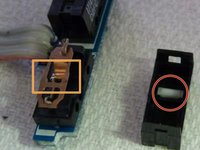
Remove the clicker and white pin.
-
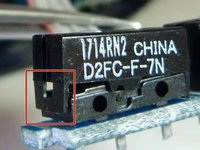
Gently press the middle part of the copper sheet until it unhooks itself.
-
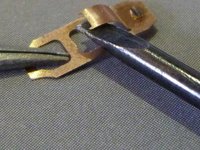
Pull the bended part of the copper sheet back.
-
-
-
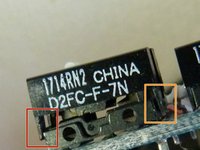
Reassemble the copper sheet with the white pin seated properly.
-
Push the spring down into its place using a spudger.
-


To reassemble your device, follow these instructions in reverse order.
Отменить: Я не выполнил это руководство.
4 человек успешно провели ремонт по этому руководству.
Команда

York University, Team S-12, Woodhouse Winter 2022 Участник York University, Team S-12, Woodhouse Winter 2022
YORK-WOODHOUSE-W22SSG12
1 член
Автор 4 руководств
1 Комментарий к руководству
On the latest version of the mouse, the clicker button can no longer be opened...