Введение
If your plushie or stuffed animal is looking a little floppy or lopsided it may be due to loss of stuffing from repetitive usage. Use this guide to replace the stuffing and get your plushie friend looking good as new. This procedure will work for most stuffed animals and plushies.
Stuffing is an important aspect of a plushie or stuffed animal as it helps maintain its shape and design. It also brings life and character into the toy.
Before using this guide, make sure your plushie doesn't need a quick re-fluffing. Quite often a plushie might fall flat due to normal use but can easily be fluffed back to its normal state without needing to replace its stuffing.
Steps 2, 7, and 9 require the handling of sharp objects. Please ensure proper handling of these objects to ensure no injuries.
Выберете то, что вам нужно
-
-
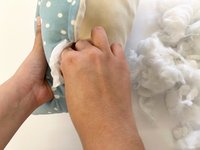
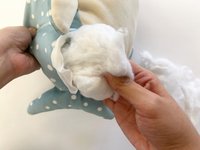
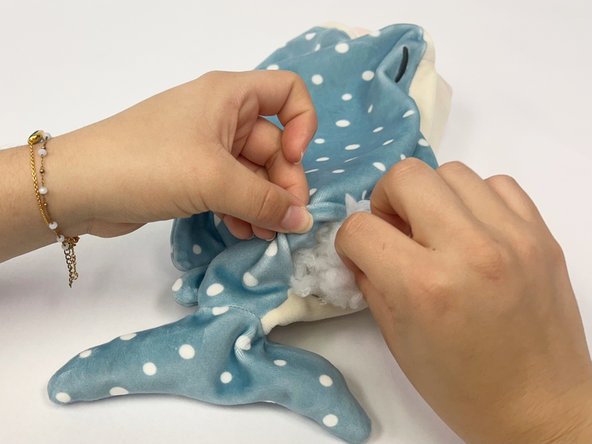
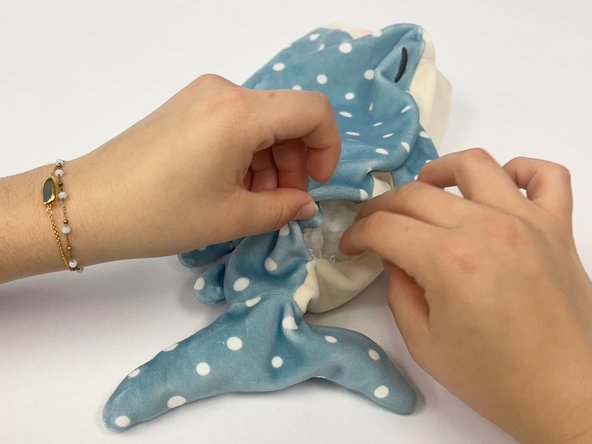
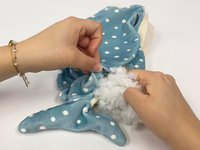
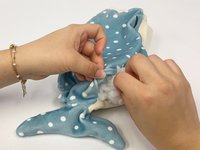
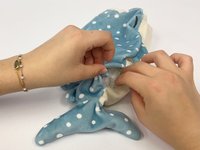
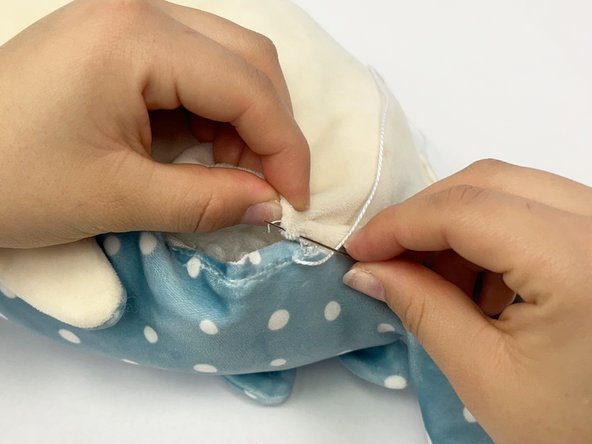
Partially unpick the seam using a seam ripper or pair of scissors (about 2 inches).
-
-
-
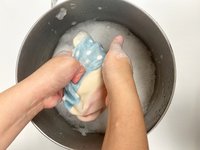
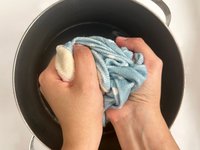
Fill a sink or bowl with warm water and light detergent.
-
Gently hand wash your plushie.
-
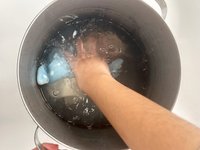
Drain and replace the container with clean and warm water.
-
Rinse off the plushie and wring it until it is no longer dripping.
-
-
-
-
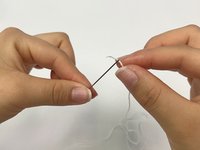
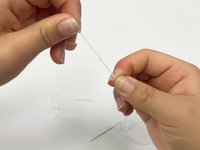
Pull the thread through the eye of the needle.
-
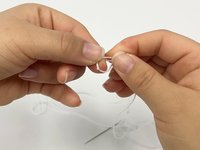
Create a knot at the end of the thread.
-
-
-
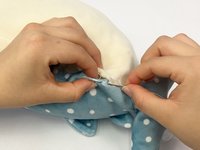
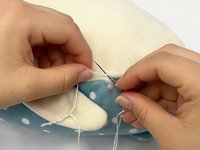
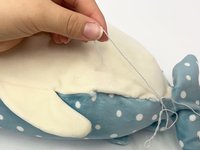
Insert the needle through the inside edge of the folded fabric
-
Make a stitch in the inside fold and pull the thread through.
-
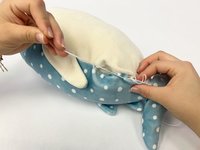
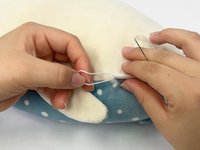
Insert the needle on the other fold and make a stitch
-
Pull the thread through and alternate stitches until you reach the other side of the opening.
-
-
-
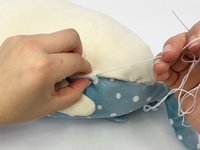
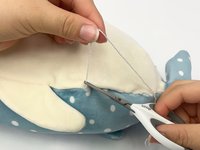
Thread the needle through the inside stitches to loop and knot the end of the thread.
-
Repeat several times to secure the stitch.
-


Your plushie is now looking almost brand new!
Отменить: Я не выполнил это руководство.
Еще один человек закончил это руководство.

Команда

UC Davis, Team 2-4, Andersen Winter 2024 Участник UC Davis, Team 2-4, Andersen Winter 2024
UCD-ANDERSEN-W24S2G4
3 членов
Автор 2 руководств