Эта версия возможно содержит некорректные исправления. Переключить на последнюю проверенную версию.
Выберете то, что вам нужно
-
Этот шаг не переведен. Помогите перевести
-
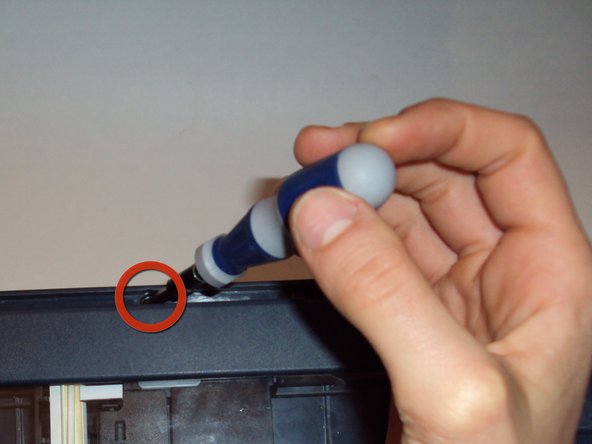
Carefully wedge the flathead 3/32" screwdriver on the outer groove of the control panel faceplate.
-
Follow the perimeter of the groove with the flathead 3/32" screwdriver making sure to gently pry and lift upward until the control panel faceplate comes off.
-
-
Этот шаг не переведен. Помогите перевести
-
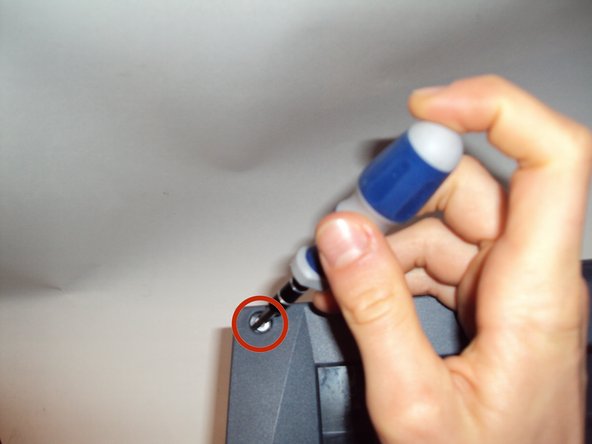
Once the control panel faceplate is off, look for the Lock/Unlock tab located underneath the off button.
-
To unlock and release the control panel, insert the flathead 3/32" screwdriver into the tab and carefully push down. The control panel will then separate from the printer's base by sliding it downward a little.
-
-
Этот шаг не переведен. Помогите перевести
-
Underneath the control panel will be a flat grey ribbon cable. This cable is attached at the base of the green control board with the other end of the cable located on the back side of the printer's base.
-
Carefully disconnect both ends of the flat grey ribbon cable to release the control panel in its entirety.
-
-
Этот шаг не переведен. Помогите перевести
-
Lift open the scanner lid and locate a black tab located at the center of the scanner bed.
-
Using your finger push (pull on some printers) the tab towards the scanner lid. This will release the scanner lid
-
-
Этот шаг не переведен. Помогите перевести
-
Once the scanner lid is removed, use the Philips #1(Torx on some printers) Screwdriver to remove the screw.
-
-
Этот шаг не переведен. Помогите перевести
-
Remove all four silver screws from the corners of the scanner glass cover with a T10 Torx Screwdriver.
-
-
Этот шаг не переведен. Помогите перевести
-
Once you have removed the four torx screws, gently lift the scanner glass cover from the printer's base.
-
-
Этот шаг не переведен. Помогите перевести
-
Turn the scanner glass over and place it on a clean surface.
-
Moisten a lint-free cloth with alcohol and gently wipe down the calibration strip.
-


Отменить: Я не выполнил это руководство.
8 участников успешно повторили данное руководство.
Команда

Cal Poly, Team 12-31, Maness Spring 2011 Участник Cal Poly, Team 12-31, Maness Spring 2011
CPSU-MANESS-S11S12G31
5 членов
Автор 9 руководств
2 Комментариев
Thank you for this guide! My printer scan head was clicking and grinding at startup and would not allow me to print.
In addition to cleaning the glass and calibration strip, I manually slid the scanner head back and forth through its full range of motion. Once the printer was reassembled, the grinding ceased and all operations are back to normal.
Yes, great advice!
And the step by step guide is really of vital help! Just taking the dust flocks out and carefully cleaning the parts w/ a small brush or ear tips and akcohol saved my 12 yr old printer! I'm soooo greatful to you all for helping us keep our hardware goods for a long time to come!