Перейти к основному содержанию

Hp 15-f305dx Hard Drive Replacement

Выберете то, что вам нужно

  1. Hp 15-f305dx Hard Drive Replacement, Battery: шаг 1, изображение 1 из 1
    • Turn off the computer. If you are unsure whether the computer is off or in Hibernation, turn the computer on, and then shut it down through the operating system.

  2. Hp 15-f305dx Hard Drive Replacement: шаг 2, изображение 1 из 1
    • Turn the computer upside down on a flat surface.

  3. Hp 15-f305dx Hard Drive Replacement: шаг 3, изображение 1 из 3 Hp 15-f305dx Hard Drive Replacement: шаг 3, изображение 2 из 3 Hp 15-f305dx Hard Drive Replacement: шаг 3, изображение 3 из 3
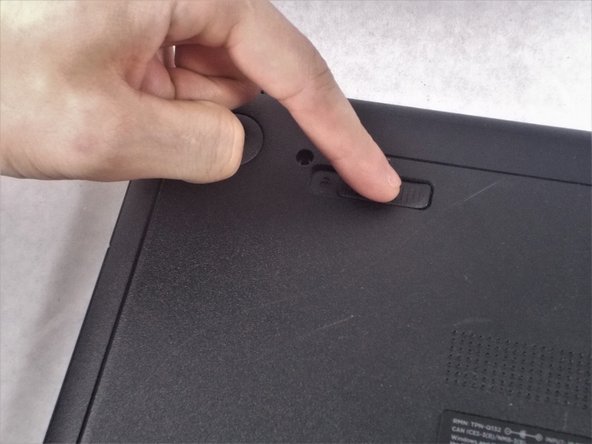
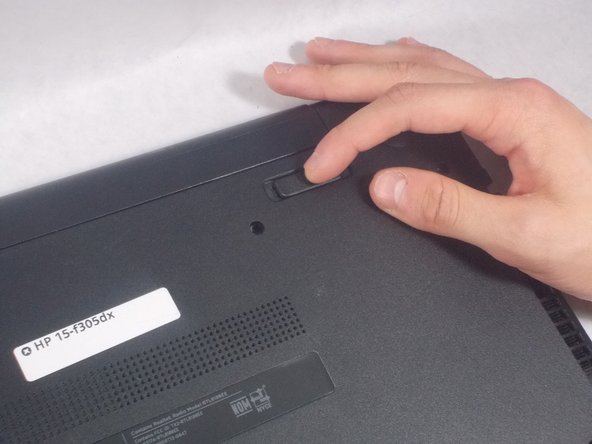
    • Firmly slide the release latch to unlock the battery and slide the battery release latch to release the battery.

  4. Hp 15-f305dx Hard Drive Replacement: шаг 4, изображение 1 из 2 Hp 15-f305dx Hard Drive Replacement: шаг 4, изображение 2 из 2
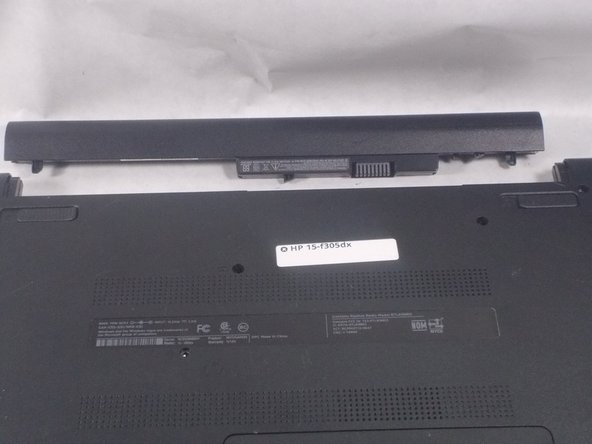
    • Lift the battery from the middle and then pivot it outward to remove it from the computer.

  5. Hp 15-f305dx Hard Drive Replacement, Keyboard: шаг 5, изображение 1 из 1
    • Flip the laptop around.

  6. Hp 15-f305dx Hard Drive Replacement: шаг 6, изображение 1 из 2 Hp 15-f305dx Hard Drive Replacement: шаг 6, изображение 2 из 2
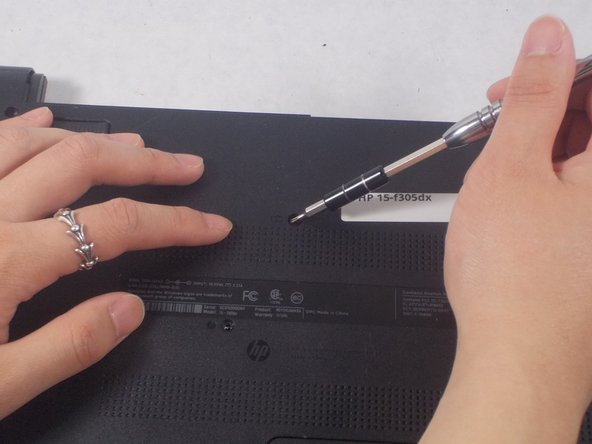
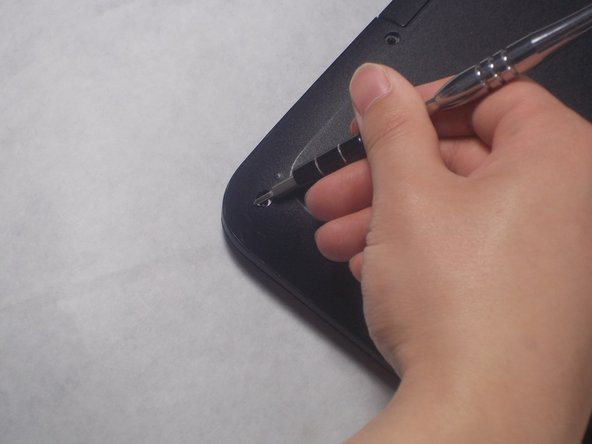
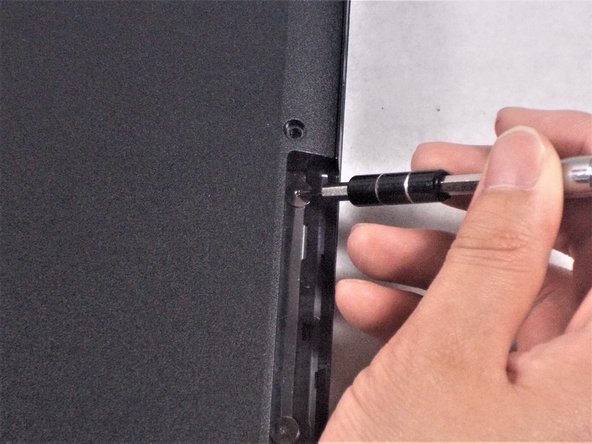
    • Remove the single 7 mm screw from the top middle of the laptop using a Phillips #0 screwdriver.

  7. Hp 15-f305dx Hard Drive Replacement: шаг 7, изображение 1 из 2 Hp 15-f305dx Hard Drive Replacement: шаг 7, изображение 2 из 2
    • Pry the keyboard out of the laptop gently and flip the keyboard around.

  8. Hp 15-f305dx Hard Drive Replacement: шаг 8, изображение 1 из 1
    • Disconnect the connected cable from the mainboard.

  9. Hp 15-f305dx Hard Drive Replacement, Hard Drive: шаг 9, изображение 1 из 2 Hp 15-f305dx Hard Drive Replacement, Hard Drive: шаг 9, изображение 2 из 2
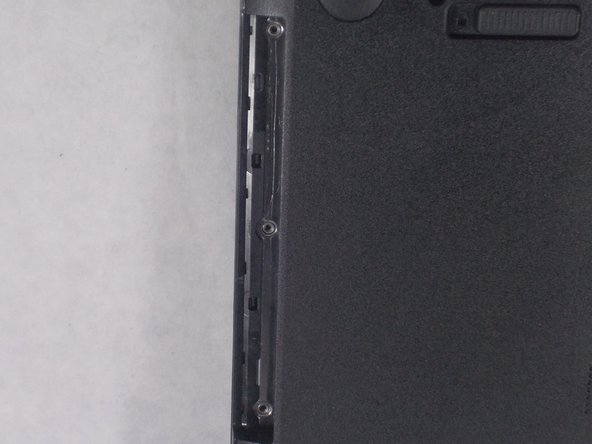
    • Remove the twelve screws from the bottom of the laptop with the Philips #0 Screwdriver.

  10. Hp 15-f305dx Hard Drive Replacement: шаг 10, изображение 1 из 3 Hp 15-f305dx Hard Drive Replacement: шаг 10, изображение 2 из 3 Hp 15-f305dx Hard Drive Replacement: шаг 10, изображение 3 из 3
    • Eject the CD player on the side of the laptop by sliding it out.

  11. Hp 15-f305dx Hard Drive Replacement: шаг 11, изображение 1 из 3 Hp 15-f305dx Hard Drive Replacement: шаг 11, изображение 2 из 3 Hp 15-f305dx Hard Drive Replacement: шаг 11, изображение 3 из 3
    • Use a Phillips # 1 Screwdriver to unscrew the three screws under the CD player

  12. Hp 15-f305dx Hard Drive Replacement: шаг 12, изображение 1 из 3 Hp 15-f305dx Hard Drive Replacement: шаг 12, изображение 2 из 3 Hp 15-f305dx Hard Drive Replacement: шаг 12, изображение 3 из 3
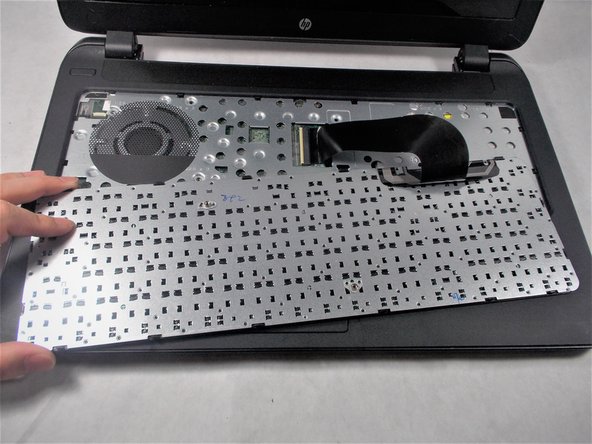
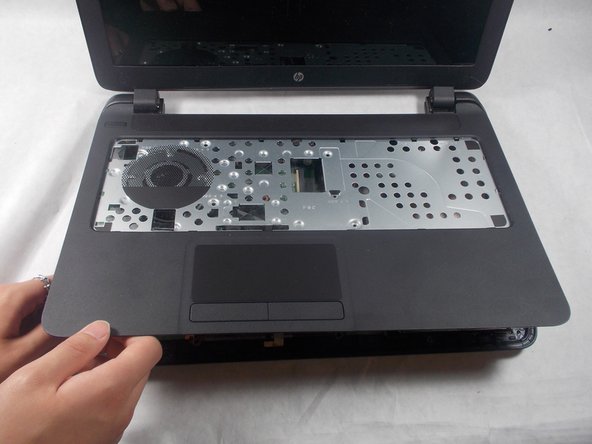
    • Flip the device around and open it. Use the blue spudger tool to remove the casing around the keyboard space by driving it the crease and propping it up.

    • Once you have used the spudger tool all the way around the casing, lift the casing up from the device.

  13. Hp 15-f305dx Hard Drive Replacement: шаг 13, изображение 1 из 2 Hp 15-f305dx Hard Drive Replacement: шаг 13, изображение 2 из 2
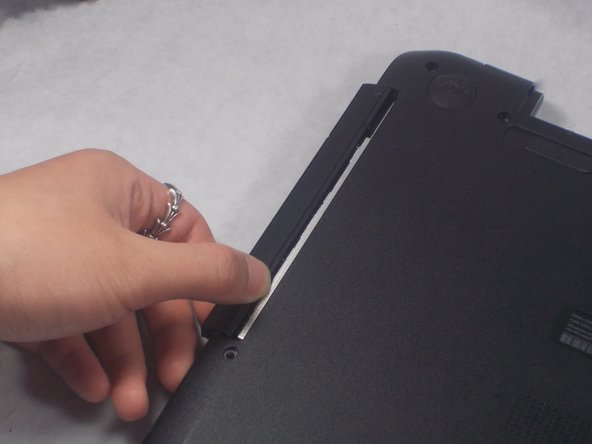
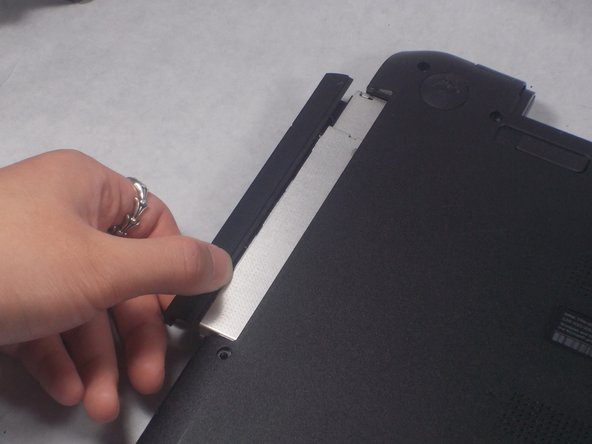
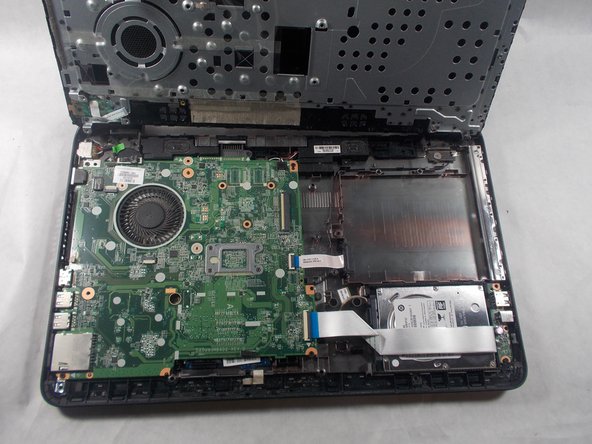
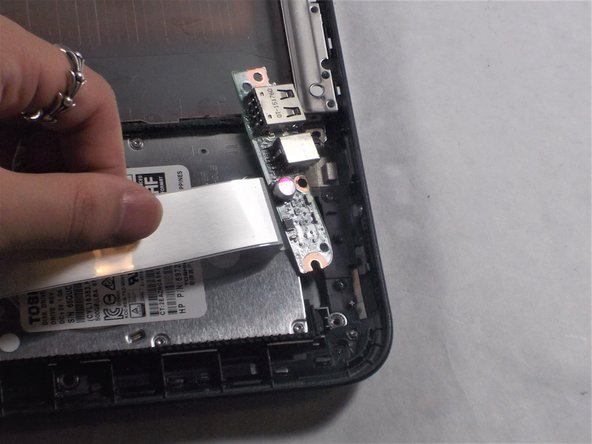
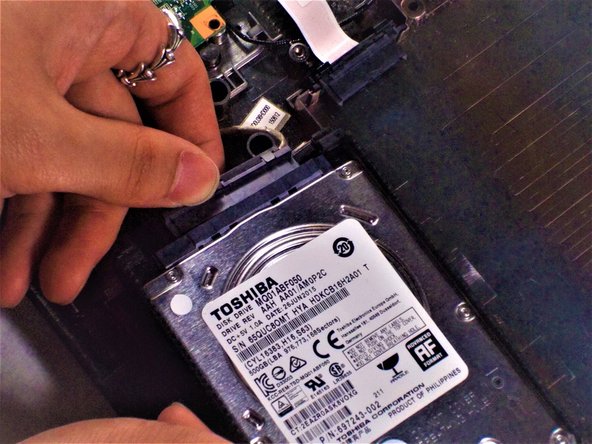
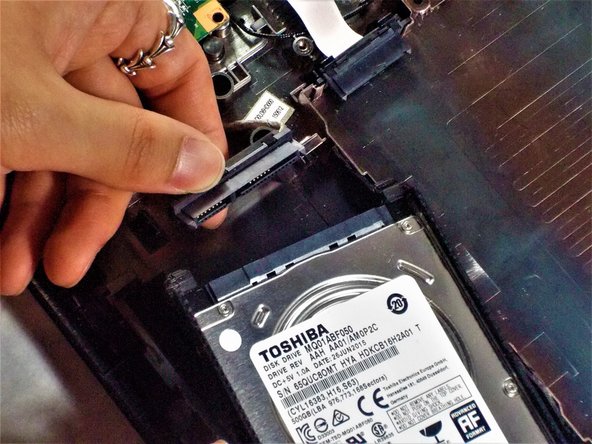
    • Use a Phillips #0 screwdriver to remove the screw that holds the USB drive in the bottom right corner near the hard drive. Once removed, lift the USB drive off of the hard drive.

  14. Hp 15-f305dx Hard Drive Replacement: шаг 14, изображение 1 из 3 Hp 15-f305dx Hard Drive Replacement: шаг 14, изображение 2 из 3 Hp 15-f305dx Hard Drive Replacement: шаг 14, изображение 3 из 3
    • Lift the hard drive from the device and unconnect the cord attached to it.

Заключение

To reassemble your device, follow these instructions in reverse order.

2 участников успешно повторили данное руководство.

Brandon

Участник с: 03/23/18

681 Репутация

Автор 4 руководств

Команда

UMass Dartmouth, Team S2-G3, Bernier Spring 2018 Участник UMass Dartmouth, Team S2-G3, Bernier Spring 2018

UMASSD-BERNIER-S18S2G3

3 членов

Автор 4 руководств

0 Комментариев

Добавить комментарий

Просмотр статистики:

За последние 24часов: 1

За последние 7 дней: 4

За последние 30 дней: 26

За всё время: 4,195