Введение
Use this guide to replace the battery in your Huawei P10 Lite smartphone.
Выберете то, что вам нужно
-
-
Insert the tip of an opening pick between the back cover and the mid frame and slide it around the phone, to cut the adhesive.
-
Using a suction handle to lift the back cover may help to get an initial gap for the opening pick to put in.
-
-
-
After you cut the adhesive on every edge, twist your opening pick, to separate the rear cover from the phone.
-
Flip the rear cover over to the right side of the phone.
-
-
-
Use a pair of tweezers to remove the sticker.
-
Remove the two Phillips #00 screws.
-
Remove the four 2.5 mm Phillips #00 screws.
-
-
-
-
Use tweezers to remove the mainboard shield.
-
Use the flat end of a spudger to disconnect the finger print sensor flex cable.
-
-
-
Remove the Phillips screw holding the battery connector plate in place.
-
Remove the battery connector plate.
-
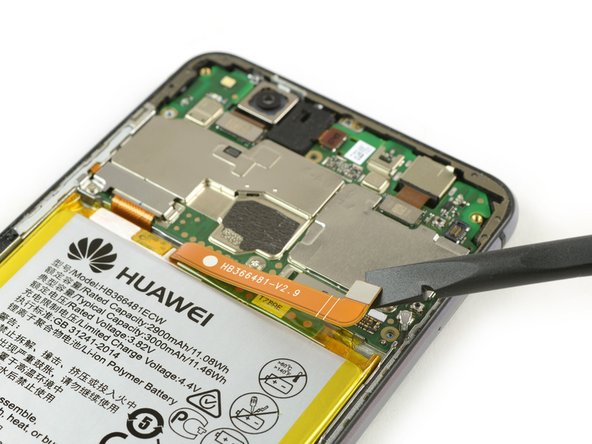
Use the flat end of a spudger to disconnect the battery flex cable.
-
-
-
Use an iOpener to loosen the adhesive beneath the battery.
-
Insert a spudger between the battery and the mid frame to create a gap.
-
Insert an opening pick or use the spuder in the gap to cut the adhesive beneath the battery.
-
-
-
Use a spudger to cut the rest of the adhesive and lever the battery out of the phone.
-
Remove the battery.
-


To reassemble your device, follow these instructions in reverse order. When reassembling your phone apply new adhesive where it is necessary.
To reassemble your device, follow these instructions in reverse order. When reassembling your phone apply new adhesive where it is necessary.
Отменить: Я не выполнил это руководство.
58 участников успешно повторили данное руководство.


12 Комментариев
Réussi en 50min.
J’ai passé 17min juste sur l’étape 1 pour comprendre où était la limite entre la coque et le chassis et comment passer un outil.
Pour les étapes 1, 2, 6 et 7, je n’ai pas réussi avec mes médiators et mes spudgers, trop flexibles (ils étaient vendu en kit avec ma batterie, rien à voir avec ceux vendus par ifixit). Je m’en suis sorti avec un tout petit tournevis plat de précision mais ce n’est pas l’idéal.
L’étape 6 est particulièrement difficile. J’ai chauffé la batterie avec un décapeur thermique réglé sur 120°C pour ramollir la colle mais c’était encore très adhérent. J’ai fait très attention mais j’ai eu quelques ratés et j’ai percé l’enveloppe de la batterie (je pense qu’il y a moins de risque en utilisant un spudger très rigide plutôt qu’un petit tournevis). Une odeur très forte en est sortie, attention à ne pas la respirer.
fait en un peu plus d’1h.
Une bonne demi heure rien que pour décoller la batterie, je ne souhaiter pas l’endommager ni le téléphone donc j’ai pris mon temps.
je trouve le iOpener trop petit, du coup je m’en suis inspiré pour m’en faire un plus grand, avec de l’eau et des sac congélation 3 épaisseurs pour éviter toute fuite et condensation non souhaiter.
Bonjour, pourquoi déconnecter le capteur d’empreinte cela ne semble pas obligatoire pour accéder à la batterie ?
Je pense que c’est principalement pour une question de pratique, comme la batterie est vraiment très énervante à retirer (dû à la colle) la plaque arrière du téléphone nous gêne inutilement lors de la manipulation, comme ça coûte pas grand chose de la retirer autant le faire :’)
Lucas -
Guia de molta utilitat. Vaig fer servir un assecador de cabell per a estovar l’adhesiu i va funcionar molt bé. No vaig utilitzar iopener.
En desenganxar la bateria però, vaig malmetre el cable flex de la pantalla. La propera vegada hauré d’anar amb més compte.