Перейти к основному содержанию

Huawei Y7 2018 (LDN-L21) Display Assembly with Frame Replacement

Выберете то, что вам нужно

Видео обзор

  1. Huawei Y7 2018 (LDN-L21) Display Assembly with Frame Replacement, Switch off the device: шаг 1, изображение 1 из 3 Huawei Y7 2018 (LDN-L21) Display Assembly with Frame Replacement, Switch off the device: шаг 1, изображение 2 из 3 Huawei Y7 2018 (LDN-L21) Display Assembly with Frame Replacement, Switch off the device: шаг 1, изображение 3 из 3
    • Turn off the device

    • Remove the sim tray

  2. Huawei Y7 2018 (LDN-L21) Display Assembly with Frame Replacement, Back Cover: шаг 2, изображение 1 из 3 Huawei Y7 2018 (LDN-L21) Display Assembly with Frame Replacement, Back Cover: шаг 2, изображение 2 из 3 Huawei Y7 2018 (LDN-L21) Display Assembly with Frame Replacement, Back Cover: шаг 2, изображение 3 из 3
    • Use Plastic tool to separate the back cover

    • With a Phillips screwdriver remove two black screws and the battery flex connector shield

    • Disconnect the battery and the finger print sensor flex cable

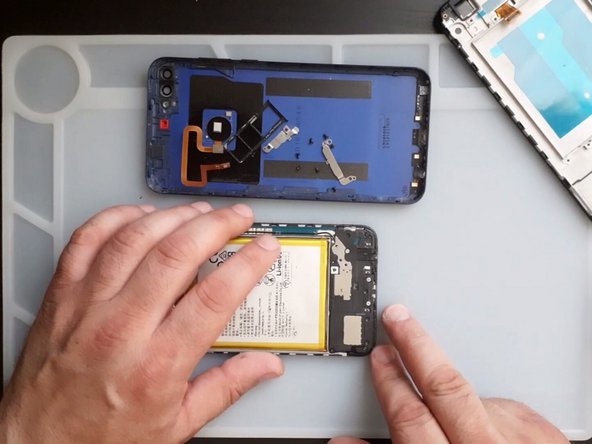
  3. Huawei Y7 2018 (LDN-L21) Display Assembly with Frame Replacement, Logic Board Removal Part 1: шаг 3, изображение 1 из 3 Huawei Y7 2018 (LDN-L21) Display Assembly with Frame Replacement, Logic Board Removal Part 1: шаг 3, изображение 2 из 3 Huawei Y7 2018 (LDN-L21) Display Assembly with Frame Replacement, Logic Board Removal Part 1: шаг 3, изображение 3 из 3
    • Remove all screws from the top of the logic board

    • Remove the shield covering the camera connectors

    • Remove the screws and the plastic cover at the bottom of the device

    • Be careful! Different colored screws have different size

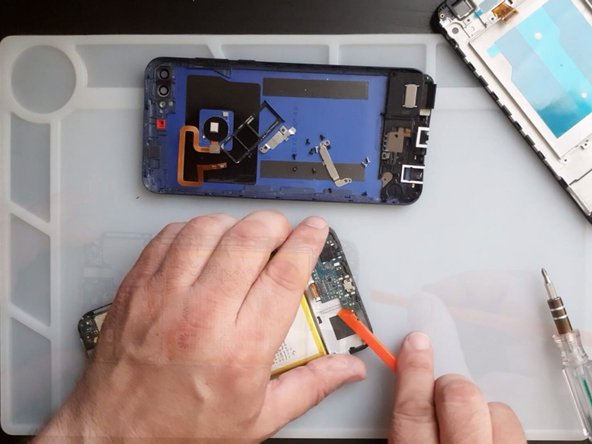
  4. Huawei Y7 2018 (LDN-L21) Display Assembly with Frame Replacement, Logic Board Removal - Part 2: шаг 4, изображение 1 из 3 Huawei Y7 2018 (LDN-L21) Display Assembly with Frame Replacement, Logic Board Removal - Part 2: шаг 4, изображение 2 из 3 Huawei Y7 2018 (LDN-L21) Display Assembly with Frame Replacement, Logic Board Removal - Part 2: шаг 4, изображение 3 из 3
    • Disconnect the Screen Flex cable

    • Remove the logic board

    • Note that at the bottom side of board is attached to the display with double-sided tape

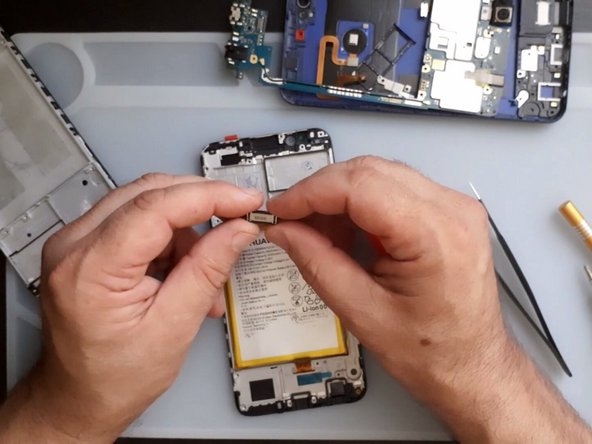
  5. Huawei Y7 2018 (LDN-L21) Display Assembly with Frame Replacement: шаг 5, изображение 1 из 3 Huawei Y7 2018 (LDN-L21) Display Assembly with Frame Replacement: шаг 5, изображение 2 из 3 Huawei Y7 2018 (LDN-L21) Display Assembly with Frame Replacement: шаг 5, изображение 3 из 3
    • Now you have to transfer:

    • Receiver

    • Proximity sensor

    • Volume buttons flex

    • Vibration

    • Battery

Заключение

To reassemble your device, follow these instructions in reverse order.

11 участников успешно повторили данное руководство.

ZFix

Участник с: 12/09/13

191 771 Репутация

Автор 330 руководств

Команда

Master Techs Участник Master Techs

Community

321 членов

Автор 1 515 руководств

Один комментарий

Can i get video guide

filmon - Ответить

Добавить комментарий

Просмотр статистики:

За последние 24 час(ов): 5

За последние 7 дней: 41

За последние 30 дней: 134

За всё время: 6,817