Эта версия возможно содержит некорректные исправления. Переключить на последнюю проверенную версию.
Выберете то, что вам нужно
-
Этот шаг не переведен. Помогите перевести
-
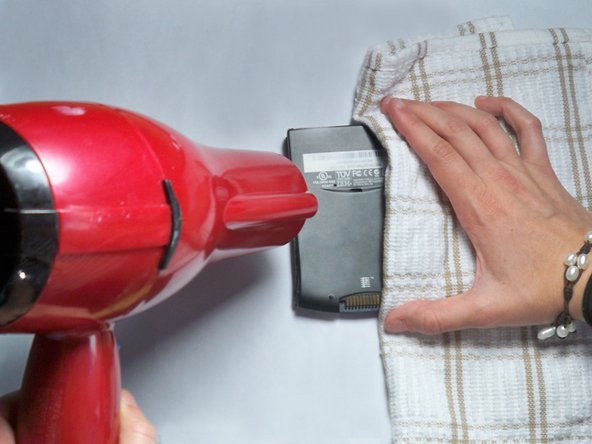
Using a hair dryer, slowly heat the edges of the WorkPad.
-
Spend at least one minute heating each side of the device. This will melt the glue holding the case together, and allow it to be removed.
-
-
Этот шаг не переведен. Помогите перевести
-
Use a plastic opening tool to pry the back case from the WorkPad.
-
-
Этот шаг не переведен. Помогите перевести
-
Turn the device over, so that the screen is laying on a flat surface.
-
-
Этот шаг не переведен. Помогите перевести
-
If the back case has already been removed, carefully place it on the WorkPad to protect the circuitry inside from the heat.
-
Using the hair dryer, slowly heat the edges of the device. Spend at least 1 minute on each side, thoroughly heating the case.
-
-
-
Этот шаг не переведен. Помогите перевести
-
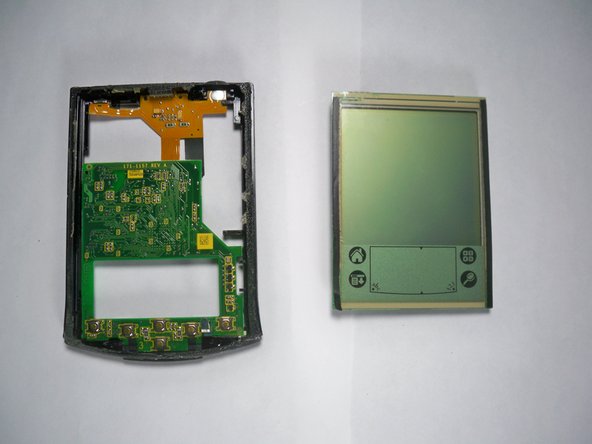
Using the Plastic Opening Tools, take the front of the case off.
-
The power button at the top of the device will be loose once the front part of the case is removed.
-
-
Этот шаг не переведен. Помогите перевести
-
Remove the yellow tape that is covering the battery connector
-
-
Этот шаг не переведен. Помогите перевести
-
Using the tweezers, carefully disconnect the battery cable from the port
-
-
Этот шаг не переведен. Помогите перевести
-
Using the plastic opening tools, lift the battery out of the case
-
-
Этот шаг не переведен. Помогите перевести
-
Using the spudger lift the tabs holding the LCD/Digitizer combo cables to the WorkPad.
-
-
Этот шаг не переведен. Помогите перевести
-
Using your thumb, press down gently on the back of the LCD.
-
The LCD will disconnect and fall out of the case, so be sure to have your hand waiting for it.
-
-
Этот шаг не переведен. Помогите перевести
-
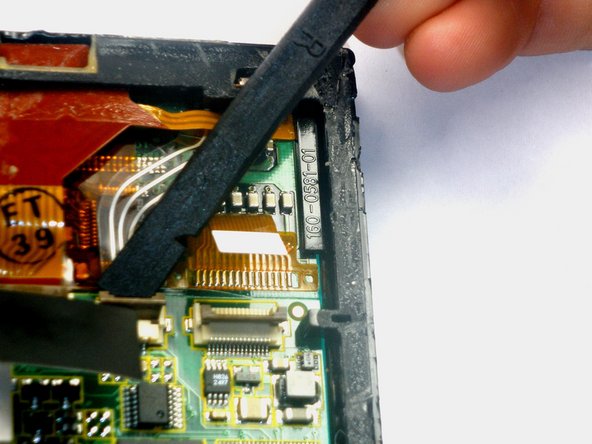
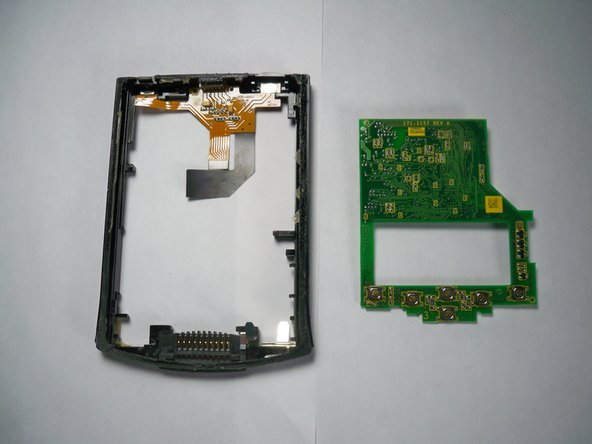
Using the plastic opening tool, lift the clip holding the motherboard cable.
-
-
Этот шаг не переведен. Помогите перевести
-
Gripping the motherboard as shown, lift up slightly and pull outward.
-


Команда

Cal Poly, Team 21-35, Regan Fall 2010 Участник Cal Poly, Team 21-35, Regan Fall 2010
CPSU-REGAN-F10S21G35
3 членов
Автор 5 руководств