Перейти к основному содержанию

Insignia Flex 11.6 Screen Replacement

Выберете то, что вам нужно

  1. Insignia Flex 11.6 Screen Replacement, Power Removal: шаг 1, изображение 1 из 3 Insignia Flex 11.6 Screen Replacement, Power Removal: шаг 1, изображение 2 из 3 Insignia Flex 11.6 Screen Replacement, Power Removal: шаг 1, изображение 3 из 3
    • Before working on the device, make sure the device is off and not plugged into any power source for safety reasons. Failure to comply could result in injury.

    • Place the device on a firm surface with the device screen facing down.

  2. Insignia Flex 11.6 Screen Replacement: шаг 2, изображение 1 из 2 Insignia Flex 11.6 Screen Replacement: шаг 2, изображение 2 из 2
    • Remove 2, 6.1 mm Phillips J000 screws from the back of the device.

    • If any screws are stripped, refer to the ifixit guide for how to remove a stripped screw. How to Remove a Stripped Screw

  3. Insignia Flex 11.6 Screen Replacement: шаг 3, изображение 1 из 3 Insignia Flex 11.6 Screen Replacement: шаг 3, изображение 2 из 3 Insignia Flex 11.6 Screen Replacement: шаг 3, изображение 3 из 3
    Инструмент, используемый на этом этапе:
    Plastic Cards
    $2.99
    Купить
    • Using a plastic tool and the plastic card, gently pry off the back cover.

  4. Insignia Flex 11.6 Screen Replacement: шаг 4, изображение 1 из 3 Insignia Flex 11.6 Screen Replacement: шаг 4, изображение 2 из 3 Insignia Flex 11.6 Screen Replacement: шаг 4, изображение 3 из 3
    • Using tweezers, remove the electrical connector that connects to the battery to remove the power to the battery.

  5. Insignia Flex 11.6 Screen Replacement, Motherboard: шаг 5, изображение 1 из 1
    • Unplug the 2 speaker's connection from the motherboard.

  6. Insignia Flex 11.6 Screen Replacement: шаг 6, изображение 1 из 2 Insignia Flex 11.6 Screen Replacement: шаг 6, изображение 2 из 2
    • Peel the yellow tape off from on top of the electrical connectors.

  7. Insignia Flex 11.6 Screen Replacement: шаг 7, изображение 1 из 2 Insignia Flex 11.6 Screen Replacement: шаг 7, изображение 2 из 2
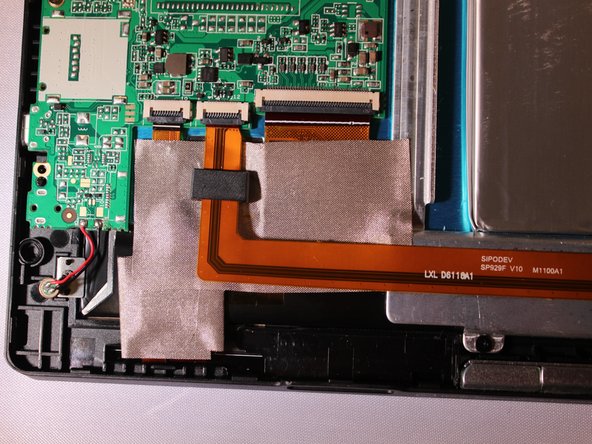
    • Flip up the black cover pieces to expose the 3 electrical connectors.

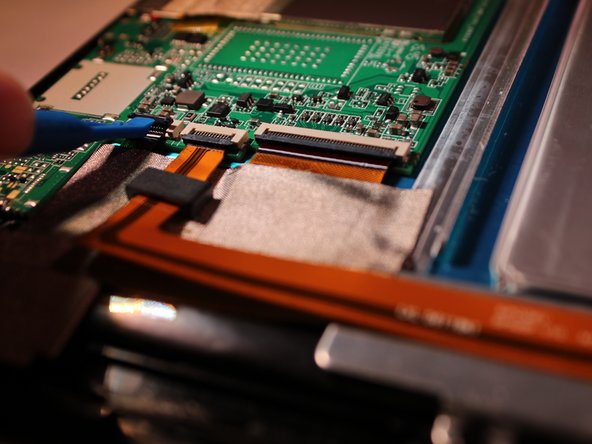
    • Remove 3 electrical connectors by gently pulling back on them with some tweezers.

  8. Insignia Flex 11.6 Screen Replacement: шаг 8, изображение 1 из 3 Insignia Flex 11.6 Screen Replacement: шаг 8, изображение 2 из 3 Insignia Flex 11.6 Screen Replacement: шаг 8, изображение 3 из 3
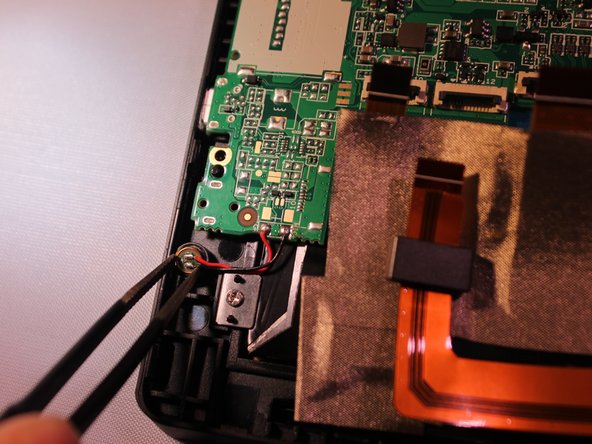
    • Unplug the 2 black ground wires from the motherboard by gently prying on them until they unhook from the motherboard.

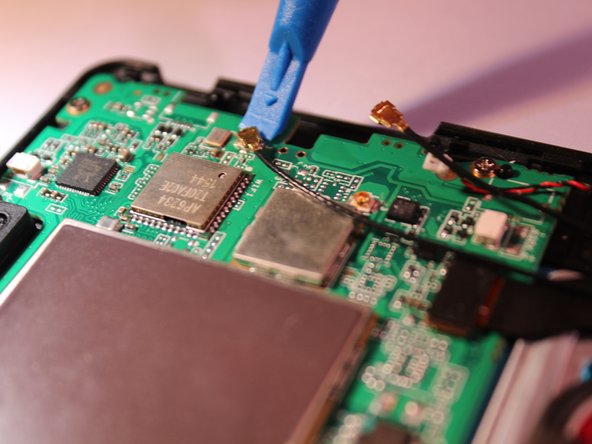
    • Remove the black camera connector by gently prying on it until it unhooks.

  9. Insignia Flex 11.6 Screen Replacement: шаг 9, изображение 1 из 2 Insignia Flex 11.6 Screen Replacement: шаг 9, изображение 2 из 2
    • Using tweezers, remove the microphone from the the plastic cover.

  10. Insignia Flex 11.6 Screen Replacement: шаг 10, изображение 1 из 1
    • Remove 5 - 3.4 mm Phillips J000 screws from the motherboard.

    • Motherboard pops out.

  11. Insignia Flex 11.6 Screen Replacement, Screen: шаг 11, изображение 1 из 3 Insignia Flex 11.6 Screen Replacement, Screen: шаг 11, изображение 2 из 3 Insignia Flex 11.6 Screen Replacement, Screen: шаг 11, изображение 3 из 3
    • Remove battery by prying off with card.

  12. Insignia Flex 11.6 Screen Replacement: шаг 12, изображение 1 из 2 Insignia Flex 11.6 Screen Replacement: шаг 12, изображение 2 из 2
    • Peel back the copper color electrical connector with blue opening tool.

  13. Insignia Flex 11.6 Screen Replacement: шаг 13, изображение 1 из 1
    • Remove 12 - 4.15mm J000 Phillips screws from the metal bracket.

    • Bracket will then come off.

  14. Insignia Flex 11.6 Screen Replacement: шаг 14, изображение 1 из 1
    • Remove 1 - 3.4 mm J000 Phillips screw from metal plate bracket.

  15. Insignia Flex 11.6 Screen Replacement: шаг 15, изображение 1 из 2 Insignia Flex 11.6 Screen Replacement: шаг 15, изображение 2 из 2
    • Remove screen from case by prying with a card.

Заключение

To reassemble your device, follow these instructions in reverse order.

4 участников успешно повторили данное руководство.

Connor Sweeney

Участник с: 09/28/16

449 Репутация

Автор 5 руководств

Команда

Eastern Washington University, Team 2-4, Mathisen Fall 2016 Участник Eastern Washington University, Team 2-4, Mathisen Fall 2016

EWU-MATHISEN-F16S2G4

4 членов

Автор 10 руководств

6 Комментариев

The Flex 11.6" Model# NS-P11W7100 DOEST HAVE THOSE SCREWS RIGHT THERE!!!!!

Charles Kinnison - Ответить

yeah, thats the one I have. its quite a bit different. the speaker wires are soldered, too…

Joshua Francis -

mine doesn’t look like that…

Joshua Francis - Ответить

where can i get a new screen to buy?

florence sefaa - Ответить

Do you sell the insignia ns-p11w7100 tablet 11.6 inches screen? I need on to fix my broken part.

florence sefaa - Ответить

Добавить комментарий

Просмотр статистики:

За последние 24часов: 0

За последние 7 дней: 3

За последние 30 дней: 13

За всё время: 4,444