Перейти к основному содержанию

Insignia Flex 8 NS-15AT08 Cameras Replacement

Выберете то, что вам нужно

  1. Insignia Flex 8 NS-15AT08 Cameras Replacement, Back Casing: шаг 1, изображение 1 из 2 Insignia Flex 8 NS-15AT08 Cameras Replacement, Back Casing: шаг 1, изображение 2 из 2
    • Insert a plastic opening tool into the seam between the back casing and the screen to separate the back casing from the tablet.

    • You may need to use a metal opening tool for extra prying power, but beware that it can scratch your device or damage the internal components if the tool is inserted too deep.

    • You will hear the tabs pop as you separate the back casing around the tablet.

  2. Insignia Flex 8 NS-15AT08 Cameras Replacement: шаг 2, изображение 1 из 2 Insignia Flex 8 NS-15AT08 Cameras Replacement: шаг 2, изображение 2 из 2
    • Lift the back casing away from the rest of the device which should include the exposed circuit board and screen.

    • Set the casing aside.

  3. Insignia Flex 8 NS-15AT08 Cameras Replacement, Cameras: шаг 3, изображение 1 из 1
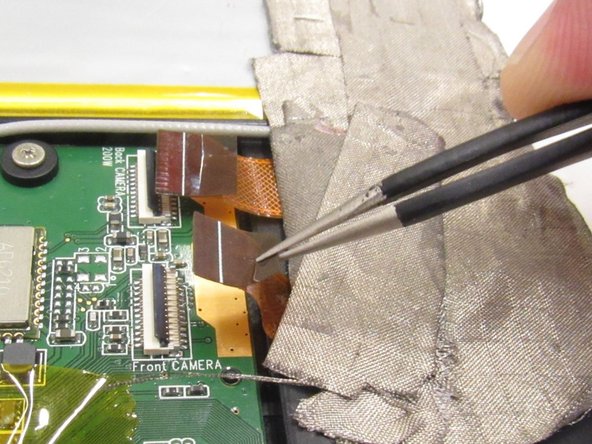
    • Use a plastic opening tool to flip up the black strip that is holding the orange camera ribbon near the module on the circuit board labeled "front camera" in white print.

    • Repeat this action on the orange camera ribbon near the module on the circuit board labeled "back camera" in white print.

  4. Insignia Flex 8 NS-15AT08 Cameras Replacement: шаг 4, изображение 1 из 2 Insignia Flex 8 NS-15AT08 Cameras Replacement: шаг 4, изображение 2 из 2
    Инструмент, используемый на этом этапе:
    Tweezers
    $4.99
    Купить
    • Use tweezers to gently pull on both orange camera ribbons in the opposite direction in which they are connected until they disconnect from the modules on the circuit board.

  5. Insignia Flex 8 NS-15AT08 Cameras Replacement: шаг 5, изображение 1 из 2 Insignia Flex 8 NS-15AT08 Cameras Replacement: шаг 5, изображение 2 из 2
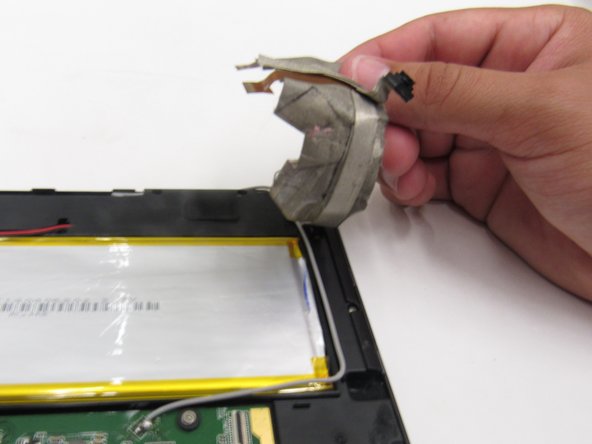
    • Peel off the grey tape covering the ribbons, in order to separate the cameras and their respective ribbons from the rest of the device.

    • Do not use excessive force while removing the tape to prevent tears in the ribbons.

  6. Insignia Flex 8 NS-15AT08 Cameras Replacement: шаг 6, изображение 1 из 1
    • Use a a plastic opening tool to pry out the back camera at the top of the circuit board.

Заключение

To reassemble your device, follow these instructions in reverse order.

Krystal Rhodes

Участник с: 09/22/15

488 Репутация

Автор 3 руководств

Команда

Baylor, Team 6-7, Williams Fall 2015 Участник Baylor, Team 6-7, Williams Fall 2015

BU-WILLIAMS-F15S6G7

3 членов

Автор 10 руководств

0 Комментариев

Добавить комментарий

Просмотр статистики:

За последние 24часов: 0

За последние 7 дней: 2

За последние 30 дней: 3

За всё время: 195