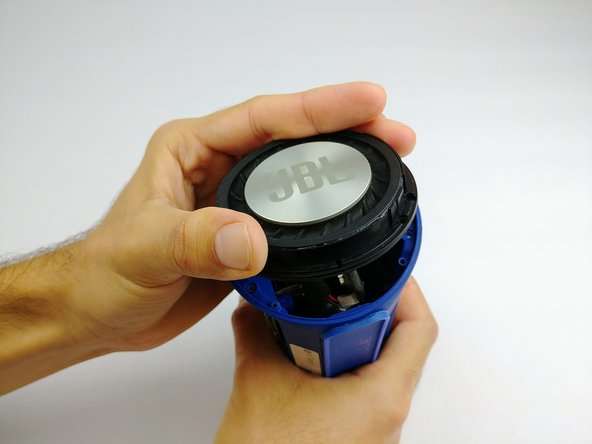
Перейти к основному содержанию

JBL Charge 2 Motherboard Replacement

Выберете то, что вам нужно

  1. JBL Charge 2 Motherboard Replacement, Battery: шаг 1, изображение 1 из 1
    • Remove the screen cover from the speaker using a metal spudger.

  2. JBL Charge 2 Motherboard Replacement: шаг 2, изображение 1 из 2 JBL Charge 2 Motherboard Replacement: шаг 2, изображение 2 из 2
    • Using a Phillips #1 screwdriver (PH1), remove the (4) four 8mm screws.

    • Remove the end cap of the device. Repeat the same process to remove the other end cap.

  3. JBL Charge 2 Motherboard Replacement: шаг 3, изображение 1 из 2 JBL Charge 2 Motherboard Replacement: шаг 3, изображение 2 из 2
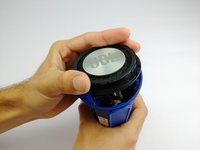
    • To remove the end diaphragms, use a Phillips #1 screwdriver (PH1) and remove the (4) four 6mm screws.

    • Twist off the end cap and remove them from the device.

  4. JBL Charge 2 Motherboard Replacement: шаг 4, изображение 1 из 2 JBL Charge 2 Motherboard Replacement: шаг 4, изображение 2 из 2
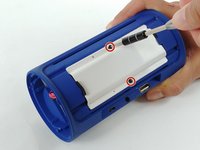
    • Use a Phillips #1 screwdriver (PH1) to remove the (2) two screws from the battery cover.

    • Pry away the plastic battery cover with a plastic spudger.

  5. JBL Charge 2 Motherboard Replacement: шаг 5, изображение 1 из 1
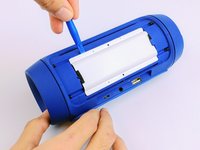
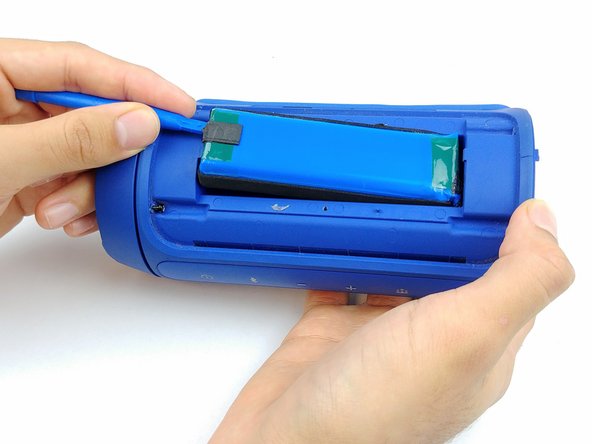
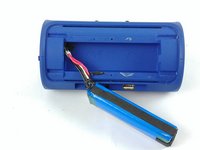
    • Disconnect the battery connector with a plastic opening tool and wiggle the connector free.

  6. JBL Charge 2 Motherboard Replacement: шаг 6, изображение 1 из 3 JBL Charge 2 Motherboard Replacement: шаг 6, изображение 2 из 3 JBL Charge 2 Motherboard Replacement: шаг 6, изображение 3 из 3
    • Scrape the battery wire sealant off with a plastic opening tool, and ensure it is free of the body of the speaker and wires.

    • Slide the battery free.

  7. JBL Charge 2 Motherboard Replacement, Speakers: шаг 7, изображение 1 из 1
    • Remove the opposite screen cover using a metal spudger

  8. JBL Charge 2 Motherboard Replacement: шаг 8, изображение 1 из 1
    • Use the Phillips #1 screwdriver (PH1) to remove the (8) eight screws.

    • Pull out the speakers from the device.

  9. JBL Charge 2 Motherboard Replacement: шаг 9, изображение 1 из 1
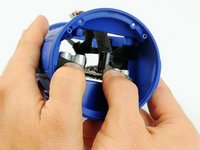
    • Disconnect the wiring from the speaker by using the fine tip pry tool.

    • Remove the speakers from the device.

  10. JBL Charge 2 Motherboard Replacement, Motherboard: шаг 10, изображение 1 из 1
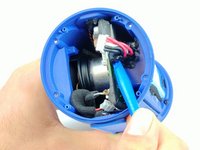
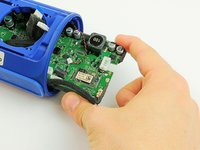
    • Use a spudger to disconnect the gold antenna connector from the main circuit board.

  11. JBL Charge 2 Motherboard Replacement: шаг 11, изображение 1 из 1
    • Disconnect the microphone connector using the plastic opening tool.

  12. JBL Charge 2 Motherboard Replacement: шаг 12, изображение 1 из 1
    • Use a plastic opening tool to disconnect the 3.5 mm headphone connector.

  13. JBL Charge 2 Motherboard Replacement: шаг 13, изображение 1 из 1
    • Disconnect micro-b connector with a plastic opening tool.

  14. JBL Charge 2 Motherboard Replacement: шаг 14, изображение 1 из 1
    • Remove the connector to the USB connector using a plastic opening tool.

  15. JBL Charge 2 Motherboard Replacement: шаг 15, изображение 1 из 1
    • Remove the speaker wires from the control panel by prying off with a plastic opening tool.

  16. JBL Charge 2 Motherboard Replacement: шаг 16, изображение 1 из 1
    • Next, disconnect the control-panel ribbon by prying out the grey plastic tab using a plastic opening tool. The ribbon should freely come out afterwards.

  17. JBL Charge 2 Motherboard Replacement: шаг 17, изображение 1 из 3 JBL Charge 2 Motherboard Replacement: шаг 17, изображение 2 из 3 JBL Charge 2 Motherboard Replacement: шаг 17, изображение 3 из 3
    • Caution: Touching the capacitors will short out the circuit board. Push on the end of the circuit board and carefully keep thumbs on foam insulation on ends of board.

    • Remove the motherboard from the device.

Заключение

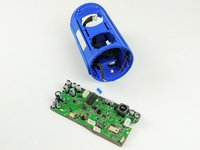
To reassemble your device, follow these instructions in reverse order.

5 участников успешно повторили данное руководство.

Mauzor Ilonzo

Участник с: 09/26/17

495 Репутация

Автор 3 руководств

Команда

USF Tampa, Team S2-G4, Passmore Fall 2017 Участник USF Tampa, Team S2-G4, Passmore Fall 2017

USFT-PASSMORE-F17S2G4

4 членов

Автор 8 руководств

2 Комментариев

Guten Tag

Vielen Dank für die prima Anleitung!

Ich habe den Fehler bei meinem Charge 2+ gefunden. Das Bauteil mit der 100 drauf ist außen mehrfach gerissen. Was ist das für ein Bauteil und kann ich das bestellen?

Liebe Grüße

Stefan

Stefan Erb - Ответить

Hello i have a problem with component 100 but i don't now what is ? someone can help me thanks and from were can i order ?

naskicha_94 - Ответить

Добавить комментарий

Просмотр статистики:

За последние 24часов: 3

За последние 7 дней: 16

За последние 30 дней: 55

За всё время: 8,140