Перейти к основному содержанию
/
Мой рабочий стол для верстки руководств

Получите быстрый доступ к руководствам, запчастям и ответам касательно ваших устройств

JBL Everest Elite 300 Headband Cushion Replacement

JBL Everest Elite 300 Headband Cushion Replacement

Breanna Davis

Breanna Davis и 3 другие участники

Последнее обновление December 27, 2023

20 - 30 минут
Средне

If the headband of your headphones displays signs of wear and tear or provides discomfort, then this guide is perfect for you. This guide will help you easily remove and replace the headband. All you need is a Phillips #000 screwdriver, an iFixit opening pick, and a SIM card ejector.

Выберете то, что вам нужно

Инструменты

Показать больше…

  1. JBL Everest Elite 300 Headband Cushion Replacement, Headband Cushion: шаг 1, изображение 1 из 1
    • Extend the headphone.

  2. JBL Everest Elite 300 Headband Cushion Replacement: шаг 2, изображение 1 из 3 JBL Everest Elite 300 Headband Cushion Replacement: шаг 2, изображение 2 из 3 JBL Everest Elite 300 Headband Cushion Replacement: шаг 2, изображение 3 из 3
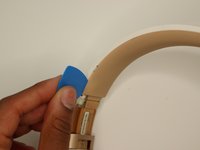
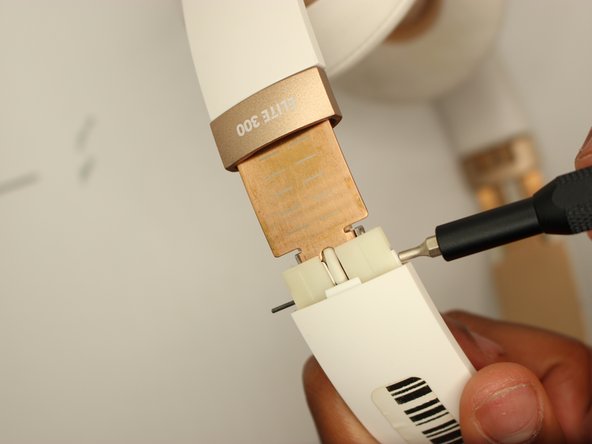
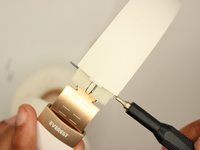
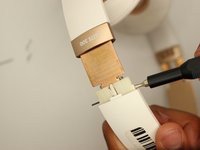
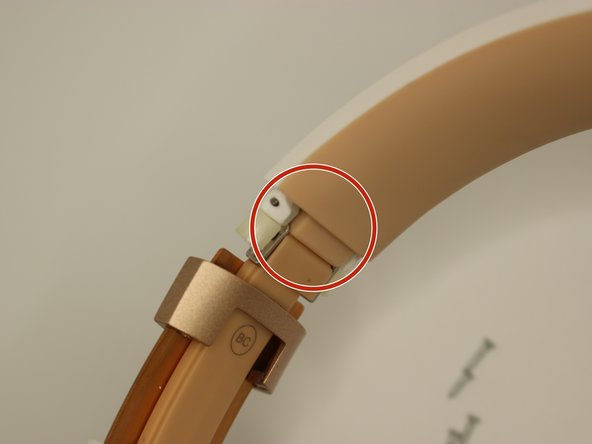
    • Bend the hinge slightly, then remove the two .5 mm screws with a Phillips #000 screwdriver.

    • This will be repeated on both sides.

  3. JBL Everest Elite 300 Headband Cushion Replacement: шаг 3, изображение 1 из 1
    • Slide down the "Elite 300" tab.

    • Repeat on both sides.

  4. JBL Everest Elite 300 Headband Cushion Replacement: шаг 4, изображение 1 из 2 JBL Everest Elite 300 Headband Cushion Replacement: шаг 4, изображение 2 из 2
    • Use a SIM tool to push pin fully through and out.

    • Repeat on the other side.

  5. JBL Everest Elite 300 Headband Cushion Replacement: шаг 5, изображение 1 из 2 JBL Everest Elite 300 Headband Cushion Replacement: шаг 5, изображение 2 из 2
    • Go along the edges with the pick, and pull up, taking off the band.

  6. JBL Everest Elite 300 Headband Cushion Replacement: шаг 6, изображение 1 из 3 JBL Everest Elite 300 Headband Cushion Replacement: шаг 6, изображение 2 из 3 JBL Everest Elite 300 Headband Cushion Replacement: шаг 6, изображение 3 из 3
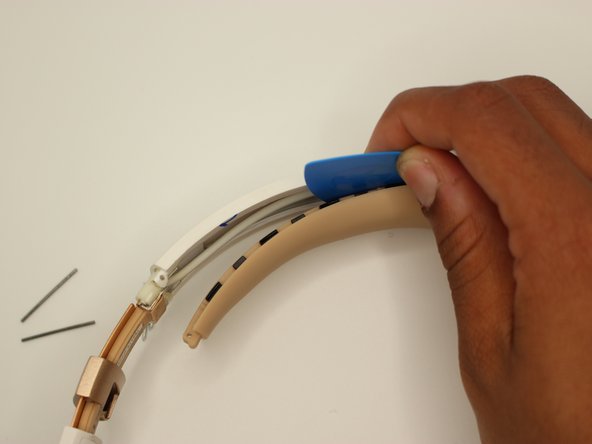
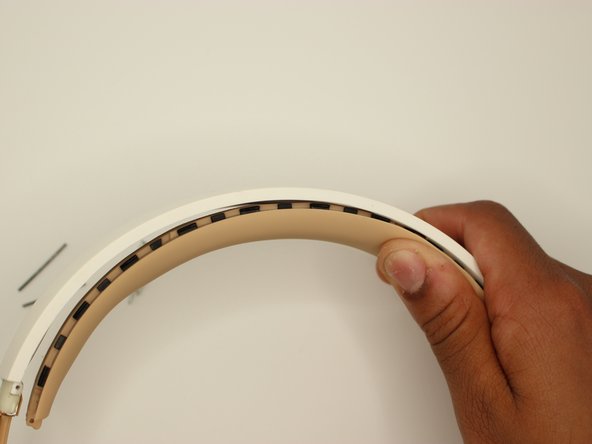
    • After fully taking off the band, you are now ready to insert in the new band.

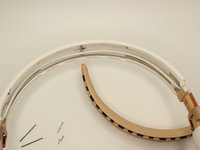
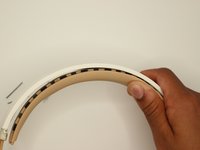
    • When placing in the new headband, line up the holes as shown in image 2.

    • The headband is difficult to replace, however after lining up the holes, the headband will snap into place. Push into the plastic and push away from you. A click will happen indicating it attatching.

Заключение

To reassemble your device, follow these instructions in reverse order.

Breanna Davis

Участник с: 09/13/23

317 Репутация

Автор 2 руководств

Команду

University of North Texas, Team 1-2, Kilpatrick Fall 2023 Участник University of North Texas, Team 1-2, Kilpatrick Fall 2023

UNT-KILPATRICK-F23S1G2

4 членов

Автор 5 руководств

0 Комментариев

Добавить комментарий

Статистика просмотров:

За последние 24 час(ов): 2

За последние 7 дней: 2

За последние 30 дней: 6

За всё время: 132