Введение
If your Jam Voice Portable Speaker no longer produces clear audio, but instead disoriented or no audio at all, then your speaker is in need of a replacement. In order to replace the speaker the motherboard will be exposed, so please be careful to not pull or damage any of the wires. After you accomplish this easy to follow guide, you can once again go back to enjoying your music on the go. Only one screwdriver is required, so if you're unfamiliar with screwdrivers, here is a link for Screwdriver Best Practices that can help.
Screwdriver Best Practices
Выберете то, что вам нужно
-
-
Insert the plastic opening tool underneath the mesh top.
-
Pry the cover open.
-
-
-
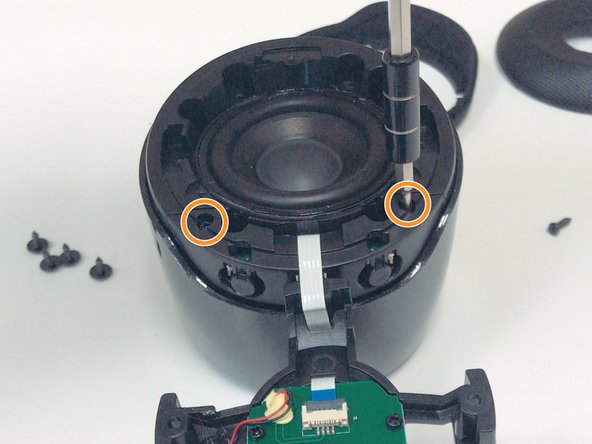
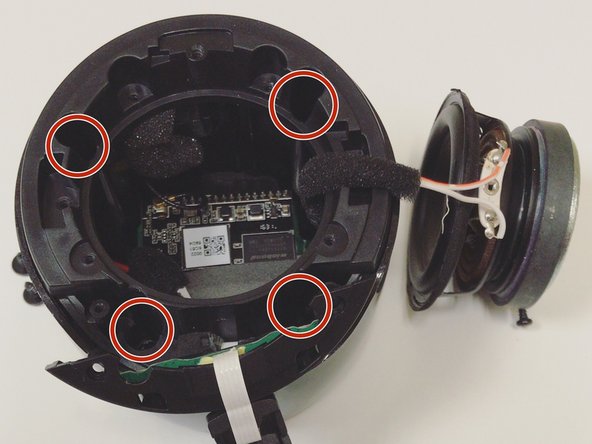
Remove the four 5mm Phillips screws that hold down the speaker in place.
-
Remove the two 6mm Phillips screws that hold down the plastic casing.
-
-
-
-
Once all six screws are removed, use a Halberd Spudger or similar tool to lift up the speaker.
-
Pull the speaker up and out.
-
-
-
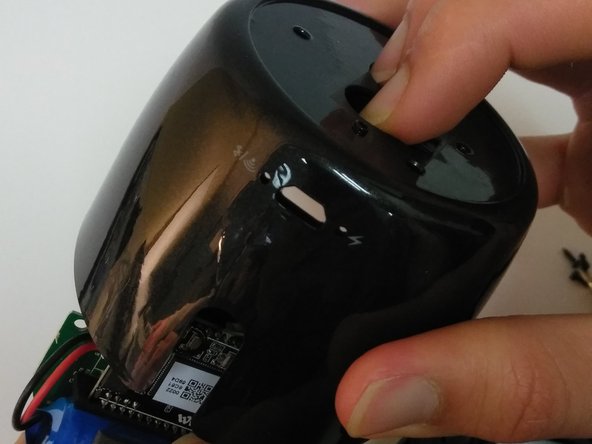
After removing all of the screws from the plastic cover, remove it by pulling up and out.
-
-
-
Remove the three 5mm Phillips screws that hold the motherboard in place.
-
After the screws are removed, place two fingers on the power button and Bluetooth button to push the motherboard out.
-
-
-
Use tweezers to pull out the speaker's wire from the motherboard.
-
Use tweezers to pull out the battery's wire from the motherboard.
-


To reassemble your device, follow these instructions in reverse order.
To reassemble your device, follow these instructions in reverse order.
Отменить: Я не выполнил это руководство.
Еще один человек закончил это руководство.
