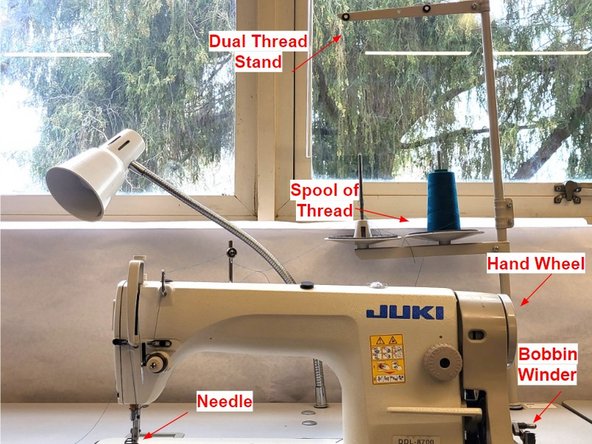
Перейти к основному содержанию

Juki DDL-8700 Bobbin Replacement

Выберете то, что вам нужно

  1. Juki DDL-8700 Bobbin Replacement, Bobbin: шаг 1, изображение 1 из 2 Juki DDL-8700 Bobbin Replacement, Bobbin: шаг 1, изображение 2 из 2
    • Diagram of the Juki Industrial Sewing Machine.

  2. Juki DDL-8700 Bobbin Replacement: шаг 2, изображение 1 из 3 Juki DDL-8700 Bobbin Replacement: шаг 2, изображение 2 из 3 Juki DDL-8700 Bobbin Replacement: шаг 2, изображение 3 из 3
    • Slide the empty bobbin onto the bobbin winder.

  3. Juki DDL-8700 Bobbin Replacement: шаг 3, изображение 1 из 3 Juki DDL-8700 Bobbin Replacement: шаг 3, изображение 2 из 3 Juki DDL-8700 Bobbin Replacement: шаг 3, изображение 3 из 3
    • Push the lever on the bobbin winder forward, away from you.

  4. Juki DDL-8700 Bobbin Replacement: шаг 4, изображение 1 из 3 Juki DDL-8700 Bobbin Replacement: шаг 4, изображение 2 из 3 Juki DDL-8700 Bobbin Replacement: шаг 4, изображение 3 из 3
    • Place the spool of thread on the dual thread stand.

    • Take the loose end of the thread and guide it through the center hole of the dual thread stand.

    • Pull the loose end of the thread through the hole, to the front.

  5. Juki DDL-8700 Bobbin Replacement: шаг 5, изображение 1 из 3 Juki DDL-8700 Bobbin Replacement: шаг 5, изображение 2 из 3 Juki DDL-8700 Bobbin Replacement: шаг 5, изображение 3 из 3
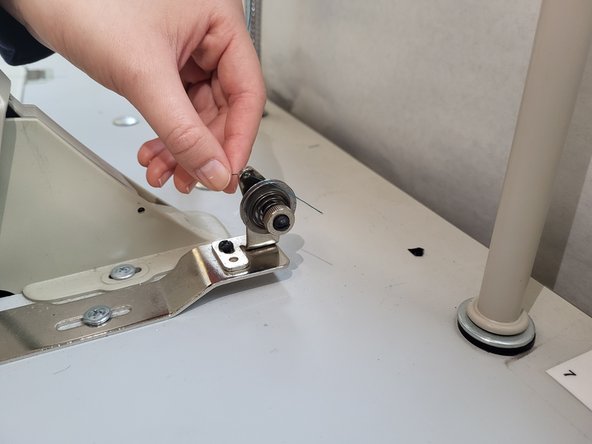
    • Holding the loose end, guide the thread through the hole near the top of the winder disk.

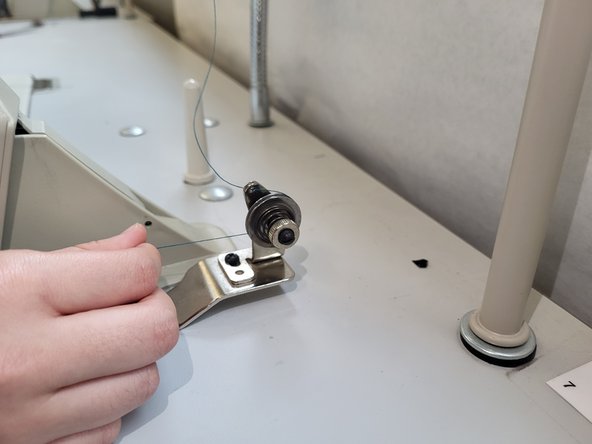
    • Pull the thread between the winder disks in a clockwise direction.

    • Guide the thread through any hole on the side of the bobbin.

  6. Juki DDL-8700 Bobbin Replacement: шаг 6, изображение 1 из 2 Juki DDL-8700 Bobbin Replacement: шаг 6, изображение 2 из 2
    • Unthread the needle before pressing the pedal.

    • Hold the thread for a few seconds while gently pressing the pedal down.

    • Continue winding the bobbin until the desired amount or until the bobbin releases.

    • Potential for machine damage: unthread the needle before pressing the pedal.

  7. Juki DDL-8700 Bobbin Replacement: шаг 8, изображение 1 из 3 Juki DDL-8700 Bobbin Replacement: шаг 8, изображение 2 из 3 Juki DDL-8700 Bobbin Replacement: шаг 8, изображение 3 из 3
    • Cut the thread.

    • Pull the bobbin winder lever towards you to release it.

    • Slide the bobbin off of the bobbin winder.

  8. Juki DDL-8700 Bobbin Replacement: шаг 9, изображение 1 из 3 Juki DDL-8700 Bobbin Replacement: шаг 9, изображение 2 из 3 Juki DDL-8700 Bobbin Replacement: шаг 9, изображение 3 из 3
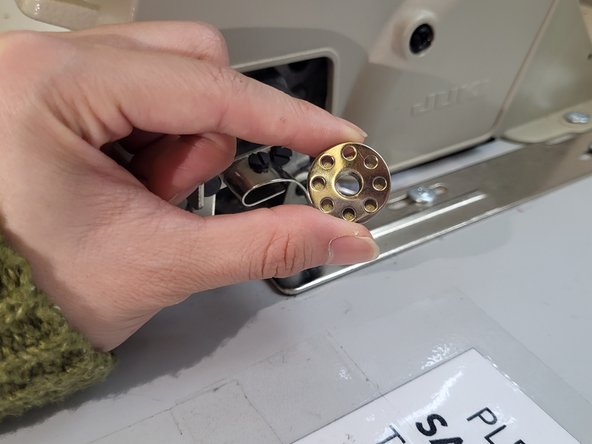
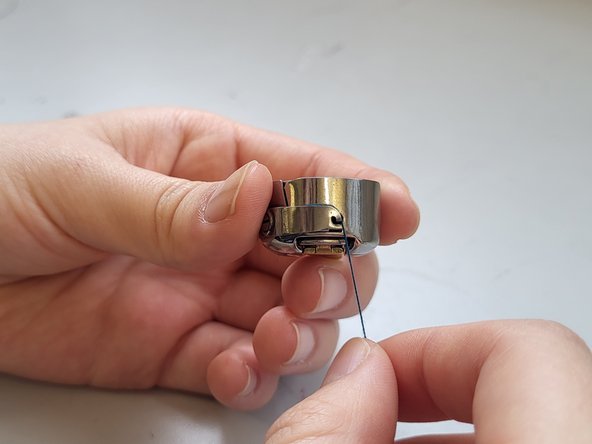
    • Place bobbin into bobbin case.

    • Pull the thread into the slit on the side of the bobbin.

    • Guide the thread under the notch on the side of the case.

    • Pulling the thread will turn the bobbin in a counter-clockwise direction.

  9. Juki DDL-8700 Bobbin Replacement: шаг 10, изображение 1 из 3 Juki DDL-8700 Bobbin Replacement: шаг 10, изображение 2 из 3 Juki DDL-8700 Bobbin Replacement: шаг 10, изображение 3 из 3
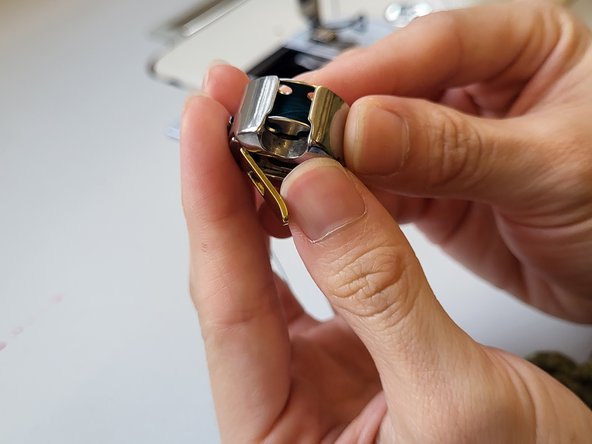
    • Lift the arm of the bobbin case.

    • Place the bobbin case into the machine with the opening at the top.

    • Release the arm when the bobbin case is in place.

  10. Juki DDL-8700 Bobbin Replacement: шаг 11, изображение 1 из 3 Juki DDL-8700 Bobbin Replacement: шаг 11, изображение 2 из 3 Juki DDL-8700 Bobbin Replacement: шаг 11, изображение 3 из 3
    • Rethread the needle from left to right.

  11. Juki DDL-8700 Bobbin Replacement: шаг 12, изображение 1 из 3 Juki DDL-8700 Bobbin Replacement: шаг 12, изображение 2 из 3 Juki DDL-8700 Bobbin Replacement: шаг 12, изображение 3 из 3
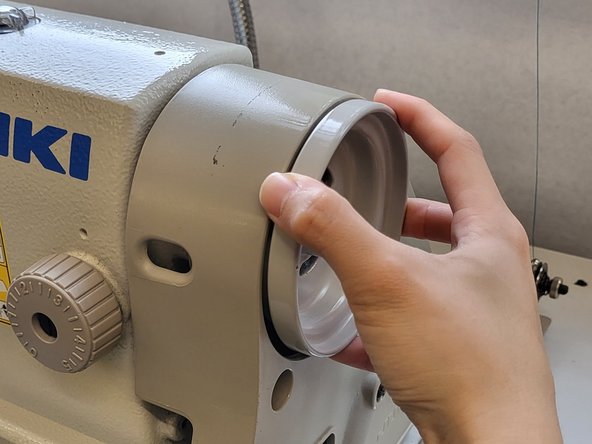
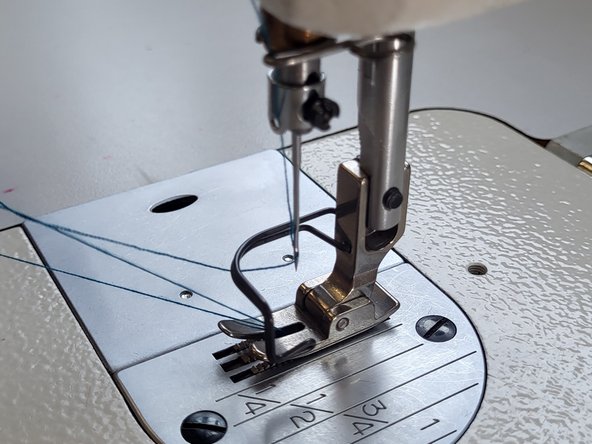
    • Turn the hand wheel counter clockwise towards you to move the needle down and back up.

  12. Juki DDL-8700 Bobbin Replacement: шаг 13, изображение 1 из 3 Juki DDL-8700 Bobbin Replacement: шаг 13, изображение 2 из 3 Juki DDL-8700 Bobbin Replacement: шаг 13, изображение 3 из 3
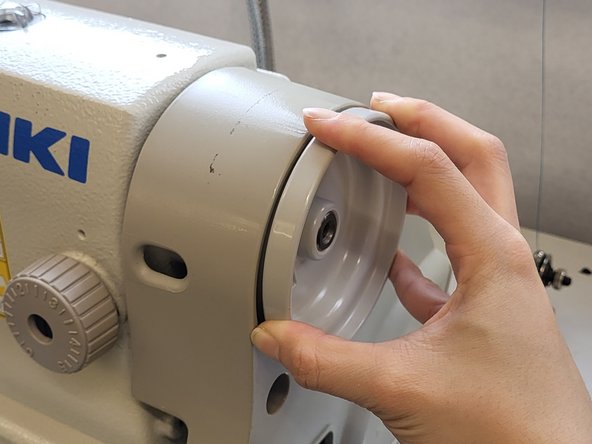
    • Hold the thread while making a full rotation with the hand wheel.

    • Allow the needle to lower into the machine and rise back up to its original position.

    • Retrieve the bobbin from the bottom of the machine.

Заключение

At this point, your bobbin should be threaded and replaced. You can now return to your sewing project.

Еще один человек закончил это руководство.

Kaylin Lee

Участник с: 02/02/24

232 Репутация

1 руководство автора

Команда

UC Davis, Team 1-4, Andersen Winter 2024 Участник UC Davis, Team 1-4, Andersen Winter 2024

UCD-ANDERSEN-W24S1G4

3 членов

Автор 1 руководств

0 Комментарии к руководству

Добавить комментарий

Статистика просмотров:

За последние 24 часов: 2

За последние 7 дней: 10

За последние 30 дней: 38

За всё время: 405