Введение
For every maintenance the Exhaust valve should be checked. The valve tappet breaks often or the seal rubber can become brittle over time. You can also replace the whole valve, it is not very expensive.
Выберете то, что вам нужно
-
-
The instructions are suitable for nearly every model of Jura and similar ones e.g. AEG and Krups.
-
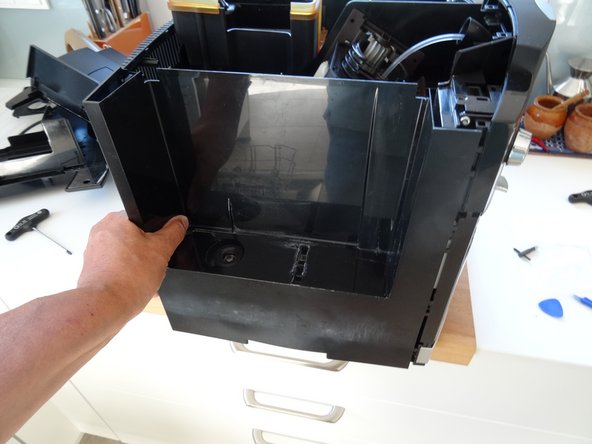
Remove the water reservoir.
-
-
-
Using an oval head bit you can screw them out. If you haven´t got one you can carefully use pliers. It is a good idea to later change the screws for normal ones.
-
Beneath both top side covers are two Torx T15 screws. Remove those. Now lift off the whole top cover. Sometimes it jams and you have to use a bit of force.
-
The side covers must be pushed backwards by about 1 cm. Sometimes this is a little bit difficult to move. If necessary, wedge a plastic opening tool into the gap between the side covers and the front panel. The rear cover can be easily removed.
-
-
-
-
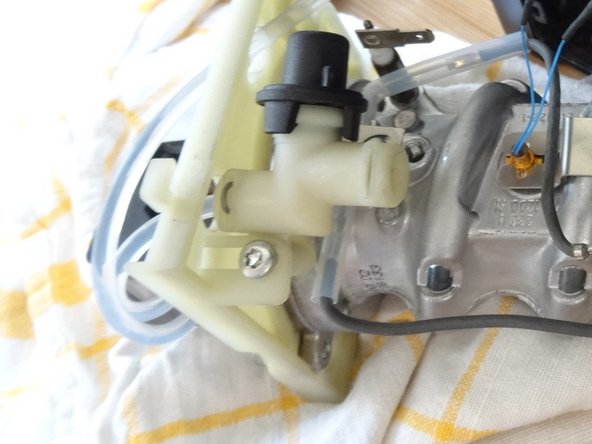
The outlet valve is located in the hot water pipe near the heater. In this model, it is screwed to the carriage for the heating cartridge.
-
The black cap on the valve is fixed with three detents. Loosen them carefully with a spudgerl.
-
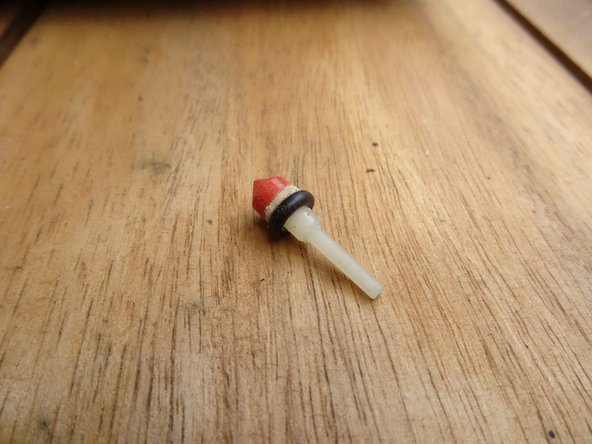
Gently lift the cap off. Pay attention to the order of the spring, pressure plate and plunger.
-
-
-
On this valve, the plunger was broken and had to be replaced with a new one. The plastic model is shown here, but a metal valve plunger would be better as it would not break again.
-
If the stamp is still good, it is sufficient to install new seals. Coat the seals thinly with food-grade silicone grease.
-


Follow the steps in reverse order to reassemble your device.
Follow the steps in reverse order to reassemble your device.
Особая благодарность этим переводчикам:
100%

carlotremoladaпомогает нам починить мир! Хотите внести свой вклад?
Начните переводить ›
Команда

Repair is War on Entropy Участник Repair is War on Entropy
Community
25 членов
Автор 1 114 руководств