Введение
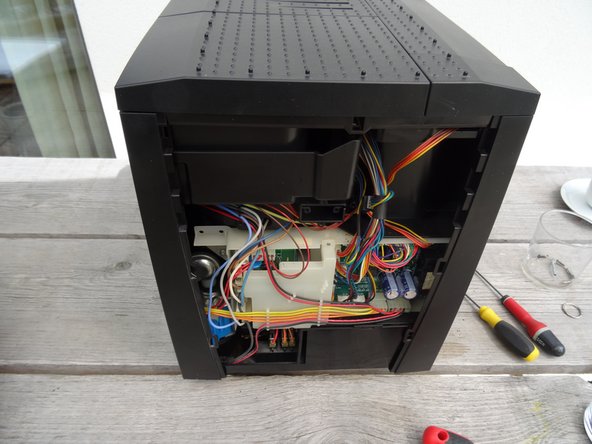
Für die meisten Reparaturen muss das Gehäuse der Jura Z geöffnet werden, dies wird hier gezeigt.
Выберете то, что вам нужно
-
-
Entferne alle Anbauteile: Wassertank, Tropfschale, Aramomadeckel.
-
-
-
Drehe die Maschine mit dem Rückseite zu dir.
-
Das Jurazeichen muss entfernt werden, verdrehe es dazu einige Millimeter gegen den Uhrzeigersinn.
-
Hebe das Jurazeichen heraus.
Ich musste bei einer Impressa Z9 das Emblem gegen den Uhrzeigersinn drehen um es zu lösen.
-
-
-
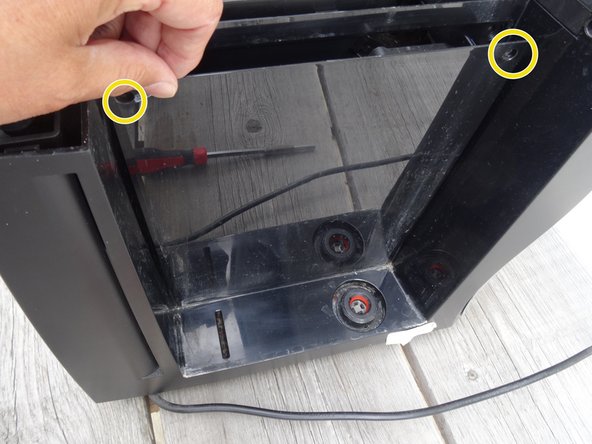
Unter dem Jurazeichen befinden sich zwei Schrauben mit einem Ovalkopf. Sie müssen herausgedreht werden.
-
Diese Schrauben haben einen ovalen Kopf, der sie wie Nieten aussehen lässt (Bild 2). Man braucht zum Öffnen einen speziellen Schlüssel oder das Bit von iFixit. Hier eine Anleitung zum Selbstbau. Zur Not geht es auch mit einer Spitzzange. Jura will uns aus unseren eigenen Maschinen heraushalten!
Hi there - really trying to find the tool to use for this. Please advise. Is there a link to it that I can buy?
-
-
-
-
Ziehe das - von vorne gesehen -rechte Seitenteil nach hinten und nimm es ab.
In Schritt „5“ fehlt der Hinweis auf die noch zu entfernende Schraube unten am vorderen Teil der Seitenwand.
-
-
-
Drehe die Torx T15 Schraube an der Vorderwand des Seitenteils heraus.
-
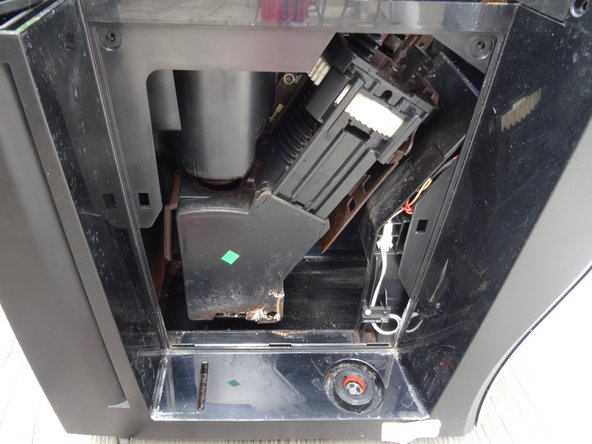
Im Seitenteil befindet sich ein Deckel über der Brühgruppe. Der Deckel ist oben mit zwei Ovalkopfschrauben befestigt. Drehe sie heraus und entnimm den Deckel.
-
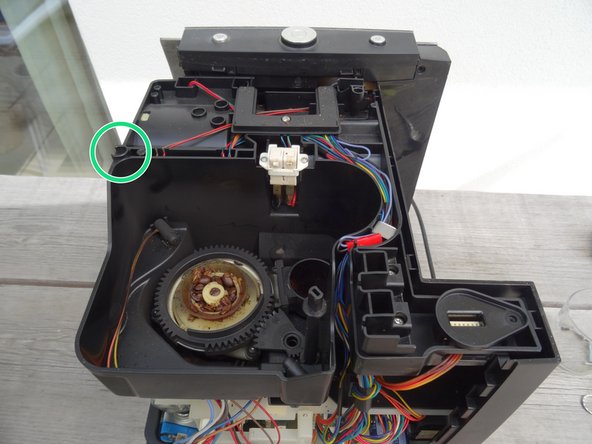
Die Brühgruppe wird sichtbar.
-
-
-
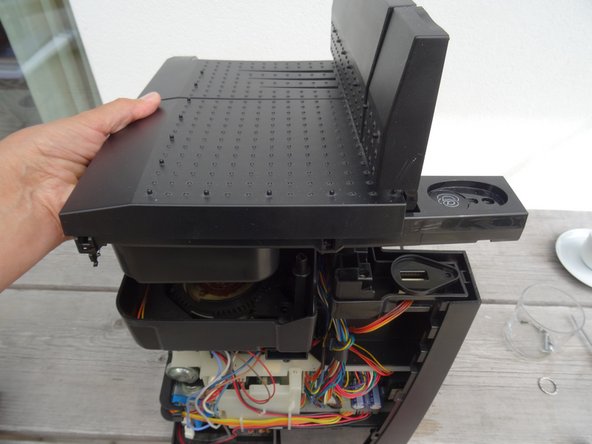
In diesem Schritt soll die obere Abdeckung entfernt werden.
-
Entferne den Pulverschacht und alle Kaffeebohnen.
-
Die Abdeckung ist mit drei Torx T15 Schrauben befestigt. Du findest sie leicht unter den Abdeckungen, auch der kleinen Abdeckung links hinten.
-
Drehe auch die beiden Kreuzschlitzschrauben am Bohnenbehälter heraus und entnimm den Bohnenbehälter.
-
Hebe die Abdeckung nach oben heraus.
-


Arbeite die Schritte in umgekehrter Reihenfolge ab, um dein Gerät wieder zusammenzubauen.
Arbeite die Schritte in umgekehrter Reihenfolge ab, um dein Gerät wieder zusammenzubauen.
Отменить: Я не выполнил это руководство.
3 участников успешно повторили данное руководство.
Команда

Repair is War on Entropy Участник Repair is War on Entropy
Community
25 членов
Автор 1 097 руководств
12 Комментариев
Hi,
Do you also have a detailed description how to disassemble the front part?
Because I need to replace the “Outlet gate black V2”, the black plastic part behind the logo at the front panel which has the tube for tea attached to it. This black plastic cover of the tube is broken and therefore I want to replace this part.
Thank you very much for your answer!
Sorry, No. I never did this fix. Perhaps one of those videos helps: https://www.youtube-nocookie.com/embed/0... and https://www.youtube-nocookie.com/embed/P...
Great photo's and directions, couldn't be clearer or more straightforward. Thank you so much!
I had a small hole in one of the internal clear water hoses right where the clip held it in place. I cut off just slightly more than a quarter inch of the hose to get safety past where the hole in the hose was; but then had to struggle to stretch the remaining hose, just that quarter of an inch that I cut off, to remount and get the clip back on. Finally got it back in place. To say Jura is stingy with their hose lengths is putting it mildly.
I have looked everyplace for that rather specialized hose to have some on hand for my next leak. The hose seems to be medical grade. Websites that sell it have ridiculous prices for just a few inches of the stuff. I would pay it if I could get a few feet, but inches for $20 or $30 dollars is insane. Do you know of a source where it can be purchased in longer lengths? Thanks again!
Thank you.
When I opened the machine all the hoses look to be the same size and type on my Jura Z9 (clear silicone hose with crisscrossed silver lines embedded in the silicone - presumably for reinforcement), however, researching hose size online for Z9 brings up different diameter hoses for each connection. Is this right, as they all looked to be the same diameter to me (I did not think to measure at the time I had the sides off). Thanks again!
Have sent it back for repair previously. CANNOT get the screws out this time. Tried needle nose pliers without success. Have bought the recommended tools with no success. Looking for your recommendation for which OTHER tool to buy to unscrew them. Dimension needed is less than 4MM, greater than 3.5. Please advise! TIA!
These oval head screws are really strange, but I never had difficulties to open them. I normally use iFixit's Oval Drive Bit Item # IF145-373-76.
VauWeh -
Do you know the procedure for a Z8? It died during power up and I’m wondering if it is a fuse.