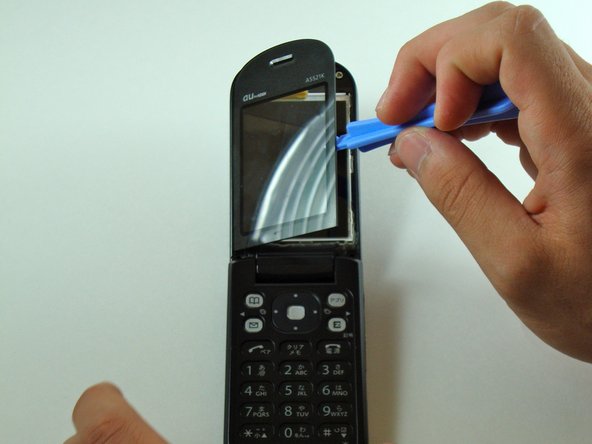
Перейти к основному содержанию

KDDI Kyocera A5521K Front LCD Screen Replacement

Выберете то, что вам нужно

  1. KDDI Kyocera A5521K Front LCD Screen Replacement, Disassembling KDDI Kyocera A5521K Faceplate: шаг 1, изображение 1 из 3 KDDI Kyocera A5521K Front LCD Screen Replacement, Disassembling KDDI Kyocera A5521K Faceplate: шаг 1, изображение 2 из 3 KDDI Kyocera A5521K Front LCD Screen Replacement, Disassembling KDDI Kyocera A5521K Faceplate: шаг 1, изображение 3 из 3
    • Pry, with a metal probe, the black covers that are located by the pivoting joints of the phone.

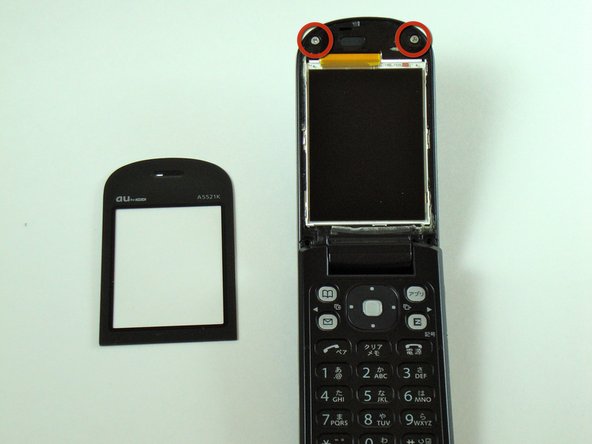
    • Beneath the covers are screws.

  2. KDDI Kyocera A5521K Front LCD Screen Replacement: шаг 2, изображение 1 из 1
    • Remove the screws using a Y0 screwdriver.

  3. KDDI Kyocera A5521K Front LCD Screen Replacement: шаг 3, изображение 1 из 3 KDDI Kyocera A5521K Front LCD Screen Replacement: шаг 3, изображение 2 из 3 KDDI Kyocera A5521K Front LCD Screen Replacement: шаг 3, изображение 3 из 3
    • Use the iPod pry tool to remove the outer screen.

    • Two screws are now visible.

    • Be careful not to crack the screen upon removal. It is adhered strongly to the phone.

  4. KDDI Kyocera A5521K Front LCD Screen Replacement: шаг 4, изображение 1 из 1
    • Use the Y0 screwdriver to remove the screws.

  5. KDDI Kyocera A5521K Front LCD Screen Replacement: шаг 5, изображение 1 из 2 KDDI Kyocera A5521K Front LCD Screen Replacement: шаг 5, изображение 2 из 2
    • Use the iPod pry tool to loosen the faceplate from the phone.

    • Slide the pry tool along the entire crease of the faceplate to completely detach it.

  6. KDDI Kyocera A5521K Front LCD Screen Replacement: шаг 6, изображение 1 из 3 KDDI Kyocera A5521K Front LCD Screen Replacement: шаг 6, изображение 2 из 3 KDDI Kyocera A5521K Front LCD Screen Replacement: шаг 6, изображение 3 из 3
    • Separate the faceplate from the phone.

  7. KDDI Kyocera A5521K Front LCD Screen Replacement, Front LCD Screen: шаг 7, изображение 1 из 3 KDDI Kyocera A5521K Front LCD Screen Replacement, Front LCD Screen: шаг 7, изображение 2 из 3 KDDI Kyocera A5521K Front LCD Screen Replacement, Front LCD Screen: шаг 7, изображение 3 из 3
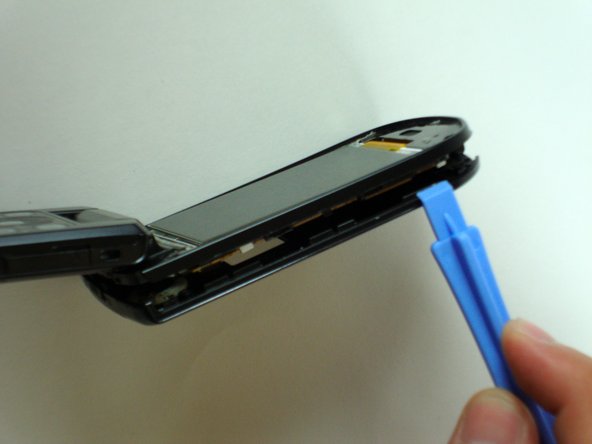
    • Rotate the phone 180 degrees.

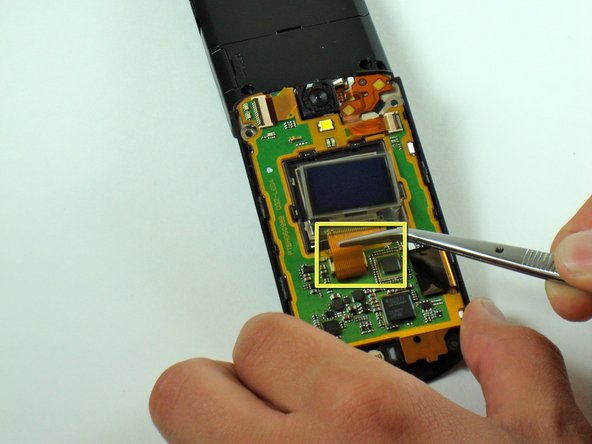
    • Grab the flexible circuit with tweezers (or use your fingers if you can manage a firm grip).

    • Pull the flexible circuit to towards you to separate the front LCD screen from the phone.

  8. KDDI Kyocera A5521K Front LCD Screen Replacement: шаг 8, изображение 1 из 3 KDDI Kyocera A5521K Front LCD Screen Replacement: шаг 8, изображение 2 из 3 KDDI Kyocera A5521K Front LCD Screen Replacement: шаг 8, изображение 3 из 3
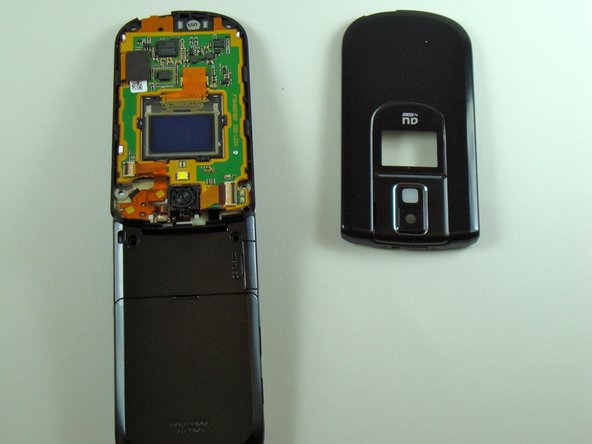
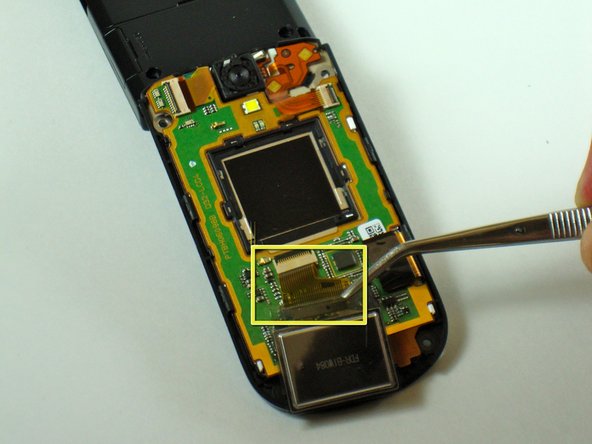
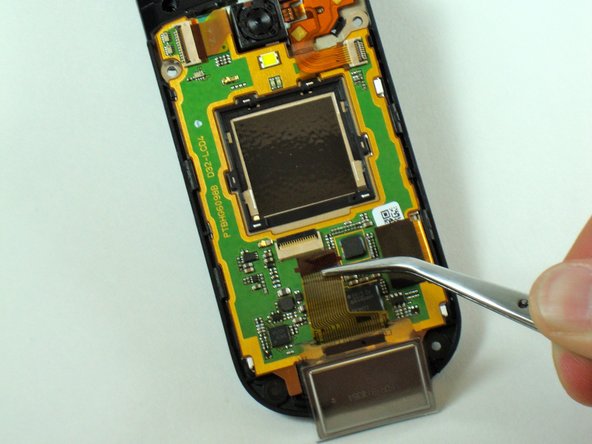
    • Firmly pull the flexible circuit from the connector.

    • Be careful not to damage the flexible circuit.

    • The front LCD screen should now be separate from the phone.

Заключение

To reassemble your device, follow these instructions in reverse order.

Dominic Grisafe

Участник с: 04/15/10

157 Репутация

Автор 10 руководств

Команда

Cal Poly, Team 28-25, Regan Spring 2010 Участник Cal Poly, Team 28-25, Regan Spring 2010

CPSU-REGAN-S10S28G25

4 членов

Автор 20 руководств

0 Комментариев

Добавить комментарий

Просмотр статистики:

За последние 24часов: 2

За последние 7 дней: 2

За последние 30 дней: 9

За всё время: 1,502