Перейти к основному содержанию

KYVOL CYBOVAC E20 Motherboard Replacement

Выберете то, что вам нужно

  1. KYVOL CYBOVAC E20 Motherboard Replacement, Battery: шаг 1, изображение 1 из 2 KYVOL CYBOVAC E20 Motherboard Replacement, Battery: шаг 1, изображение 2 из 2
    • Start by laying the device on a flat surface with the logo facing up.

    • Flip the device over.

  2. KYVOL CYBOVAC E20 Motherboard Replacement: шаг 2, изображение 1 из 2 KYVOL CYBOVAC E20 Motherboard Replacement: шаг 2, изображение 2 из 2
    • Remove two 1 mm screws using a Phillips #00 screwdriver.

  3. KYVOL CYBOVAC E20 Motherboard Replacement: шаг 3, изображение 1 из 2 KYVOL CYBOVAC E20 Motherboard Replacement: шаг 3, изображение 2 из 2
    • Remove the cover.

  4. KYVOL CYBOVAC E20 Motherboard Replacement: шаг 4, изображение 1 из 2 KYVOL CYBOVAC E20 Motherboard Replacement: шаг 4, изображение 2 из 2
    • Lift the battery.

    • Press down on the top of the white connector.

    • Remove the battery from the vacuum.

  5. KYVOL CYBOVAC E20 Motherboard Replacement, Wheel: шаг 5, изображение 1 из 1
    • Remove both sweepers by pinching near the base of the brushes and pulling up.

  6. KYVOL CYBOVAC E20 Motherboard Replacement: шаг 6, изображение 1 из 1
    • Remove four 10 mm screws using a Phillips #00 screwdriver.

  7. KYVOL CYBOVAC E20 Motherboard Replacement: шаг 7, изображение 1 из 3 KYVOL CYBOVAC E20 Motherboard Replacement: шаг 7, изображение 2 из 3 KYVOL CYBOVAC E20 Motherboard Replacement: шаг 7, изображение 3 из 3
    • Lift the wheel to detach the tensioning spring. This step requires you to first press down on the wheel, then detach.

    • Disconnect the wheel motor from the power supply.

    • Repeat the process for the other wheel.

  8. KYVOL CYBOVAC E20 Motherboard Replacement, Motherboard: шаг 8, изображение 1 из 2 KYVOL CYBOVAC E20 Motherboard Replacement, Motherboard: шаг 8, изображение 2 из 2
    • Flip the device over.

    • Remove the eight 15 mm screws on the device's underside using a Phillips #2 screwdriver

  9. KYVOL CYBOVAC E20 Motherboard Replacement: шаг 9, изображение 1 из 2 KYVOL CYBOVAC E20 Motherboard Replacement: шаг 9, изображение 2 из 2
    • Remove the eight 10 mm screws with a Phillips #2 screwdriver to remove the bumper.

    • Disconnect the sensor wire from the front of the device.

  10. KYVOL CYBOVAC E20 Motherboard Replacement: шаг 10, изображение 1 из 2 KYVOL CYBOVAC E20 Motherboard Replacement: шаг 10, изображение 2 из 2
    • Remove the dust bin from the device.

  11. KYVOL CYBOVAC E20 Motherboard Replacement: шаг 11, изображение 1 из 3 KYVOL CYBOVAC E20 Motherboard Replacement: шаг 11, изображение 2 из 3 KYVOL CYBOVAC E20 Motherboard Replacement: шаг 11, изображение 3 из 3
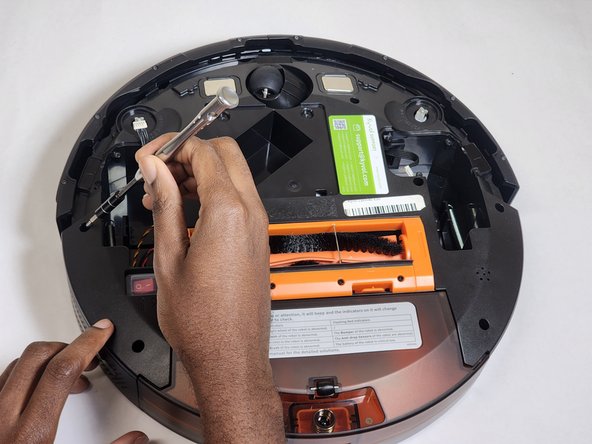
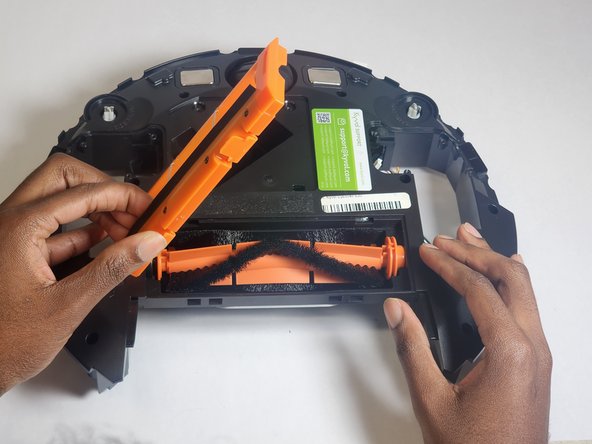
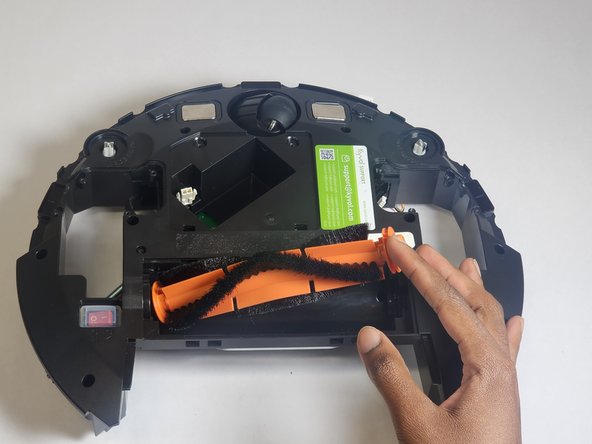
    • Remove the main brush from the bottom of the device.

    • Remove the orange cover, then pop the brush out of its compartment.

  12. KYVOL CYBOVAC E20 Motherboard Replacement: шаг 12, изображение 1 из 2 KYVOL CYBOVAC E20 Motherboard Replacement: шаг 12, изображение 2 из 2
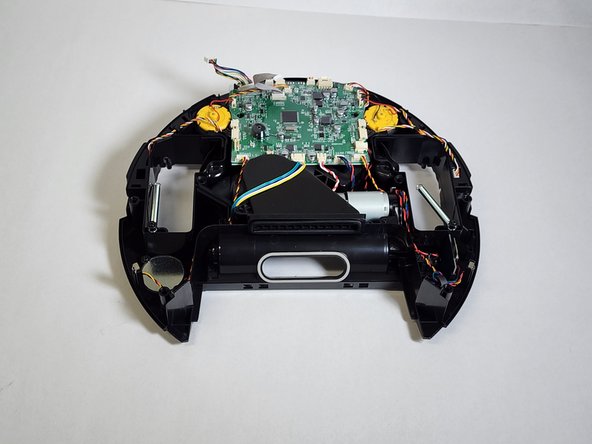
    • Disconnect the ribbon cable between the top and bottom halves of the device and remove the top half away from the rest of the body.

  13. KYVOL CYBOVAC E20 Motherboard Replacement: шаг 13, изображение 1 из 1
    • Remove the three 10 mm screws from the motherboard using a Phillips #2 screwdriver.

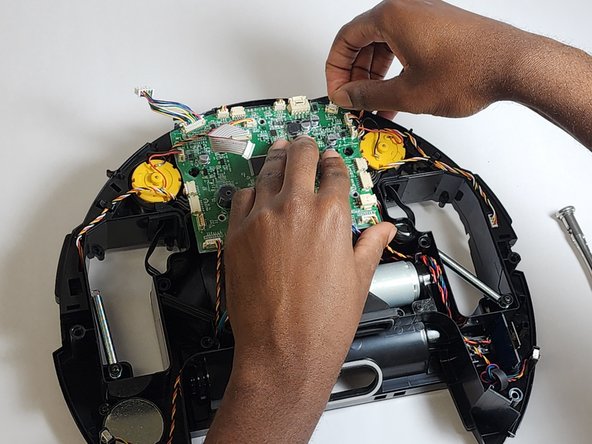
  14. KYVOL CYBOVAC E20 Motherboard Replacement: шаг 14, изображение 1 из 3 KYVOL CYBOVAC E20 Motherboard Replacement: шаг 14, изображение 2 из 3 KYVOL CYBOVAC E20 Motherboard Replacement: шаг 14, изображение 3 из 3
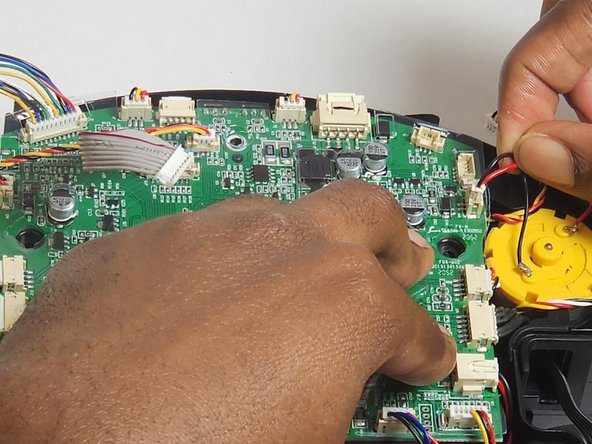
    • Detach the connections on the motherboard carefully.

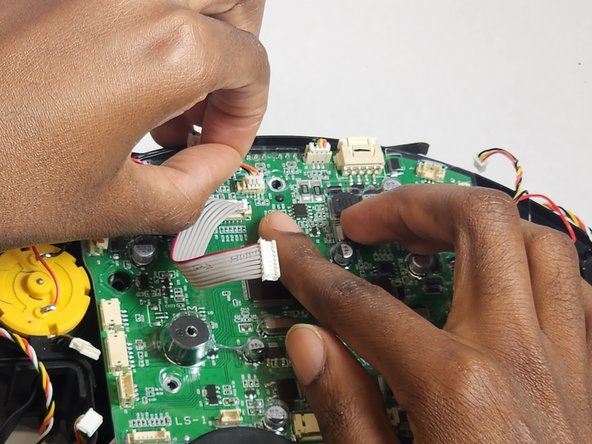
  15. KYVOL CYBOVAC E20 Motherboard Replacement: шаг 15, изображение 1 из 3 KYVOL CYBOVAC E20 Motherboard Replacement: шаг 15, изображение 2 из 3 KYVOL CYBOVAC E20 Motherboard Replacement: шаг 15, изображение 3 из 3
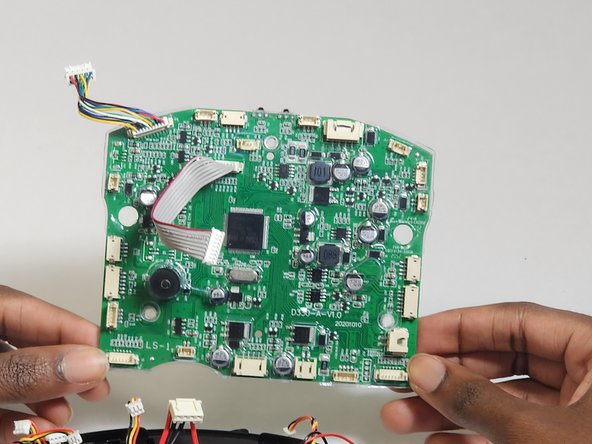
    • Continue removing the connections up until you are done removing all 19 of the motherboard connections.

    • Once all plugs are disconnected, lift the motherboard out of the device.

Заключение

To reassemble your device, follow these instructions in reverse order.

Еще один человек закончил это руководство.

Blayde Johnson

Участник с: 07/13/23

181 Репутация

1 руководство автора

Команда

IUPUI, Team 1-1, Harley Summer 2023 Участник IUPUI, Team 1-1, Harley Summer 2023

IUPUI-HARLEY-SU23S1G1

4 членов

Автор 4 руководств

0 Комментариев

Добавить комментарий

Просмотр статистики:

За последние 24часов: 0

За последние 7 дней: 0

За последние 30 дней: 3

За всё время: 108