Перейти к основному содержанию

Karcher Carpet Cleaner BRC3015C 2018 Pump Replacement

Выберете то, что вам нужно

  1. Karcher Carpet Cleaner BRC3015C 2018 Pump Replacement, Disconnect the hose: шаг 1, изображение 1 из 2 Karcher Carpet Cleaner BRC3015C 2018 Pump Replacement, Disconnect the hose: шаг 1, изображение 2 из 2
    • Make sure the carpet cleaner is turned off and completely disconnected from power.

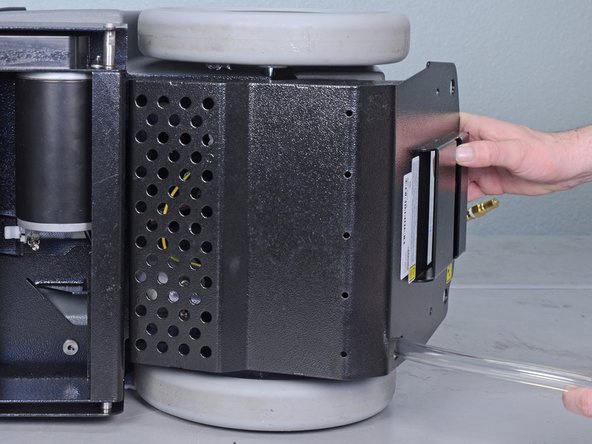
    • Pull the hose on the rear of the carpet cleaner straight down to disconnect it.

  2. Karcher Carpet Cleaner BRC3015C 2018 Pump Replacement, Remove the bottom cover: шаг 2, изображение 1 из 1
    • Use a 3 mm hex key to remove two bolts securing the bottom cover.

  3. Karcher Carpet Cleaner BRC3015C 2018 Pump Replacement: шаг 3, изображение 1 из 3 Karcher Carpet Cleaner BRC3015C 2018 Pump Replacement: шаг 3, изображение 2 из 3 Karcher Carpet Cleaner BRC3015C 2018 Pump Replacement: шаг 3, изображение 3 из 3
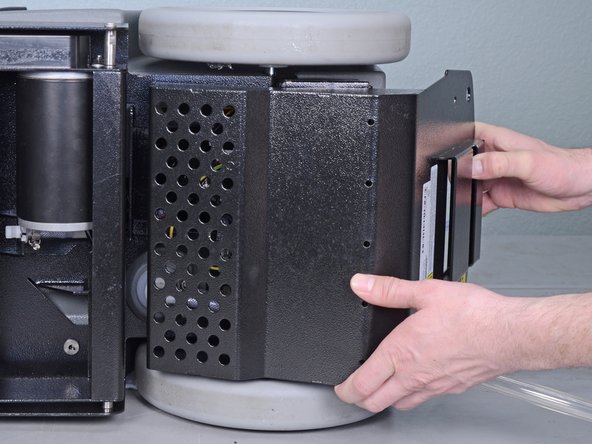
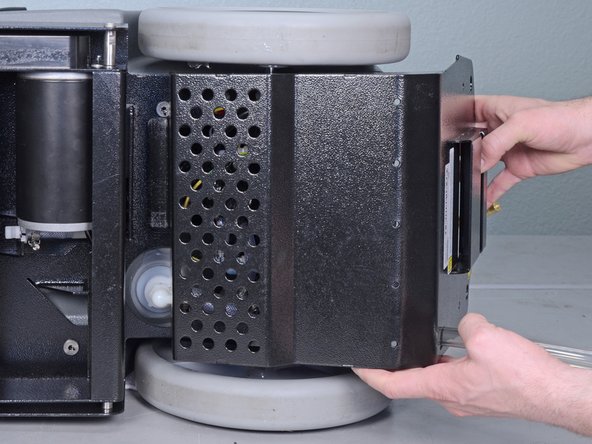
    • Rotate the bottom cover down toward the bottom of the carpet cleaner, then pull it straight back toward the rear of the carpet cleaner to remove it.

    • Don't completely remove the cover yet. There is a ground wire connecting the cover to the carpet cleaner that must be disconnected first.

  4. Karcher Carpet Cleaner BRC3015C 2018 Pump Replacement, Disconnect the ground wire: шаг 4, изображение 1 из 1
    • Pull the yellow and green ground wire connectors straight apart to disconnect the bottom cover's ground wire.

  5. Karcher Carpet Cleaner BRC3015C 2018 Pump Replacement, Remove the pump cover: шаг 5, изображение 1 из 1
    • Use a 3 mm hex key to remove the four bolts securing the pump cover.

  6. Karcher Carpet Cleaner BRC3015C 2018 Pump Replacement: шаг 6, изображение 1 из 2 Karcher Carpet Cleaner BRC3015C 2018 Pump Replacement: шаг 6, изображение 2 из 2
    • Remove the pump cover.

  7. Karcher Carpet Cleaner BRC3015C 2018 Pump Replacement, Remove the pump hoses: шаг 7, изображение 1 из 2 Karcher Carpet Cleaner BRC3015C 2018 Pump Replacement, Remove the pump hoses: шаг 7, изображение 2 из 2
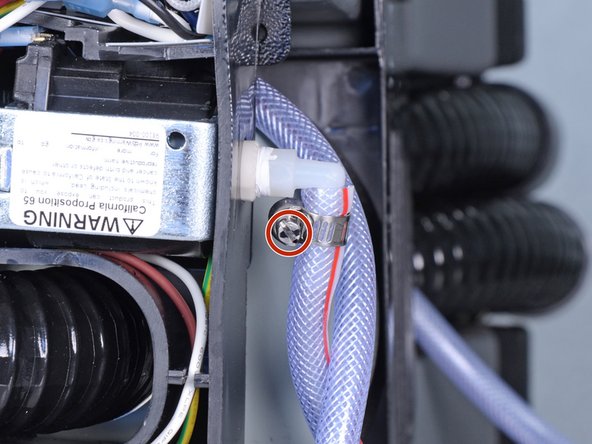
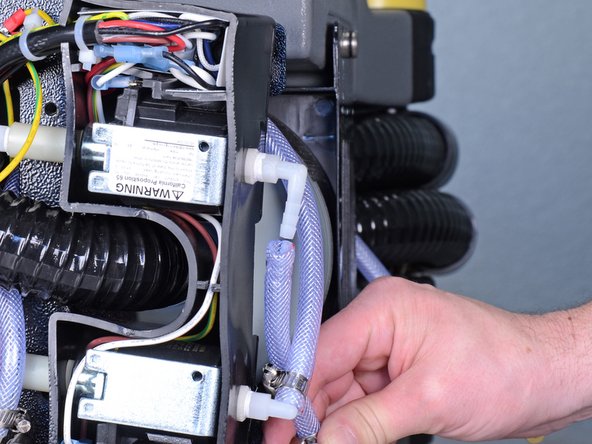
    • Use a flathead screwdriver to loosen the hose clamps at both ends of the pump.

  8. Karcher Carpet Cleaner BRC3015C 2018 Pump Replacement: шаг 8, изображение 1 из 3 Karcher Carpet Cleaner BRC3015C 2018 Pump Replacement: шаг 8, изображение 2 из 3 Karcher Carpet Cleaner BRC3015C 2018 Pump Replacement: шаг 8, изображение 3 из 3
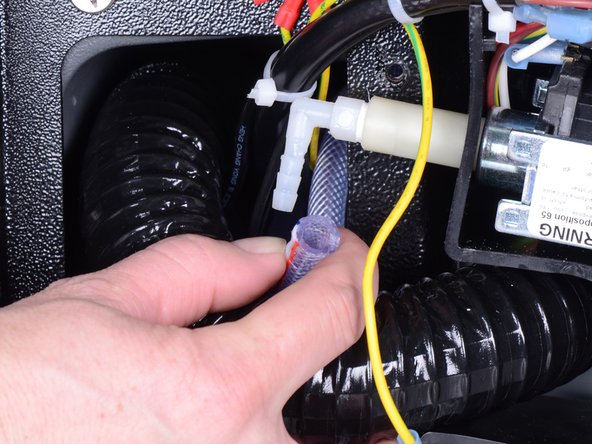
    • Pull the hoses at both ends of the pump straight off of their hose barbs to remove them.

  9. Karcher Carpet Cleaner BRC3015C 2018 Pump Replacement, Remove the pump: шаг 9, изображение 1 из 1
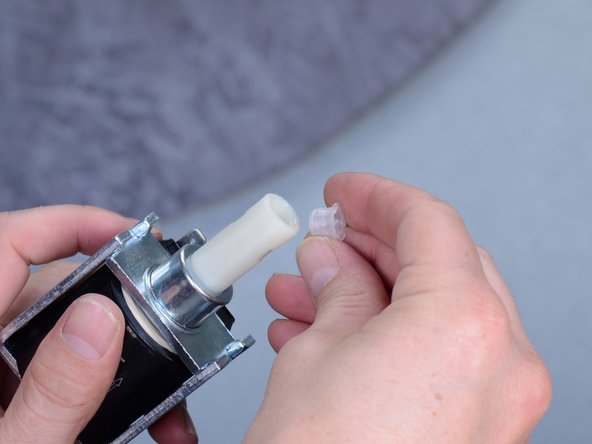
    • Use your fingers to unscrew the hose barb from the outward-facing end of the pump.

  10. Karcher Carpet Cleaner BRC3015C 2018 Pump Replacement: шаг 10, изображение 1 из 3 Karcher Carpet Cleaner BRC3015C 2018 Pump Replacement: шаг 10, изображение 2 из 3 Karcher Carpet Cleaner BRC3015C 2018 Pump Replacement: шаг 10, изображение 3 из 3
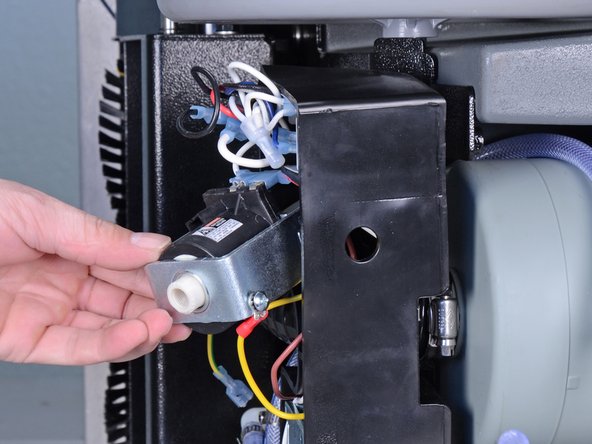
    • Bend the outer side of the pump compartment away from the pump very slightly.

    • Slide the pump out of the hole in the side of the pump compartment, then continue to slide the pump out of the compartment.

    • Do not completely remove the pump yet, as it is still tethered to the carpet cleaner by three wires.

  11. Karcher Carpet Cleaner BRC3015C 2018 Pump Replacement: шаг 11, изображение 1 из 1
    • Use a Phillips #2 screwdriver to remove the screw securing the ground wire to the pump.

    • Remove the ground wire from the pump.

  12. Karcher Carpet Cleaner BRC3015C 2018 Pump Replacement: шаг 12, изображение 1 из 2 Karcher Carpet Cleaner BRC3015C 2018 Pump Replacement: шаг 12, изображение 2 из 2
    • Pull the two connectors straight off of the pump to disconnect them from the pump.

  13. Karcher Carpet Cleaner BRC3015C 2018 Pump Replacement: шаг 13, изображение 1 из 1
    • Use your fingers to unscrew the remaining hose barb from the pump.

  14. Karcher Carpet Cleaner BRC3015C 2018 Pump Replacement: шаг 14, изображение 1 из 2 Karcher Carpet Cleaner BRC3015C 2018 Pump Replacement: шаг 14, изображение 2 из 2
    • Your new pump may come with plugs on either end. Use an angled pick or small flathead screwdriver to pry these out before installation.

Заключение

To reassemble your device, follow these instructions in reverse order.

4 участников успешно повторили данное руководство.

Adam O'Camb

Участник с: 04/11/15

196 170 Репутация

Автор 416 руководств

3 Комментариев

, Yes, why show how to replace it if you cant even buy it? top msg says:

( Karcher Pump, 110/120V 60Hz Flojet 86201110 Not for sale)

GERALD - Ответить

Ask Google for “Kärcher 8.620-111.0”

VauWeh -

The one we have has 4 mm screws. Otherwise, very helpful, thanks.

DAVID - Ответить

Добавить комментарий

Просмотр статистики:

За последние 24часов: 1

За последние 7 дней: 5

За последние 30 дней: 14

За всё время: 1,394