Перейти к основному содержанию

Kenwood DNX571HD LCD Touch Screen Replacement

Выберете то, что вам нужно

  1. Kenwood DNX571HD LCD Touch Screen Replacement, LCD Touch Screen: шаг 1, изображение 1 из 2 Kenwood DNX571HD LCD Touch Screen Replacement, LCD Touch Screen: шаг 1, изображение 2 из 2
    • Turn off the stereo and remove from the vehicle before starting.

    • Unscrew the four 3.5mm side screws with a Phillips #1 screwdriver.

    • There are two screws per side.

  2. Kenwood DNX571HD LCD Touch Screen Replacement: шаг 2, изображение 1 из 3 Kenwood DNX571HD LCD Touch Screen Replacement: шаг 2, изображение 2 из 3 Kenwood DNX571HD LCD Touch Screen Replacement: шаг 2, изображение 3 из 3
    • Use a spudger to unhook the plastic clips on the sides and top of the front panel. There are two clips on each side and one clip on the top.

    • Place the spudger between the plastic tab and the metal case and gently lift the spudger away from the case.

  3. Kenwood DNX571HD LCD Touch Screen Replacement: шаг 3, изображение 1 из 1
    • Pull the top of the front panel out and down to remove front panel.

    • Remove the front panel gently so as not to damage the ribbon cables behind it.

  4. Kenwood DNX571HD LCD Touch Screen Replacement: шаг 4, изображение 1 из 2 Kenwood DNX571HD LCD Touch Screen Replacement: шаг 4, изображение 2 из 2
    • Flip up the black clasp with the spudger to disconnect the small white ribbon cable from the main board.

  5. Kenwood DNX571HD LCD Touch Screen Replacement: шаг 5, изображение 1 из 2 Kenwood DNX571HD LCD Touch Screen Replacement: шаг 5, изображение 2 из 2
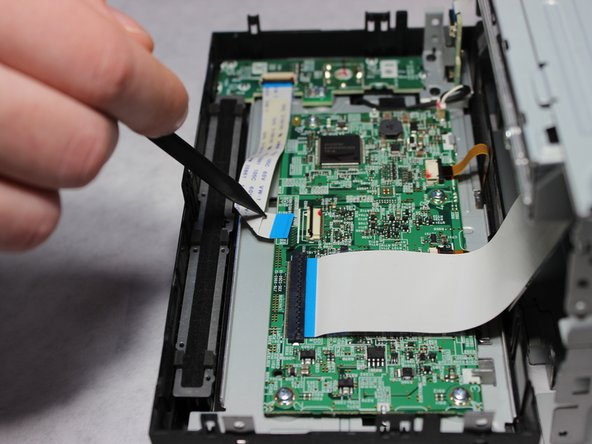
    • Flip up the black clasp with the spudger to disconnect the large white ribbon cable from the main board.

  6. Kenwood DNX571HD LCD Touch Screen Replacement: шаг 6, изображение 1 из 2 Kenwood DNX571HD LCD Touch Screen Replacement: шаг 6, изображение 2 из 2
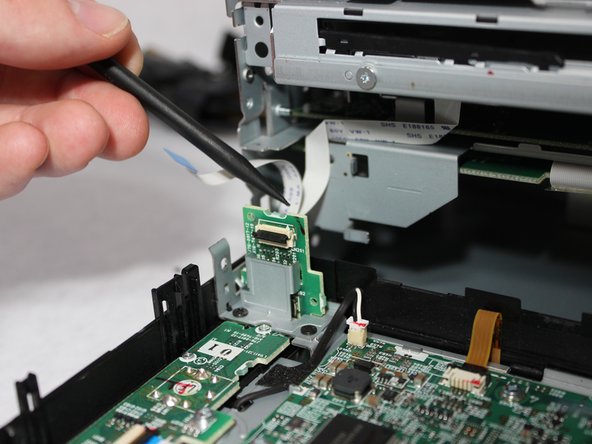
    • Flip up the black clasp with the spudger to disconnect the small white ribbon cable from the vertical board.

    • Carefully pull the ribbon from the clasp with the spudger.

  7. Kenwood DNX571HD LCD Touch Screen Replacement: шаг 7, изображение 1 из 2 Kenwood DNX571HD LCD Touch Screen Replacement: шаг 7, изображение 2 из 2
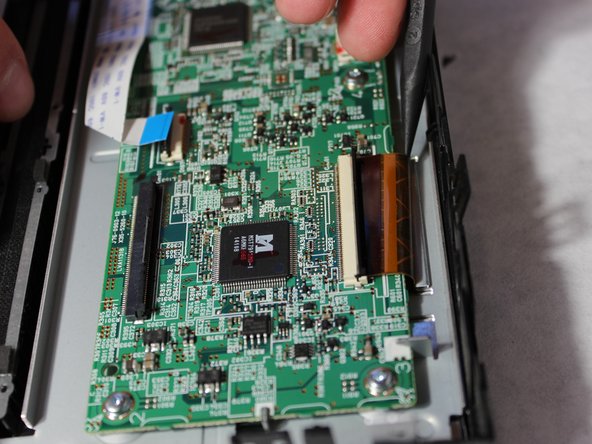
    • Flip up the black clasp with the spudger to disconnect the large orange ribbon cable from the main board.

    • Carefully pull the ribbon from the clasp with the spudger.

  8. Kenwood DNX571HD LCD Touch Screen Replacement: шаг 8, изображение 1 из 2 Kenwood DNX571HD LCD Touch Screen Replacement: шаг 8, изображение 2 из 2
    • Push out the black clasp with the spudger to disconnect the small orange ribbon cable from the main board.

    • Gently push the ribbon out of the clasp with the spudger.

  9. Kenwood DNX571HD LCD Touch Screen Replacement: шаг 9, изображение 1 из 2 Kenwood DNX571HD LCD Touch Screen Replacement: шаг 9, изображение 2 из 2
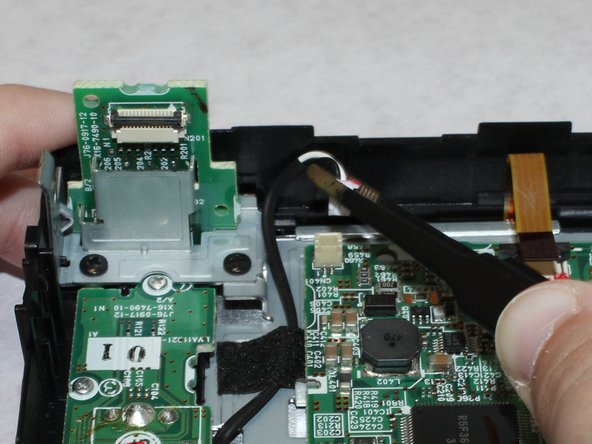
    • Using a pair of tweezers, gently pull up on the connector for the power cable to disconnect it from the main board.

  10. Kenwood DNX571HD LCD Touch Screen Replacement: шаг 10, изображение 1 из 2 Kenwood DNX571HD LCD Touch Screen Replacement: шаг 10, изображение 2 из 2
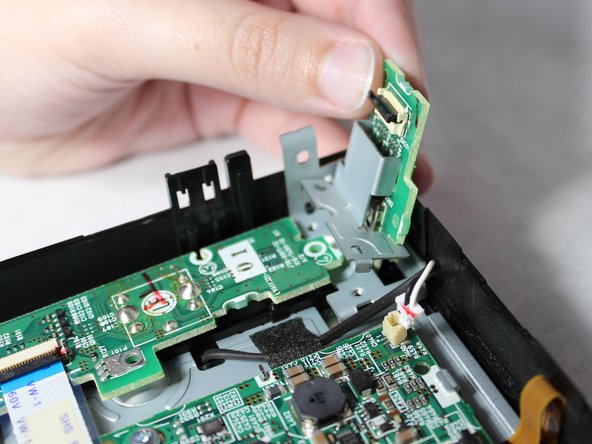
    • Unscrew the two 4mm screws holding down the board that is standing vertically with a Phillips #1 screwdriver.

    • Pull up on the board to remove it.

  11. Kenwood DNX571HD LCD Touch Screen Replacement: шаг 11, изображение 1 из 2 Kenwood DNX571HD LCD Touch Screen Replacement: шаг 11, изображение 2 из 2
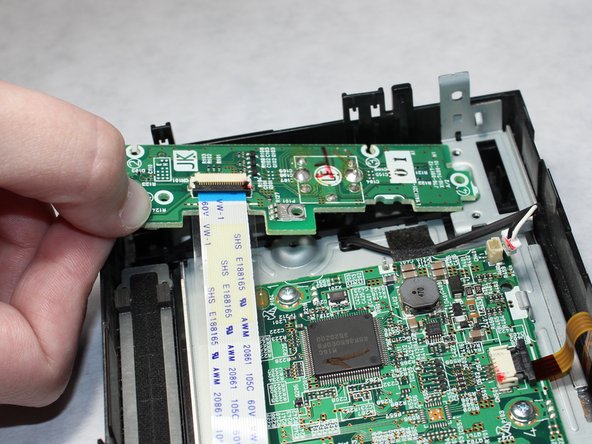
    • Unscrew the four 5.5mm screws with a JIS #00 screwdriver.

    • Unscrew the 4mm screw with a Phillips #1 screwdriver.

    • Remove the disconnected circuit board.

  12. Kenwood DNX571HD LCD Touch Screen Replacement: шаг 12, изображение 1 из 2 Kenwood DNX571HD LCD Touch Screen Replacement: шаг 12, изображение 2 из 2
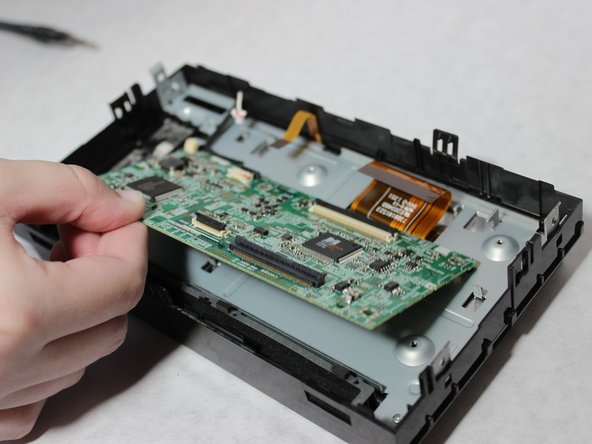
    • Unscrew the four 4mm screws on the main board with a Phillips #1 screwdriver.

    • Gently lift the board out of the casing.

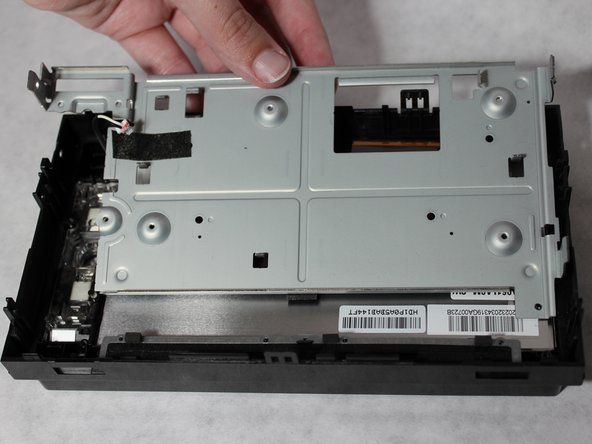
    • Unscrew the 5.5mm screw on the metal plate with a JIS #00 screwdriver.

  13. Kenwood DNX571HD LCD Touch Screen Replacement: шаг 13, изображение 1 из 1
    • Carefully remove the tape attaching the power cable to the metal plate.

  14. Kenwood DNX571HD LCD Touch Screen Replacement: шаг 14, изображение 1 из 2 Kenwood DNX571HD LCD Touch Screen Replacement: шаг 14, изображение 2 из 2
    • Use the spudger to unhook the metal tabs and detach the metal plate from the plastic housing.

    • Place the spudger between the metal tab and the plastic case and gently lift the spudger away from the case.

  15. Kenwood DNX571HD LCD Touch Screen Replacement: шаг 15, изображение 1 из 2 Kenwood DNX571HD LCD Touch Screen Replacement: шаг 15, изображение 2 из 2
    • Gently press the front of the screen to detach it from the plastic housing.

    • When removing the screen, gently flex out the plastic housing to help get the display past the plastic latch.

Заключение

To reassemble your device, follow these instructions in reverse order.

4 участников успешно повторили данное руководство.

Wendy Zaballos

Участник с: 09/17/18

952 Репутация

Автор 6 руководств

Команда

Washington State, Team S1-G1, Hope Fall 2018 Участник Washington State, Team S1-G1, Hope Fall 2018

WSU-HOPE-F18S1G1

4 членов

Автор 6 руководств

0 Комментариев

Добавить комментарий

Просмотр статистики:

За последние 24часов: 3

За последние 7 дней: 18

За последние 30 дней: 72

За всё время: 9,210