Перейти к основному содержанию

Kenwood KDC-BT362U DVD-Drive Replacement

Выберете то, что вам нужно

  1. Kenwood KDC-BT362U DVD-Drive Replacement, Front Panel: шаг 1, изображение 1 из 1
    • Locate the face-plate eject button.

  2. Kenwood KDC-BT362U DVD-Drive Replacement: шаг 2, изображение 1 из 2 Kenwood KDC-BT362U DVD-Drive Replacement: шаг 2, изображение 2 из 2
    • Press the eject button with your forefinger.

    • Remove the face-plate.

  3. Kenwood KDC-BT362U DVD-Drive Replacement: шаг 3, изображение 1 из 2 Kenwood KDC-BT362U DVD-Drive Replacement: шаг 3, изображение 2 из 2
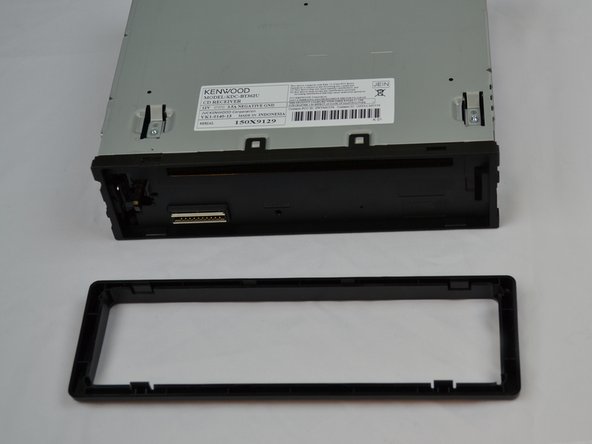
    • Starting on the top side, pop the front panel frame out.

    • Remove the face-plate frame.

  4. Kenwood KDC-BT362U DVD-Drive Replacement: шаг 4, изображение 1 из 2 Kenwood KDC-BT362U DVD-Drive Replacement: шаг 4, изображение 2 из 2
    • Use the plastic opening tool to pry open the tabs.

    • Repeat on the opposite side.

  5. Kenwood KDC-BT362U DVD-Drive Replacement: шаг 5, изображение 1 из 1
    • Remove the front panel.

  6. Kenwood KDC-BT362U DVD-Drive Replacement, Metal Case: шаг 6, изображение 1 из 3 Kenwood KDC-BT362U DVD-Drive Replacement, Metal Case: шаг 6, изображение 2 из 3 Kenwood KDC-BT362U DVD-Drive Replacement, Metal Case: шаг 6, изображение 3 из 3
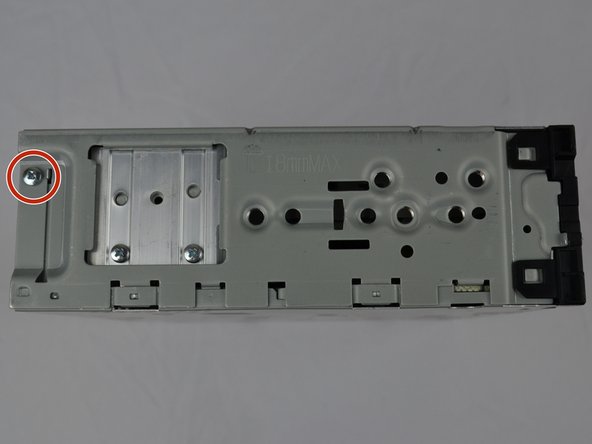
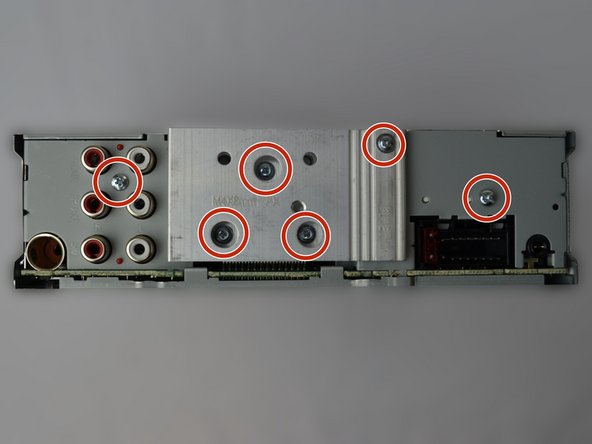
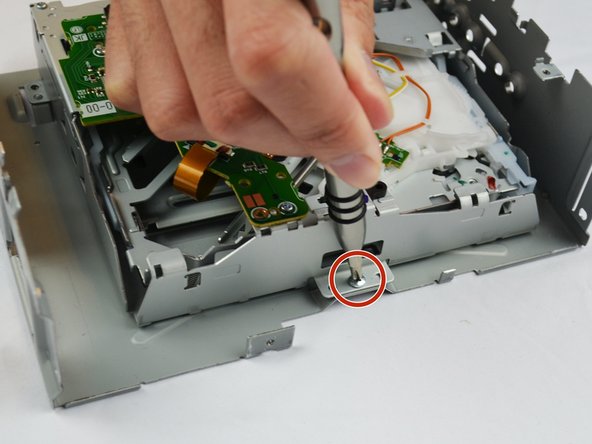
    • Use the Phillips #0 Screwdriver to remove the screws off of the metal case.

  7. Kenwood KDC-BT362U DVD-Drive Replacement: шаг 7, изображение 1 из 3 Kenwood KDC-BT362U DVD-Drive Replacement: шаг 7, изображение 2 из 3 Kenwood KDC-BT362U DVD-Drive Replacement: шаг 7, изображение 3 из 3
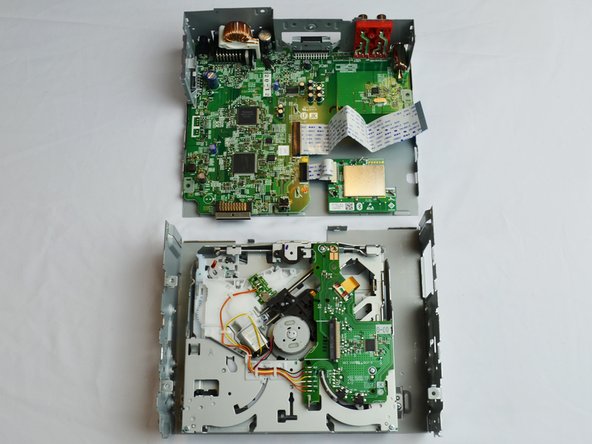
    • Carefully separate the top and bottom halves of the metal case apart.

    • Do not separate the metal case halves completely.

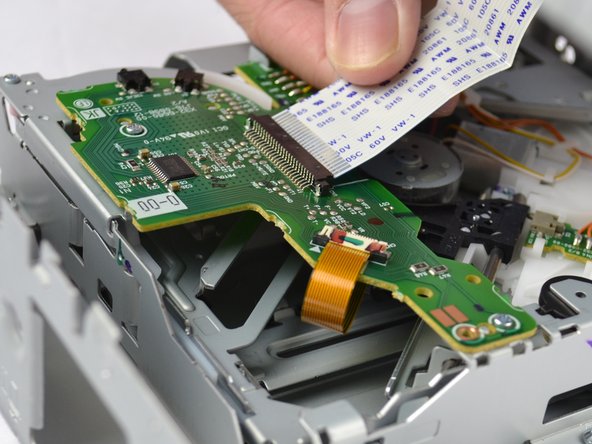
    • Carefully pull the DVD-Drive ribbon cable from the motherboard.

  8. Kenwood KDC-BT362U DVD-Drive Replacement, DVD-Drive: шаг 8, изображение 1 из 2 Kenwood KDC-BT362U DVD-Drive Replacement, DVD-Drive: шаг 8, изображение 2 из 2
    • Use the Phillips #0 Screwdriver to remove the three screws.

  9. Kenwood KDC-BT362U DVD-Drive Replacement: шаг 9, изображение 1 из 1
    • Lift the DVD-Drive to separate it from the metal case.

Заключение

To reassemble your device, follow these instructions in reverse order.

Steven Chov

Участник с: 10/04/16

349 Репутация

Автор 3 руководств

Команда

USF Tampa, Team 2-5, Cagle Fall 2016 Участник USF Tampa, Team 2-5, Cagle Fall 2016

USFT-CAGLE-F16S2G5

4 членов

Автор 5 руководств

0 Комментариев

Добавить комментарий

Просмотр статистики:

За последние 24часов: 0

За последние 7 дней: 0

За последние 30 дней: 2

За всё время: 470