Перейти к основному содержанию

Kia Rio Inner Car Door Handle Replacement

Выберете то, что вам нужно

  1. Kia Rio Inner Car Door Handle Replacement, Inner Car Door Handle: шаг 1, изображение 1 из 2 Kia Rio Inner Car Door Handle Replacement, Inner Car Door Handle: шаг 1, изображение 2 из 2
    • Find all the caps hiding the screws and remove them.

    • These are typically found in the door handle, the side of the door near the top, and in the middle of the door panel.

  2. Kia Rio Inner Car Door Handle Replacement: шаг 2, изображение 1 из 3 Kia Rio Inner Car Door Handle Replacement: шаг 2, изображение 2 из 3 Kia Rio Inner Car Door Handle Replacement: шаг 2, изображение 3 из 3
    • Remove all screws holding the door panel in place.

    • These are typically found in the middle of the door panel, on the side of the door and on the bottom right side of the door panel.

  3. Kia Rio Inner Car Door Handle Replacement: шаг 3, изображение 1 из 2 Kia Rio Inner Car Door Handle Replacement: шаг 3, изображение 2 из 2
    • Remove the screw on the door handle.

    • Remove the handle's cover.

  4. Kia Rio Inner Car Door Handle Replacement: шаг 4, изображение 1 из 1
    • Remove the screw holding the door handle to the door frame.

  5. Kia Rio Inner Car Door Handle Replacement: шаг 5, изображение 1 из 3 Kia Rio Inner Car Door Handle Replacement: шаг 5, изображение 2 из 3 Kia Rio Inner Car Door Handle Replacement: шаг 5, изображение 3 из 3
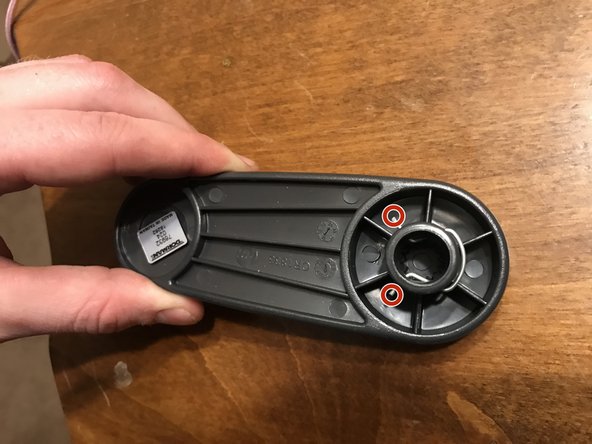
    • Remove window crank handle using the handle removal tool using the orientations seen in the first and second pictures.

    • The handle removal tool works by removing the clip seen in the third picture.

  6. Kia Rio Inner Car Door Handle Replacement: шаг 6, изображение 1 из 2 Kia Rio Inner Car Door Handle Replacement: шаг 6, изображение 2 из 2
    • Remove the door panel by pushing upwards.

    • Although not very difficult to take off, use proper squatting form to ensure you don't hurt yourself.

  7. Kia Rio Inner Car Door Handle Replacement: шаг 7, изображение 1 из 2 Kia Rio Inner Car Door Handle Replacement: шаг 7, изображение 2 из 2
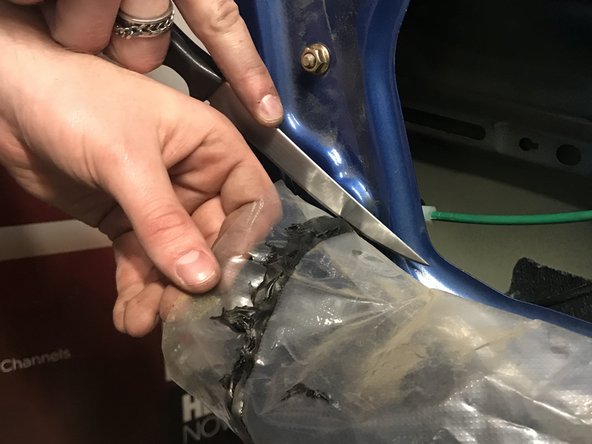
    • Use a sharp knife to cut the strip calk connecting the top half of the moisture shield.

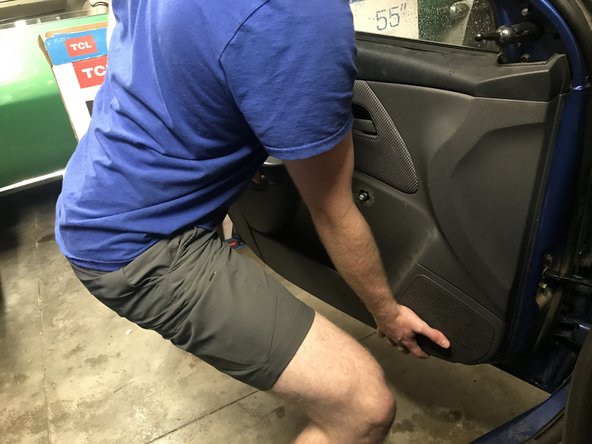
    • Pull the moisture shield half way down.

    • Don't tear the moisture shield cover.

    • The strip calk will still work as an adhesive once taken off so you can stick the moisture shield back onto the door frame.

  8. Kia Rio Inner Car Door Handle Replacement: шаг 8, изображение 1 из 2 Kia Rio Inner Car Door Handle Replacement: шаг 8, изображение 2 из 2
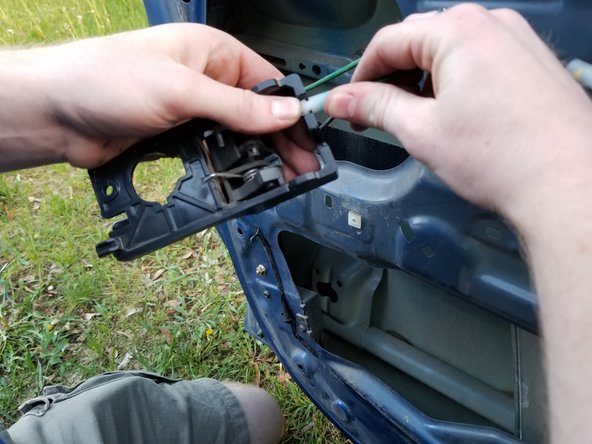
    • Remove the door handle from the door frame.

    • Remove the wires from the door handle.

    • Put on your replacement door handle.

Заключение

To reassemble your device, follow these instructions in reverse order.

2 участников успешно повторили данное руководство.

David Hicks

Участник с: 04/10/19

211 Репутация

1 руководство автора

Команда

Eastern Washington University, Team S25-G1, Crane Spring 2019 Участник Eastern Washington University, Team S25-G1, Crane Spring 2019

EWU-CRANE-S19S25G1

4 членов

Автор 3 руководств

0 Комментариев

Добавить комментарий

Просмотр статистики:

За последние 24часов: 0

За последние 7 дней: 4

За последние 30 дней: 30

За всё время: 3,847