Перейти к основному содержанию

Kindle 3 Keyboard Replacement

Архивированное руководство
Это руководство сохранено для исторических целей. Используйте его обновлённую версию, чтобы выполнить ремонт.

Выберете то, что вам нужно

  1. Kindle 3 Keyboard Replacement, Keyboard: шаг 1, изображение 1 из 1
    • Insert a plastic opening tool into the seam between the back and front of the Kindle 3 (as indicated in the photograph).

    • If you have difficulty inserting the plastic opening tool, run the flat edge of the instrument along the seam to find a gap.

    • Using the plastic opening tool, lift the back cover of the device.

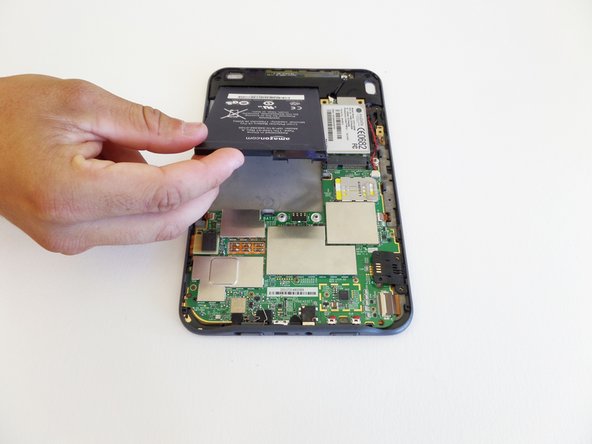
    • Remove the back cover.

  2. Kindle 3 Keyboard Replacement: шаг 2, изображение 1 из 3 Kindle 3 Keyboard Replacement: шаг 2, изображение 2 из 3 Kindle 3 Keyboard Replacement: шаг 2, изображение 3 из 3
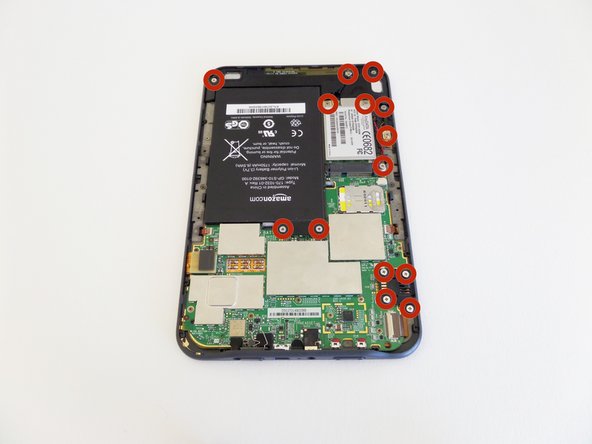
    • Using a Phillips #00 screwdriver, remove the 14 silver screws (4mm) that secure the components within the housing.

  3. Kindle 3 Keyboard Replacement: шаг 3, изображение 1 из 1
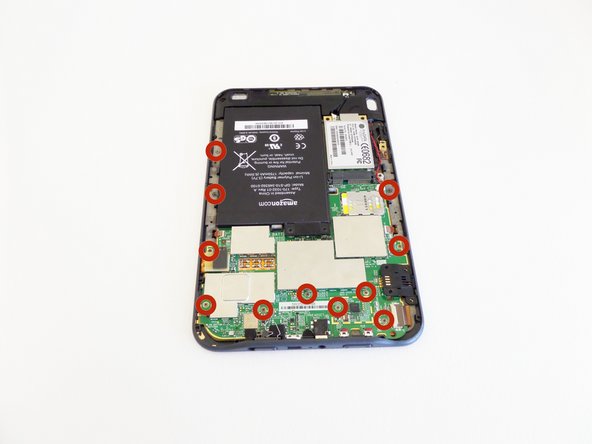
    • Using the screwdriver, remove the 11 gray screws (4mm) that secure the motherboard to the housing.

  4. Kindle 3 Keyboard Replacement: шаг 4, изображение 1 из 1
    • Remove the battery, starting from the side that was secured by the screws.

  5. Kindle 3 Keyboard Replacement: шаг 5, изображение 1 из 3 Kindle 3 Keyboard Replacement: шаг 5, изображение 2 из 3 Kindle 3 Keyboard Replacement: шаг 5, изображение 3 из 3
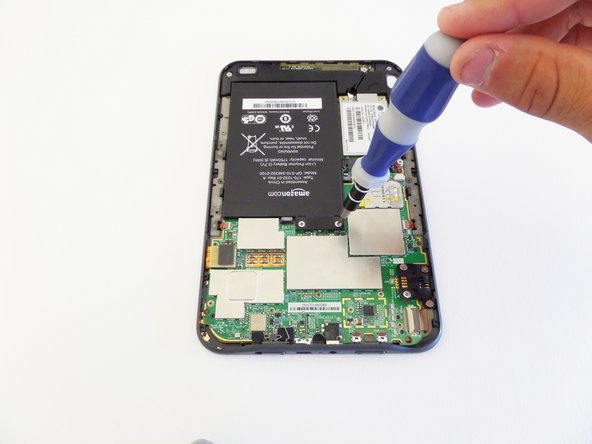
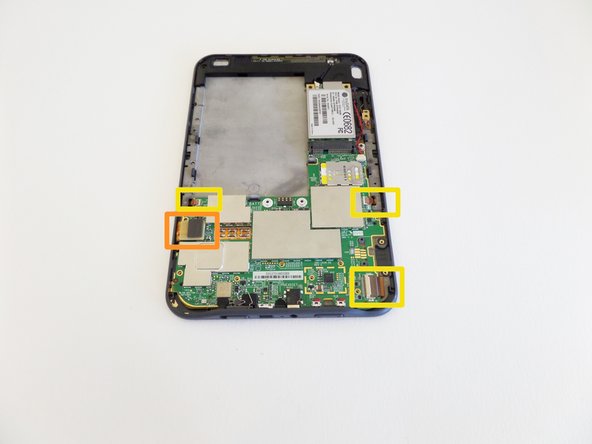
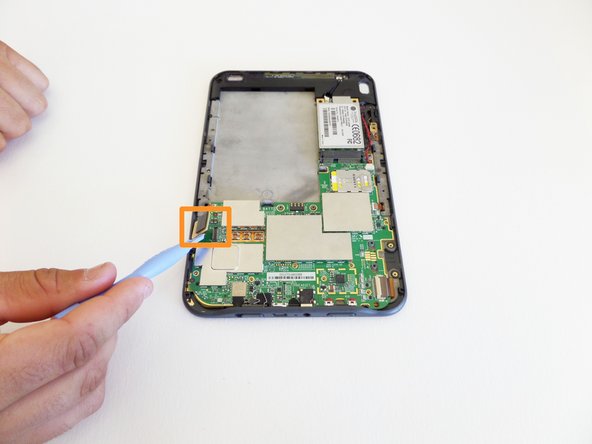
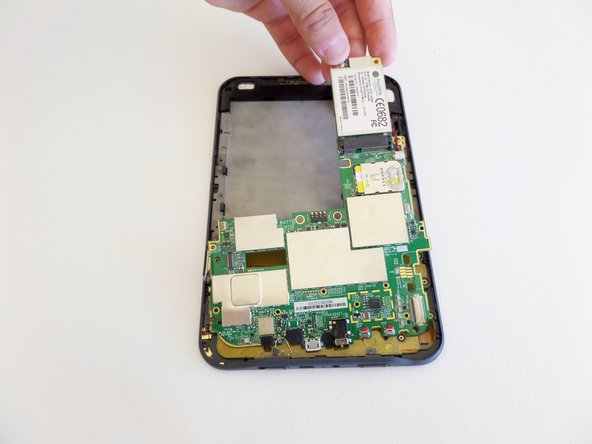
    • Using the plastic opening tool, carefully lift the ribbon cable to disconnect it from the motherboard.

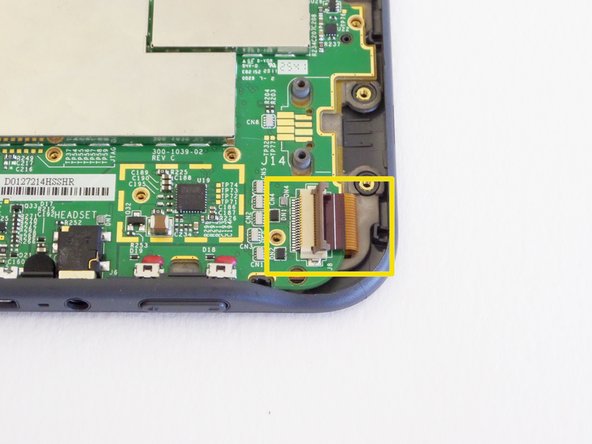
    • Latches secure the three remaining ribbon cables to the motherboard.

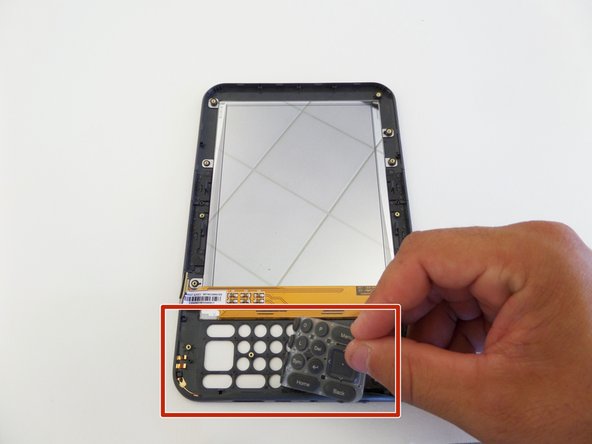
    • To disconnect the latched ribbon cable, open the latch and gently slide out the cable.

    • The rightmost photograph shows the ribbon cable with an open latch.

  6. Kindle 3 Keyboard Replacement, Remove the 3G card: шаг 6, изображение 1 из 1
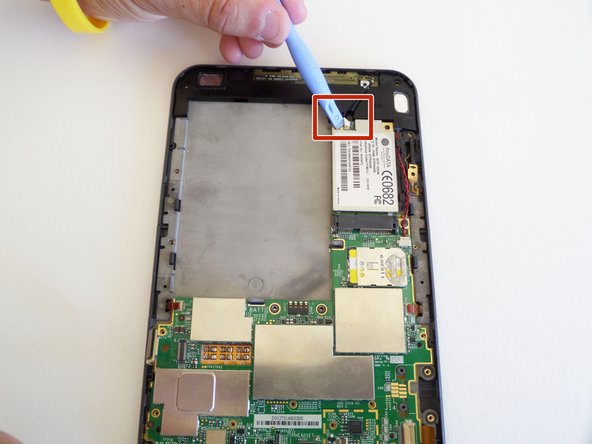
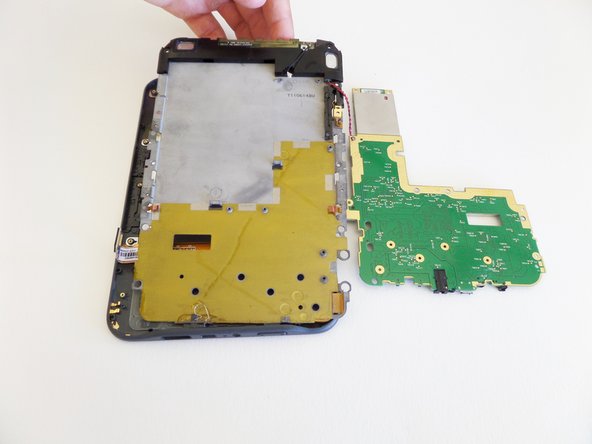
    • Insert the plastic opening tool underneath the silver-headed black cable and gently disconnect the cable from the motherboard.

  7. Kindle 3 Keyboard Replacement: шаг 7, изображение 1 из 2 Kindle 3 Keyboard Replacement: шаг 7, изображение 2 из 2
    • The motherboard is connected to the device by a red-and-black twisted pair cable. Do not detach the cable.

    • There are 3 spacers. Two of them are where the two screws attaching the battery were. The third is to the bottom right of the silver motherboard unit. Take care not to lose these spacers when moving the motherboard.

    • With the cable still attached, flip over the motherboard.

    • The silver motherboard unit with a serial number may fall out. If this occurs, slide the unit back into place.

  8. Kindle 3 Keyboard Replacement: шаг 8, изображение 1 из 1
    • Remove the gray and gold plates from the housing.

  9. Kindle 3 Keyboard Replacement: шаг 9, изображение 1 из 1
    • Replace the damaged keyboard.

    • When reassembling the Kindle 3, test the power switch to make sure it moves freely.

    • When reassembling the device, do not mix up the gray and silver screw slots.

Заключение

To reassemble your device, follow these instructions in reverse order.

James Gauger

Участник с: 09/08/14

554 Репутация

Автор 2 руководств

Команда

CSU Fullerton, Team 1-5, Bruce Fall 2014 Участник CSU Fullerton, Team 1-5, Bruce Fall 2014

CSUF-BRUCE-F14S1G5

4 членов

Автор 7 руководств

0 Комментариев

Добавить комментарий

Просмотр статистики:

За последние 24часов: 0

За последние 7 дней: 3

За последние 30 дней: 6

За всё время: 28