Введение
Use this guide to replace the metal midframe on the interior of the Kindle Fire HD 8.9". Removing this metal casing is a prerequisite for replacing most of the Kindle Fire HD's internal components.
Выберете то, что вам нужно
-
-
Insert a large plastic opening tool next to the Kindle's headphone jack.
-
Move the plastic opening tool evenly around the Kindle, separating the two halves.
-
-
-
Set the Kindle down on the rear case.
-
Holding the display assembly near the camera, carefully open the display assembly up to about 90 degrees from the rear case.
-
-
-
-
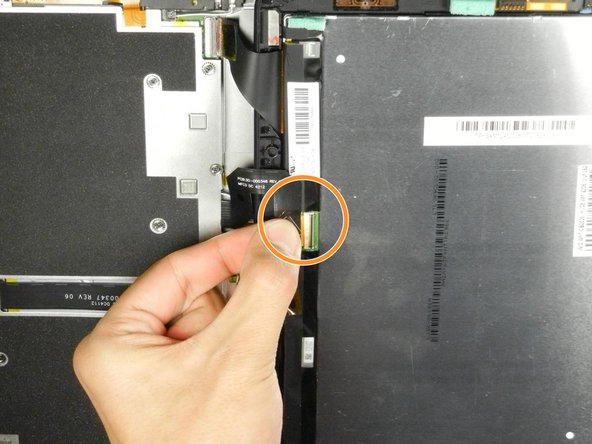
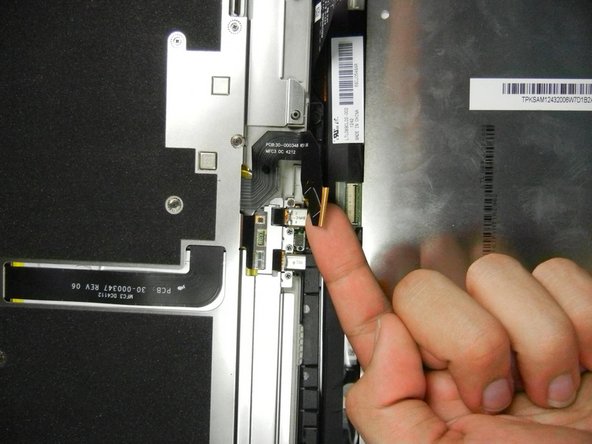
Lift the retaining flap on the ZIF connector of the upper flex cable.
-
Gently pull the cable out of its socket.
This is very delicate. The flap is very easy to break off. Remove the yellow tape on both these connectors and replace with ordinary plastic tape upon reassembly. If you don't tape them you'll pull them apart working on the other. A helper to hold the assy is a good idea.
-
-
-
Remove the following sixteen screws from the metal midframe on the rear of the device:
-
Four 3 mm Phillips screw (located in each corner of the device - noted in red in the diagram)
-
Four 3 mm Phillips screws (surrounding the ports - noted in orange in the diagram)
-
Eight 3 mm Phillips screws (located around the body of the midframe - noted in yellow in the diagram)
-


To reassemble your device, follow these instructions in reverse order.
To reassemble your device, follow these instructions in reverse order.
Отменить: Я не выполнил это руководство.
Еще один человек закончил это руководство.
Команда

Cal Poly, Team 5-16, Forte Winter 2013 Участник Cal Poly, Team 5-16, Forte Winter 2013
CPSU-FORTE-W13S5G16
5 членов
Автор 14 руководств
2 Комментариев
I suggest not removing the cables (steps 3,4 and 5) because it seems impossible to reconnect them.
Those are ZIF connectors—flip up the locking tab to release the cable, and you can remove/reinsert it freely.
Getting the SIM card dummy plug out a real challenge. Broke off one end. Seems this part was never intended to be removed.
Bob Steger - Ответить