Введение
Your device power could be malfunctioning because of a faulty speed control plate. Learn how to access it with this guide.
Выберете то, что вам нужно
-
-
Using a Phillips #2 screwdriver, remove the 10mm screw on the back cover by rotating it counterclockwise.
-
The back cover is now free. Remove it by pulling back and up on the cover.
-
-
-
Using a Phillips #2 screwdriver, remove the 5mm screws holding the trimband to the top housing by rotating them counterclockwise.
-
Pull the trimband off the housing by grabbing each side and pulling it off the front.
-
-
-
-
Using a Phillips #2 screwdriver, remove the 12mm screw by holding the grounding wire in place and rotating it counterclockwise.
-
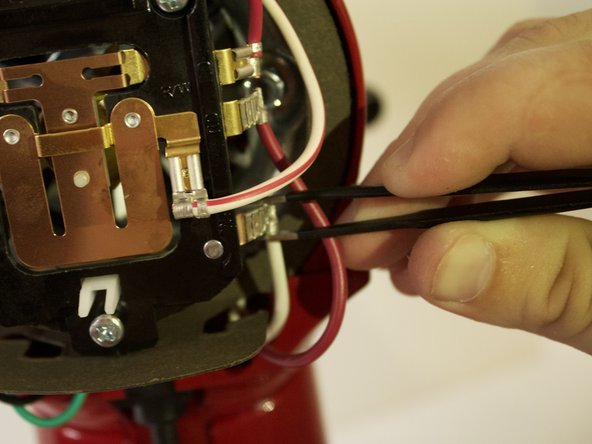
Using pliers or tweezers, remove the connectors attached to the speed control plate.
-
-
-
Remove the seal from the back of the mixer. Then unhook the spring from the bottom of the speed control plate by using tweezers and pulling it back and out of the plate.
-
Take a rag or towel and hook the spring on the towel so that the hook doesn’t spring back inside the mixer.
-
-
-
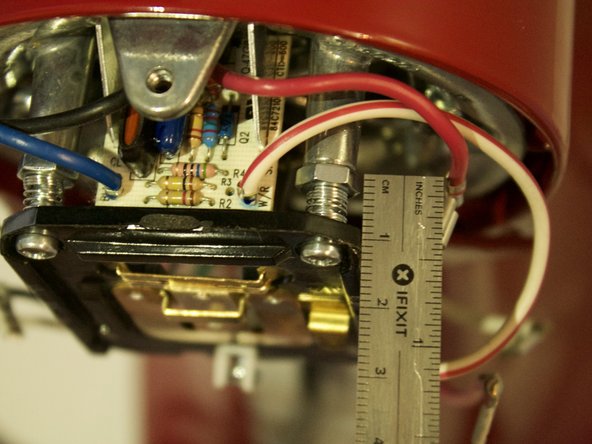
Using a Phillips #2 screwdriver, remove the two adjustment screws by rotating them counterclockwise.
What is the default measurement for the screws? I didn’t know I had to do this and already messed around with the screws.
Problem was that lever would not stay in off position without finger pressure and motor would run as soon as plugged in. In shifting the lever,I noticed a slight variation in the grey fork gizmo that protrudes above the bottom screw. That screw protruded 9/32”. I tightened it to 6/32’ and lever turns off the motor.
-
To reassemble your device, follow these instructions in reverse order.
To reassemble your device, follow these instructions in reverse order.
Отменить: Я не выполнил это руководство.
7 участников успешно повторили данное руководство.
Один комментарий
Thanks for this, but a quick question, when the mixer is switched off, the metal bar on the back of the speed plate at the bottom, is that supposed to rest on the two prongs that stick out towards the bottom of the inside of the mixer? Thanks.


