Перейти к основному содержанию

Kodak EasyShare Z740 LCD Screen Replacement

Выберете то, что вам нужно

  1. Kodak EasyShare Z740 LCD Screen Replacement, Battery: шаг 1, изображение 1 из 3 Kodak EasyShare Z740 LCD Screen Replacement, Battery: шаг 1, изображение 2 из 3 Kodak EasyShare Z740 LCD Screen Replacement, Battery: шаг 1, изображение 3 из 3
    • Slide the door on the bottom of the camera in the direction of the open symbol with your finger.

    • Release and the door will pop open.

  2. Kodak EasyShare Z740 LCD Screen Replacement: шаг 2, изображение 1 из 2 Kodak EasyShare Z740 LCD Screen Replacement: шаг 2, изображение 2 из 2
    • Slide the battery out.

  3. Kodak EasyShare Z740 LCD Screen Replacement, Lens Cover: шаг 3, изображение 1 из 2 Kodak EasyShare Z740 LCD Screen Replacement, Lens Cover: шаг 3, изображение 2 из 2
    • Remove lens cover from the camera by squeezing the protruding button on each side of the cover and pulling.

  4. Kodak EasyShare Z740 LCD Screen Replacement: шаг 4, изображение 1 из 3 Kodak EasyShare Z740 LCD Screen Replacement: шаг 4, изображение 2 из 3 Kodak EasyShare Z740 LCD Screen Replacement: шаг 4, изображение 3 из 3
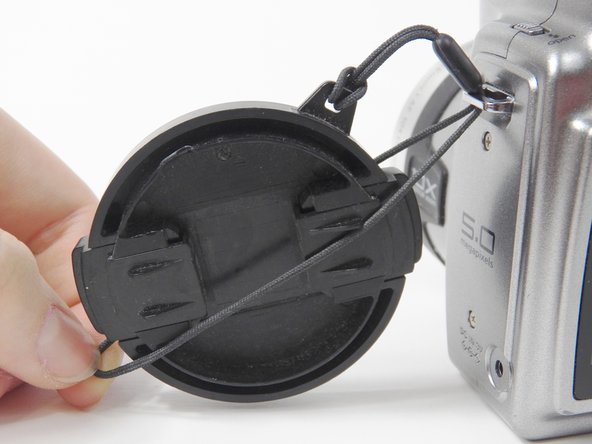
    • Pull the lens cover string toward the ground so that the loop underneath the metal slab is on top of the cover string.

    • Push up so that the string starts to come out of the top of the loop.

    • Grab the string from above the loop and pull.

  5. Kodak EasyShare Z740 LCD Screen Replacement: шаг 5, изображение 1 из 2 Kodak EasyShare Z740 LCD Screen Replacement: шаг 5, изображение 2 из 2
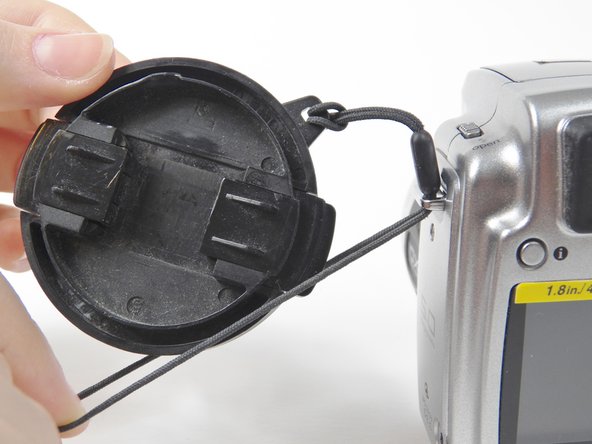
    • Feed the string on top into the metal slab while pulling the loop toward you until the plastic piece stops you from pulling any further.

  6. Kodak EasyShare Z740 LCD Screen Replacement: шаг 6, изображение 1 из 3 Kodak EasyShare Z740 LCD Screen Replacement: шаг 6, изображение 2 из 3 Kodak EasyShare Z740 LCD Screen Replacement: шаг 6, изображение 3 из 3
    • Separate the two pieces of the loop and pull the lens cover up in between them.

  7. Kodak EasyShare Z740 LCD Screen Replacement: шаг 7, изображение 1 из 3 Kodak EasyShare Z740 LCD Screen Replacement: шаг 7, изображение 2 из 3 Kodak EasyShare Z740 LCD Screen Replacement: шаг 7, изображение 3 из 3
    • Pull the lens cover and the sting will come out of the metal slab.

  8. Kodak EasyShare Z740 LCD Screen Replacement, Back Cover: шаг 8, изображение 1 из 3 Kodak EasyShare Z740 LCD Screen Replacement, Back Cover: шаг 8, изображение 2 из 3 Kodak EasyShare Z740 LCD Screen Replacement, Back Cover: шаг 8, изображение 3 из 3
    • Place lens cover back on the lens to prevent scratches or debris but leave string detached.

    • Remove a total of six 3.968mm Phillips #00 screws. Two each from the left side, bottom, and right side.

  9. Kodak EasyShare Z740 LCD Screen Replacement: шаг 9, изображение 1 из 3 Kodak EasyShare Z740 LCD Screen Replacement: шаг 9, изображение 2 из 3 Kodak EasyShare Z740 LCD Screen Replacement: шаг 9, изображение 3 из 3
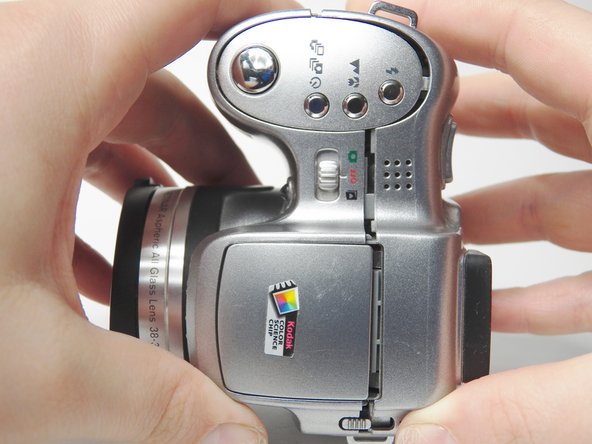
    • Pull the back cover away from the front cover.

    • You may need to use a plastic opening tool as a wedge if it does not come apart by easily.

  10. Kodak EasyShare Z740 LCD Screen Replacement: шаг 10, изображение 1 из 1
    • Separate the back cover from the front cover.

  11. Kodak EasyShare Z740 LCD Screen Replacement, LCD Screen: шаг 11, изображение 1 из 3 Kodak EasyShare Z740 LCD Screen Replacement, LCD Screen: шаг 11, изображение 2 из 3 Kodak EasyShare Z740 LCD Screen Replacement, LCD Screen: шаг 11, изображение 3 из 3
    • Flip the LCD screen down.

  12. Kodak EasyShare Z740 LCD Screen Replacement: шаг 12, изображение 1 из 3 Kodak EasyShare Z740 LCD Screen Replacement: шаг 12, изображение 2 из 3 Kodak EasyShare Z740 LCD Screen Replacement: шаг 12, изображение 3 из 3
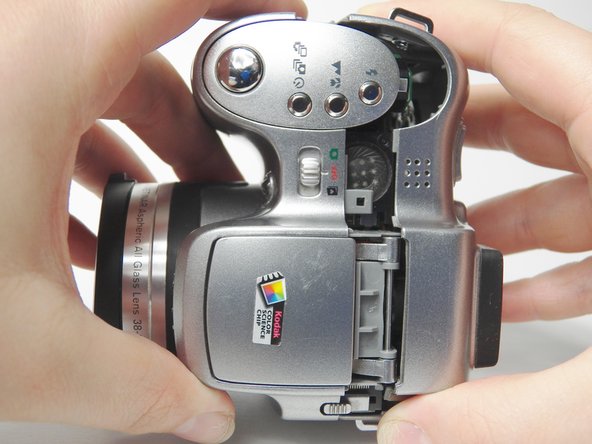
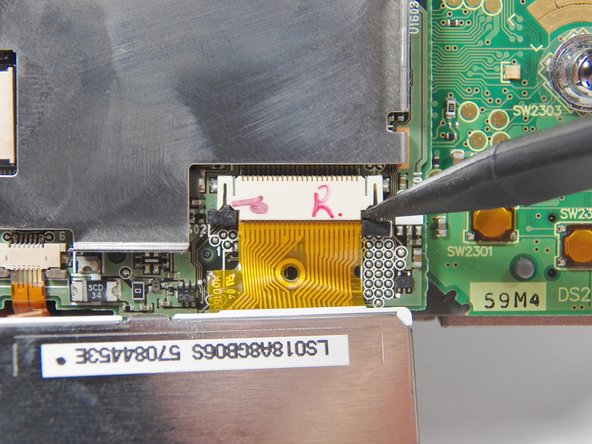
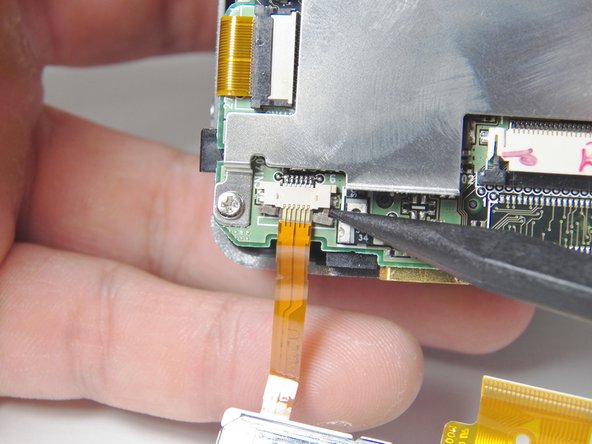
    • Locate the two sets of black tabs connecting the flat orange cables to the motherboard.

    • Slide the 2 sets of tabs down with a tool or your finger to release the cables.

  13. Kodak EasyShare Z740 LCD Screen Replacement: шаг 13, изображение 1 из 2 Kodak EasyShare Z740 LCD Screen Replacement: шаг 13, изображение 2 из 2
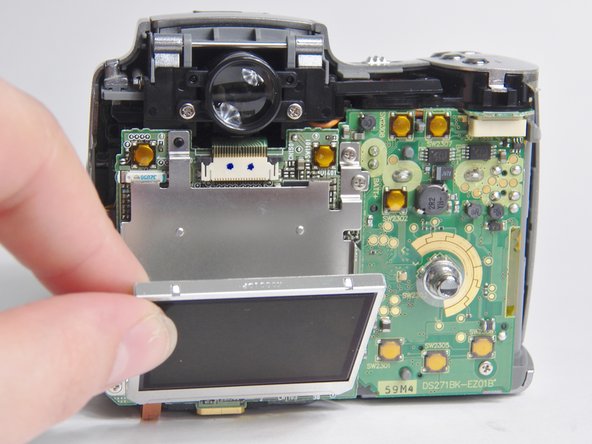
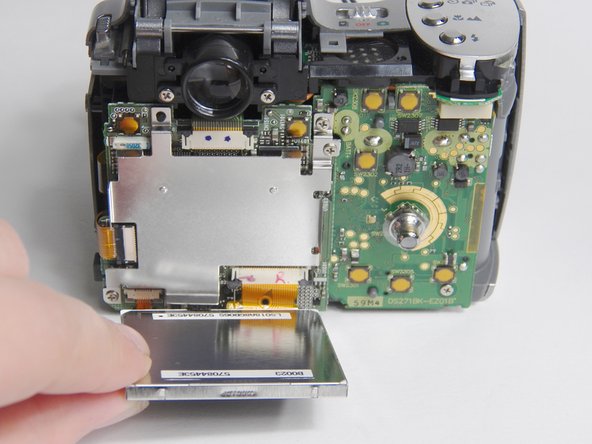
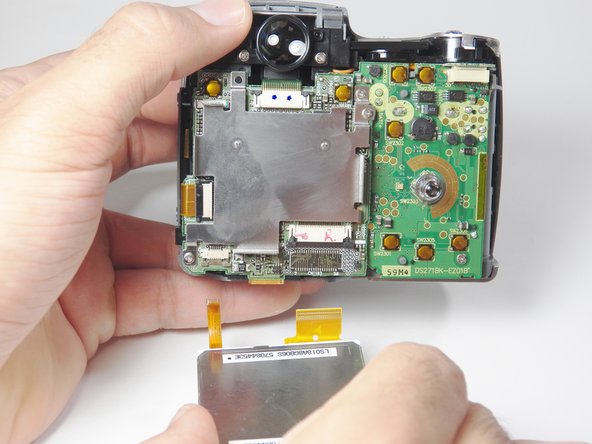
    • Gently pull the LCD screen down until the orange cables separate from the motherboard.

Заключение

To reassemble your device, follow these instructions in reverse order.

2 участников успешно повторили данное руководство.

Kirsten Price

Участник с: 09/17/14

406 Репутация

Автор 6 руководств

Команда

University of Kentucky Louisville, Team 1-4, Mathis Fall 2014 Участник University of Kentucky Louisville, Team 1-4, Mathis Fall 2014

LOUISVILLE-MATHIS-F14S1G4

4 членов

Автор 11 руководств

0 Комментариев

Добавить комментарий

Просмотр статистики:

За последние 24часов: 0

За последние 7 дней: 3

За последние 30 дней: 11

За всё время: 872