Перейти к основному содержанию

Kodak Easyshare Z981 LCD Screen Replacement

Выберете то, что вам нужно

  1. Kodak Easyshare Z981 LCD Screen Replacement, LCD Screen: шаг 1, изображение 1 из 2 Kodak Easyshare Z981 LCD Screen Replacement, LCD Screen: шаг 1, изображение 2 из 2
    • Open the battery cover and remove batteries from the camera if any are inserted.

  2. Kodak Easyshare Z981 LCD Screen Replacement: шаг 2, изображение 1 из 2 Kodak Easyshare Z981 LCD Screen Replacement: шаг 2, изображение 2 из 2
    Инструмент, используемый на этом этапе:
    Phillips #00 Screwdriver
    $5.49
    Купить
    • Use a 00 Phillips-Head screwdriver to remove screws:

    • Remove the 3 mm screws from the camera

    • Four (4) screws are in the bottom of the device

    • Four (4) screws are inside the battery cover

  3. Kodak Easyshare Z981 LCD Screen Replacement: шаг 3, изображение 1 из 1
    • Start from a corner and gently remove the cover.

    • The cover will easily lift off, so not much pressure is required.

    • Make sure to gently remove the bottom cover in order to avoid breaking the plastic.

  4. Kodak Easyshare Z981 LCD Screen Replacement: шаг 4, изображение 1 из 2 Kodak Easyshare Z981 LCD Screen Replacement: шаг 4, изображение 2 из 2
    Инструмент, используемый на этом этапе:
    Phillips #00 Screwdriver
    $5.49
    Купить
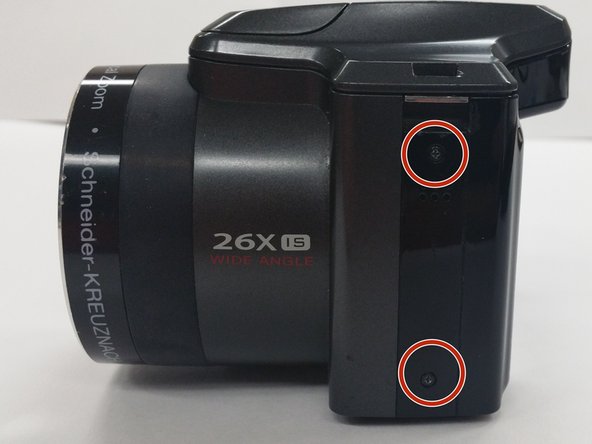
    • Use a Phillips #00 Screwdriver to remove the 4 mm screws from each side of the back cover of the camera.

    • Two (2) screws are located in the left side of the device

    • Two (2) screws are locatecd in the right side of the device

  5. Kodak Easyshare Z981 LCD Screen Replacement: шаг 5, изображение 1 из 2 Kodak Easyshare Z981 LCD Screen Replacement: шаг 5, изображение 2 из 2
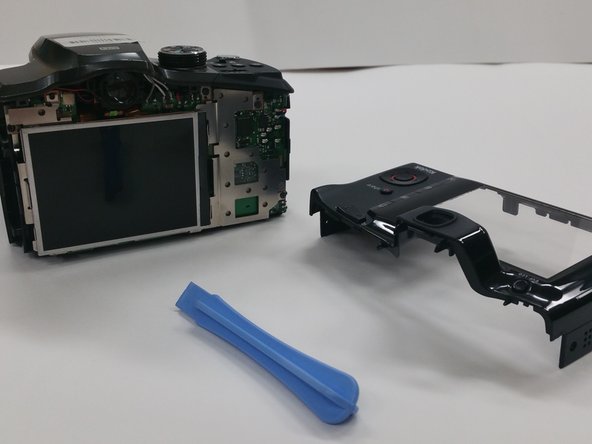
    • Insert the Plastic Opening Tool in to the crevices of back cover and gently apply pressure

    • Be gentle while removing the cover, to avoid cracking the case

  6. Kodak Easyshare Z981 LCD Screen Replacement: шаг 6, изображение 1 из 2 Kodak Easyshare Z981 LCD Screen Replacement: шаг 6, изображение 2 из 2
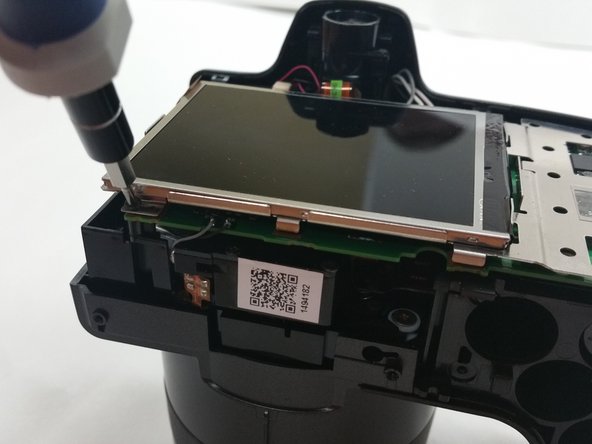
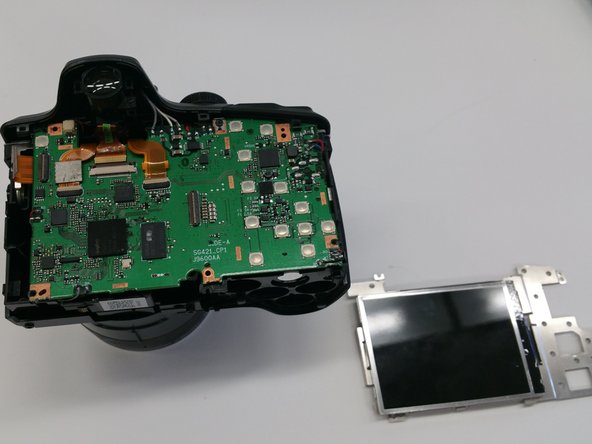
    • Once the back cover is removed locate the four 3mm screws holding the screen and the metal brace to the circuit board

  7. Kodak Easyshare Z981 LCD Screen Replacement: шаг 7, изображение 1 из 3 Kodak Easyshare Z981 LCD Screen Replacement: шаг 7, изображение 2 из 3 Kodak Easyshare Z981 LCD Screen Replacement: шаг 7, изображение 3 из 3
    Инструмент, используемый на этом этапе:
    Tweezers
    $4.99
    Купить
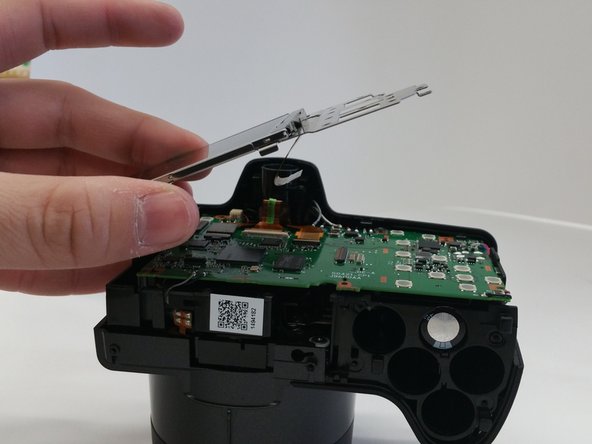
    • Gently lift up the metal brace and use a pair to disconnect the ribbon cable connecter

    • Use Tweezers to disconnect the ribbon cable connector.

    • Once disconnected remove the screen brace from the circuit board

    • Use extreme caution when removing the LCD brace pulling the brace may tear the cable

Заключение

To reassemble your device, follow these instructions in reverse order.

Еще один человек закончил это руководство.

Daniel Ramirez

Участник с: 03/03/15

152 Репутация

1 руководство автора

Команда

Sam Houston State, Team 13-6, Blackburne Winter 2015 Участник Sam Houston State, Team 13-6, Blackburne Winter 2015

SHSU-BLACKBURNE-W15S13G6

3 членов

Автор 10 руководств

0 Комментариев

Добавить комментарий

Просмотр статистики:

За последние 24часов: 0

За последние 7 дней: 0

За последние 30 дней: 8

За всё время: 581