Перейти к основному содержанию

Kyocera Hydro Vibe Volume Button Replacement

Выберете то, что вам нужно

  1. Kyocera Hydro Vibe Volume Button Replacement, Battery: шаг 1, изображение 1 из 1
    • Make sure that the device is turned off before beginning.

    • Look for a small indentation on the bottom of the phone.

    • Insert the plastic opening tool into the indentation and lift off the back casing.

  2. Kyocera Hydro Vibe Volume Button Replacement: шаг 2, изображение 1 из 3 Kyocera Hydro Vibe Volume Button Replacement: шаг 2, изображение 2 из 3 Kyocera Hydro Vibe Volume Button Replacement: шаг 2, изображение 3 из 3
    • The large white component is the battery. Look for a small indentation under the arrow that says "LIFT."

    • Place the plastic opening tool in the indentation and lift the battery out of the socket.

  3. Kyocera Hydro Vibe Volume Button Replacement, Trim: шаг 3, изображение 1 из 1
    • Locate the screws holding the trim which are the four side screws on each corner.

    • Remove each screw with a Phillips screw driver #J00. The screws are 5mm Phillips.

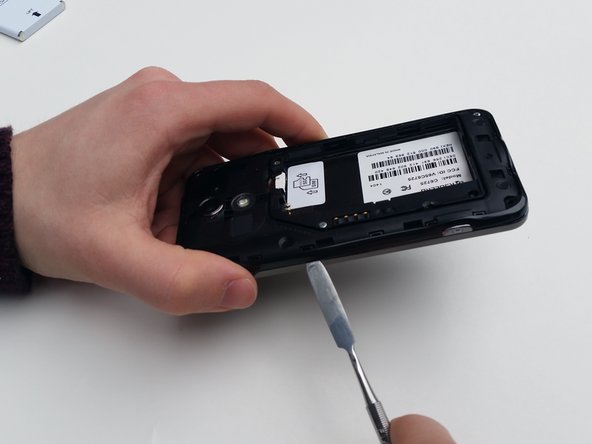
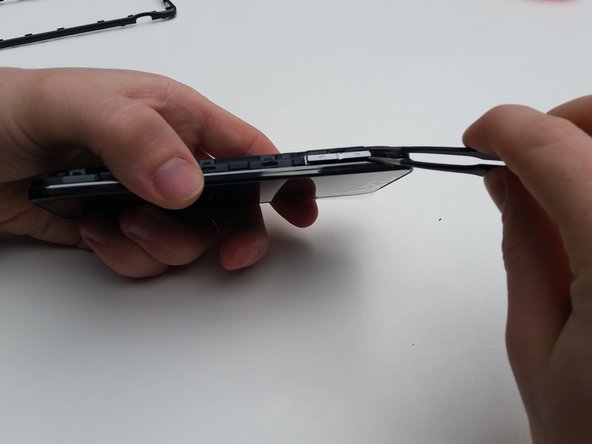
  4. Kyocera Hydro Vibe Volume Button Replacement: шаг 4, изображение 1 из 2 Kyocera Hydro Vibe Volume Button Replacement: шаг 4, изображение 2 из 2
    • Locate the clasps holding the trim in place.

    • You will need to insert the metal spudger through the bottom of the trim and slowly push upwards to release the clasps.

  5. Kyocera Hydro Vibe Volume Button Replacement: шаг 5, изображение 1 из 1
    • The trim is flimsy.

    • This is what the trim will look like once removed.

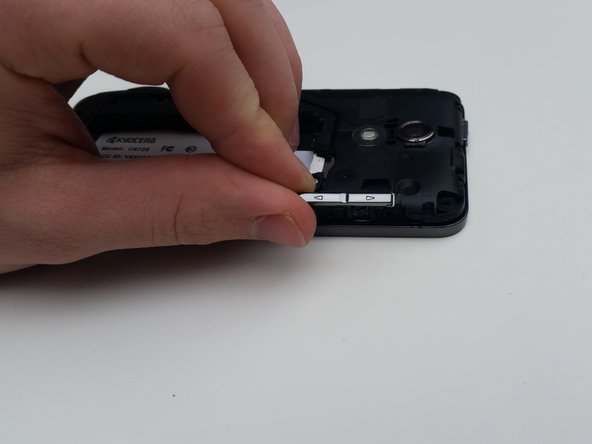
  6. Kyocera Hydro Vibe Volume Button Replacement, Volume Button: шаг 6, изображение 1 из 3 Kyocera Hydro Vibe Volume Button Replacement, Volume Button: шаг 6, изображение 2 из 3 Kyocera Hydro Vibe Volume Button Replacement, Volume Button: шаг 6, изображение 3 из 3
    • Once you have taken out the trim, the volume button will be easily removable.

    • Locate the volume button, if you are looking at the back of the phone (battery side) then it will be on the right side.

    • Take the tweezers and remove the button.

Заключение

To reassemble your device, follow these instructions in reverse order.

Еще один человек закончил это руководство.

Juliane Vo

Участник с: 01/31/16

255 Репутация

Автор 2 руководств

Команда

University of Kentucky Louisville, Team 1-5, Matravers Spring 2016 Участник University of Kentucky Louisville, Team 1-5, Matravers Spring 2016

LOUISVILLE-MATRAVERS-S16S1G5

3 членов

Автор 12 руководств

0 Комментариев

Добавить комментарий

Просмотр статистики:

За последние 24часов: 0

За последние 7 дней: 3

За последние 30 дней: 3

За всё время: 311