Перейти к основному содержанию

LG G4 Screen Assembly Replacement

Выберете то, что вам нужно

  1. LG G4 Screen Assembly Replacement, Back Cover: шаг 1, изображение 1 из 1
    • Make sure the phone is powered off.

    • Remove the rear cover by placing the plastic opening tool in the groove on the bottom left side of the LG G4 and gently prying up.

  2. LG G4 Screen Assembly Replacement: шаг 2, изображение 1 из 2 LG G4 Screen Assembly Replacement: шаг 2, изображение 2 из 2
    • Place the plastic opening tool at the bottom edge of the battery and lift up. Carefully remove battery with your hands.

  3. LG G4 Screen Assembly Replacement: шаг 3, изображение 1 из 3 LG G4 Screen Assembly Replacement: шаг 3, изображение 2 из 3 LG G4 Screen Assembly Replacement: шаг 3, изображение 3 из 3
    • Remove the eleven 3.9 mm Phillips #00 screws found at the back of the phone.

  4. LG G4 Screen Assembly Replacement: шаг 4, изображение 1 из 3 LG G4 Screen Assembly Replacement: шаг 4, изображение 2 из 3 LG G4 Screen Assembly Replacement: шаг 4, изображение 3 из 3
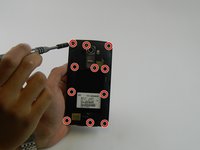
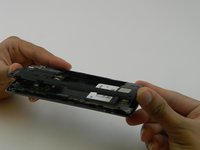
    • Once all the screws have been removed, place the plastic opening tool in the lower left corner and firmly lift the cover up.

    • Detach the cover with your fingers

  5. LG G4 Screen Assembly Replacement, Motherboard: шаг 5, изображение 1 из 2 LG G4 Screen Assembly Replacement, Motherboard: шаг 5, изображение 2 из 2
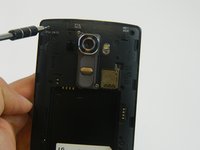
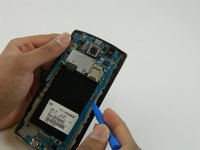
    • Remove the following four press-fit connectors with the flat edge of a plastic spudger or opening tool:

    • Front-facing camera connector.

    • Rear-facing camera connector.

    • Digitizer connector.

    • The rear-facing camera may be held down to the frame with two sided tape. Try to move the camera with the spudger prior to lifting the motherboard If it does not budge, use the same tool to pry it from the frame to avoid damaging the connector cable in the next step.

  6. LG G4 Screen Assembly Replacement: шаг 6, изображение 1 из 2 LG G4 Screen Assembly Replacement: шаг 6, изображение 2 из 2
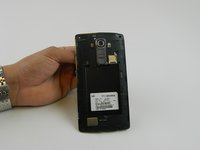
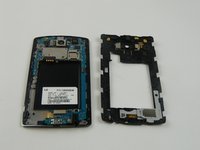
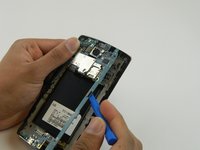
    • Remove the motherboard by lifting it up using the plastic opening tool and your fingers .

  7. LG G4 Screen Assembly Replacement, Screen Assembly: шаг 7, изображение 1 из 1
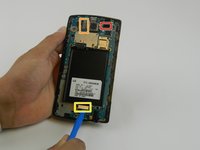
    • Use a heat gun or iOpener over the auxiliary port to soften the adhesive that secures it to the plastic housing.

  8. LG G4 Screen Assembly Replacement: шаг 8, изображение 1 из 2 LG G4 Screen Assembly Replacement: шаг 8, изображение 2 из 2
    Инструмент, используемый на этом этапе:
    Spudger
    $2.99
    Купить
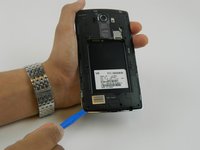
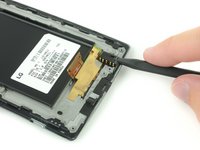
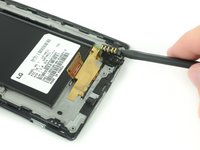
    • Insert a nylon spudger into the auxiliary port and gently pry upward to free the port.

  9. LG G4 Screen Assembly Replacement, Other components: шаг 9, изображение 1 из 1
    • You may also need to remove the vibration motor (the small circular component with two gold contacts), ear-speaker, and two rubber covers on either side of the ear-speaker to transfer these over to the new display assembly.

    • Use a spudger to carefully remove these components and then place them in the new display assembly..

Заключение

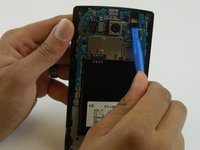
To reassemble your device, follow these instructions in reverse order.

2 участников успешно повторили данное руководство.

Sam Goldheart

Участник с: 10/18/12

465 744 Репутация

Автор 538 руководств

Команда

iFixit Участник iFixit

Staff

135 членов

Автор 16 767 руководств

0 Комментариев

Добавить комментарий

Просмотр статистики:

За последние 24часов: 0

За последние 7 дней: 5

За последние 30 дней: 9

За всё время: 1,320