Введение
This is guide will demonstrate how to remove the motherboard from a LG-K7. The motherboard has numerous of components connecting to it and user should be careful while removing these component so the main board doesn't get damage.
Выберете то, что вам нужно
-
-
Flip the LG K7 over so that the back of the phone is facing up.
-
Locate the small notch on the bottom left side of the phone.
-
-
-
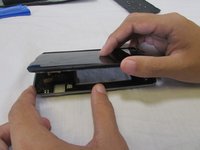
Insert a plastic opening tool into the notch and lift the back cover upward while holding the bottom portion of the phone down to remove it.
-
-
-
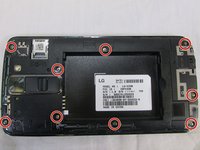
Located to nine 3.4 mm screws that keep that keep the phones rear housing in tacked.
-
Using a Phillips 00 screwdriver remove all nine 3.4 mm screws.
-
-
-
-
Turn the phone over so the screen is facing up.
-
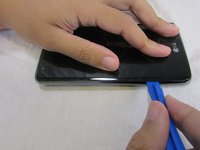
Insert your plastic opening tool between the midframe and front panel assembly on the side of the phone.
-
Slide the plastic opening tool down the seams carefully to separate the screen from the rest of the phone housing.
-
-
-
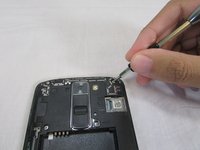
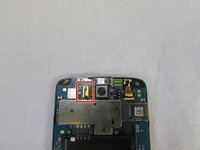
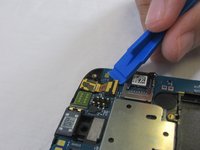
Locate the lock that holds the camera's ribbon cable in place.
-
Carefully remove the camera's ribbon cable from the motherboard using the plastic removal tool.
-
Holding the camera ribbon you just released pull upwards and the camera should release from the case.
-
-
-
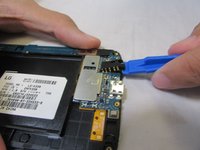
Locate the headphone jack towards the bottom right of the phone.
-
Place a plastic removal tool underneath the head phone jack.
-
Lift the plastic removal tool upward to remove the earphone jack from the phone case.
-
-
-
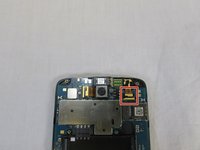
Locate the ribbon for the front facing camera.
-
Carefully remove the front facing camera's ribbon cable from the motherboard using the plastic removal tool.
-
Holding the front camera ribbon you just released pull upwards and the camera should release from the case.
-
Remove the band that connects the screen display to the motherboard.
-
-
-
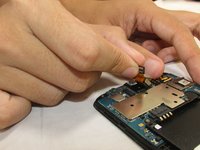
Locate the ribbon cable that connects the screen to the motherboard.
-
Carefully remove the screen's ribbon cable from the motherboard using the plastic removal tool by lifting the ribbon cable upwards.
-
-
-
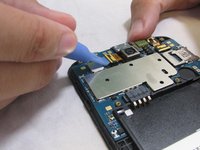
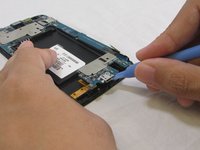
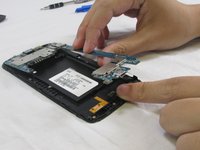
Wedge a plastic opening tool between the motherboard and the phones casing.
-
While using one finger to hold down a portion of the phone pull upwards with the plastic opening tool to loosen the motherboard from the phone casing.
-
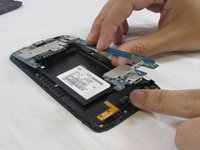
Once there is some space between the board and the phone case, using your hands carefully lift the motherboard from the phone casing.
-


To reassemble your device, follow these instructions in reverse order.
To reassemble your device, follow these instructions in reverse order.
Отменить: Я не выполнил это руководство.
7 человек успешно провели ремонт по этому руководству.
Команду

USF Tampa, Team S2-G5, Nance Fall 2017 Участник USF Tampa, Team S2-G5, Nance Fall 2017
USFT-NANCE-F17S2G5
3 членов
Автор 8 руководств