Введение
If your LG Stylo 2 Plus sounds muffled or is incapable if making sounds, it might be time to replace the speaker unit. Speaker replacement on this device is a simple task, but you need to remember to gentle; the back is made of plastic and can break.
Выберете то, что вам нужно
-
-
To remove the rear case of the phone, insert the spudger into the opening on the back of the case.
-
With the spudger parallel to the frame of the phone, slide it along the edge, forcing the casing to pop off.
-
-
-
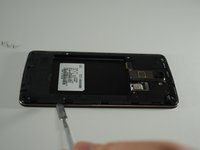
To remove the battery, insert your fingernail or the flat end of the spudger into the dimple at the bottom of the battery and lift upwards.
-
Firmly grasp the battery and remove from the phone.
-
-
-
-
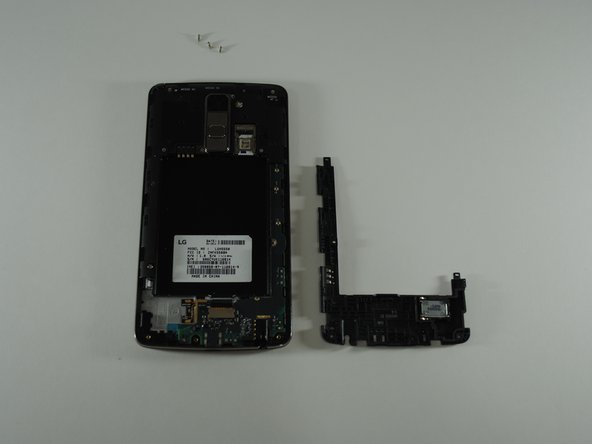
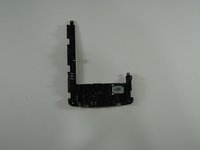
Remove the cover from the phone in order to access the speaker.
-
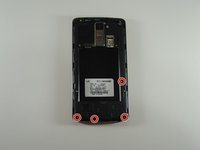
Using the JIS #000 screwdriver, remove the four 4mm screws around the base of the mid-frame.
-
-
-
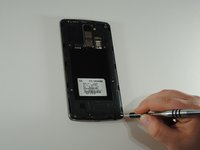
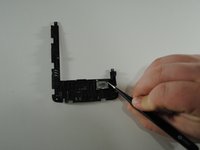
Insert the metal spudger in the dimple at the base of the mid-frame.
-
Pry upward, removing bottom section of the mid-frame from the phone.
-
-
Инструмент, используемый на этом этапе:Tweezers$4.99
-
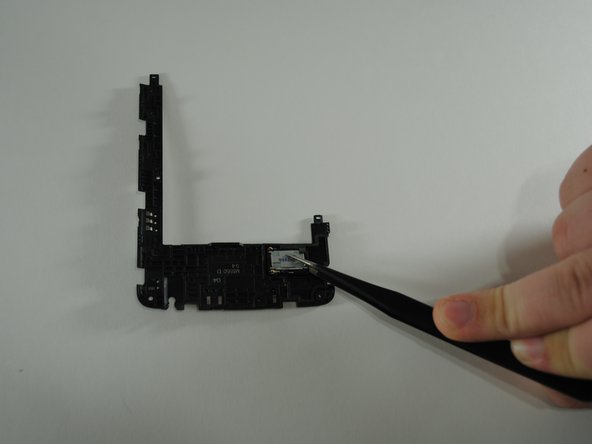
Flip the bottom piece of the mid-frame over to show the speaker in the bottom right corner.
-
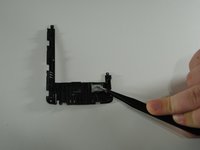
Using the tweezers, peel back the rubber resting on top of the speaker.
-
Still using the tweezers, grasp the speaker unit and remove it from the mid-frame.
-


To reassemble your device, follow these instructions in reverse order.
Отменить: Я не выполнил это руководство.
Еще один человек закончил это руководство.
Команда

UW Tacoma, Team S1-G3, Cardinal Spring 2019 Участник UW Tacoma, Team S1-G3, Cardinal Spring 2019
UWT-CARDINAL-S19S1G3
4 членов
Автор 14 руководств