Перейти к основному содержанию

LG Thrill 4G Motherboard Replacement

Выберете то, что вам нужно

  1. LG Thrill 4G Motherboard Replacement, Back Cover Removal: шаг 1, изображение 1 из 2 LG Thrill 4G Motherboard Replacement, Back Cover Removal: шаг 1, изображение 2 из 2
    • Pry open the back cover by using a fingernail or a plastic opening tool.

    • There is a small notch at the bottom of the cover for easy removal.

  2. LG Thrill 4G Motherboard Replacement, Battery Removal: шаг 2, изображение 1 из 2 LG Thrill 4G Motherboard Replacement, Battery Removal: шаг 2, изображение 2 из 2
    • Remove the battery from the phone.

    • There is a small ledge located at the bottom of the battery for easy removal.

  3. LG Thrill 4G Motherboard Replacement, Screw Removal: шаг 3, изображение 1 из 1
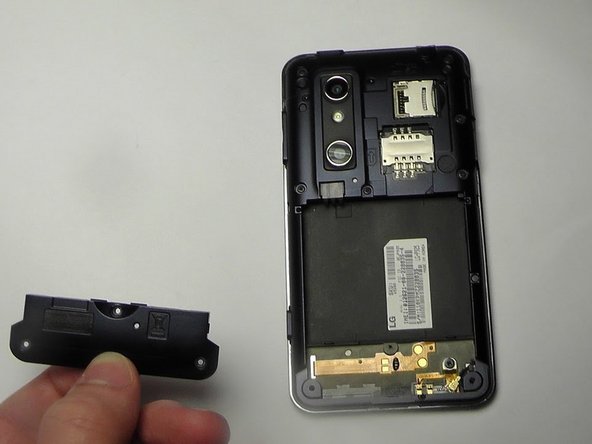
    • Remove the three Philips #00 screws from the bottom of the phone.

    • Two 5.5 mm screws

    • One 4 mm screw

  4. LG Thrill 4G Motherboard Replacement, Speaker Removal: шаг 4, изображение 1 из 2 LG Thrill 4G Motherboard Replacement, Speaker Removal: шаг 4, изображение 2 из 2
    • Use your finger or opening tool to wedge the speaker out starting at the small notch at the bottom of the phone.

  5. LG Thrill 4G Motherboard Replacement, Buttons: шаг 5, изображение 1 из 1
    • Remove the three buttons from the side and the top of the phone.

    • Power button

    • Volume button

    • 3D camera button

  6. LG Thrill 4G Motherboard Replacement: шаг 6, изображение 1 из 3 LG Thrill 4G Motherboard Replacement: шаг 6, изображение 2 из 3 LG Thrill 4G Motherboard Replacement: шаг 6, изображение 3 из 3
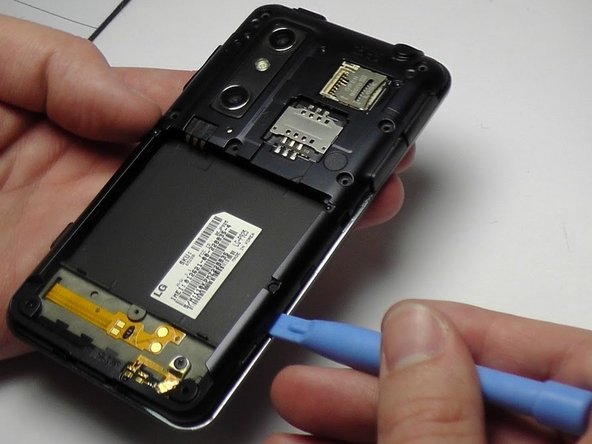
    • Place the plastic opening tool under the bezel at either bottom corner of the HDMI cover.

    • This loosens both the HDMI and USB covers for easy removal.

    • USB Cover

    • HDMI Cover

  7. LG Thrill 4G Motherboard Replacement: шаг 7, изображение 1 из 1
    • Remove the six Phillips #00 screws within the mid-cover bezel.

  8. LG Thrill 4G Motherboard Replacement, Ribbon Cable Disconnection: шаг 8, изображение 1 из 3 LG Thrill 4G Motherboard Replacement, Ribbon Cable Disconnection: шаг 8, изображение 2 из 3 LG Thrill 4G Motherboard Replacement, Ribbon Cable Disconnection: шаг 8, изображение 3 из 3
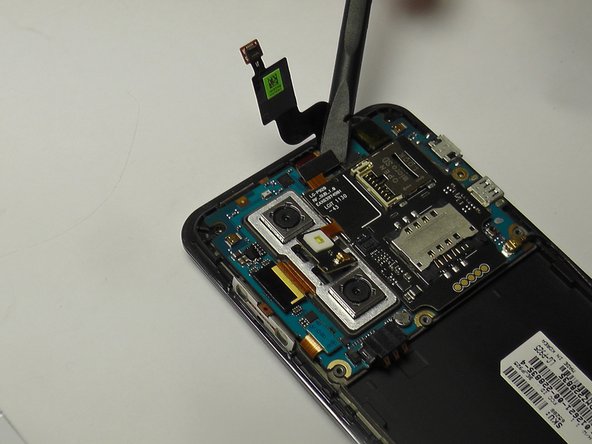
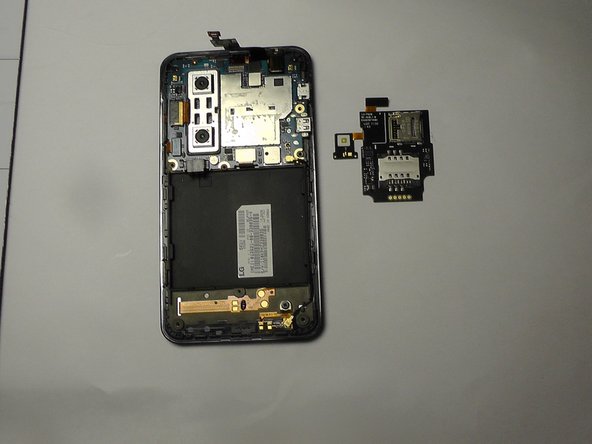
    • Utilize a spudger or plastic opening tool and gently disconnect the ribbon cable that is attached to the black micro-SIM card board.

  9. LG Thrill 4G Motherboard Replacement, SD/SIM Card Board Removal: шаг 9, изображение 1 из 3 LG Thrill 4G Motherboard Replacement, SD/SIM Card Board Removal: шаг 9, изображение 2 из 3 LG Thrill 4G Motherboard Replacement, SD/SIM Card Board Removal: шаг 9, изображение 3 из 3
    • Carefully pry the board up to detach it from its place in the phone.

    • Make sure to pry off the small tab connected to the camera unit as well.

  10. LG Thrill 4G Motherboard Replacement, Motherboard: шаг 10, изображение 1 из 2 LG Thrill 4G Motherboard Replacement, Motherboard: шаг 10, изображение 2 из 2
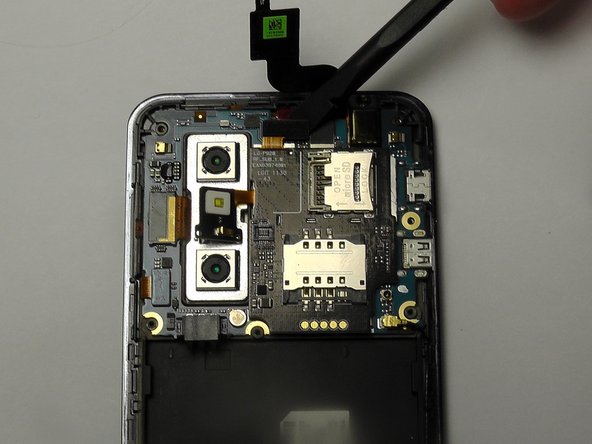
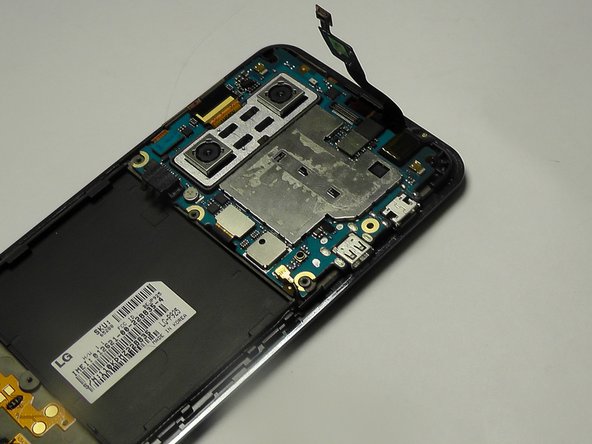
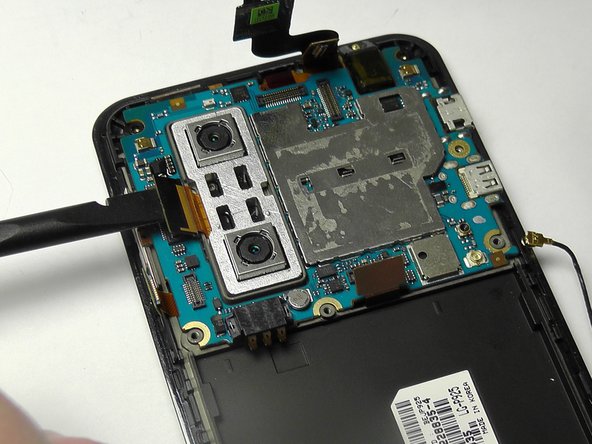
    • Use a plastic opening tool or spudger to gently disconnect the ribbon cables connected to the motherboard.

    • Disconnect the antenna cable from the bottom right corner of the motherboard.

  11. LG Thrill 4G Motherboard Replacement: шаг 11, изображение 1 из 2 LG Thrill 4G Motherboard Replacement: шаг 11, изображение 2 из 2
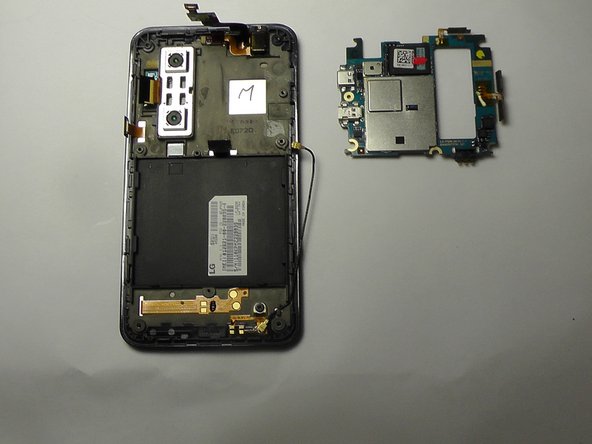
    • Use a spudger or pair of tweezers to grab the top left corner of the motherboard and gently lift it out, taking care to not damage any of the ribbon cables when removing.

Заключение

To reassemble your device, follow these instructions in reverse order.

2 участников успешно повторили данное руководство.

Luis Mena

Участник с: 01/20/15

270 Репутация

Автор 2 руководств

Команда

USF Tampa, Team 1-6, Blackwell Winter 2015 Участник USF Tampa, Team 1-6, Blackwell Winter 2015

USFT-BLACKWELL-W15S1G6

3 членов

Автор 10 руководств

0 Комментариев

Добавить комментарий

Просмотр статистики:

За последние 24часов: 0

За последние 7 дней: 2

За последние 30 дней: 6

За всё время: 489