Перейти к основному содержанию

LG VX4500 Disassembly

Архивированное руководство
Это руководство сохранено для исторических целей. Используйте его обновлённую версию, чтобы выполнить ремонт.

Выберете то, что вам нужно

  1. LG VX4500 Disassembly, Battery: шаг 1, изображение 1 из 1
    • Before removing the battery, ensure that the phone is turned off.

    • To remove the battery from your LG VX4500, turn the phone so that the back panel is showing.

  2. LG VX4500 Disassembly: шаг 2, изображение 1 из 1
    • Pull back on the white release tab and lift up the the entire battery.

  3. LG VX4500 Disassembly: шаг 3, изображение 1 из 1
    • The back panel should now be fully accessible.

  4. LG VX4500 Disassembly, LG VX4500 Disassembly: шаг 4, изображение 1 из 2 LG VX4500 Disassembly, LG VX4500 Disassembly: шаг 4, изображение 2 из 2
    • Using a paper clip, remove all 4 rubber screwcaps from the screw ports.

    • With a Phillips head screwdriver, remove all 4 screws from their ports.

    • Also remove the rubber screwcap in the upper part of the back panel along with the screw under it.

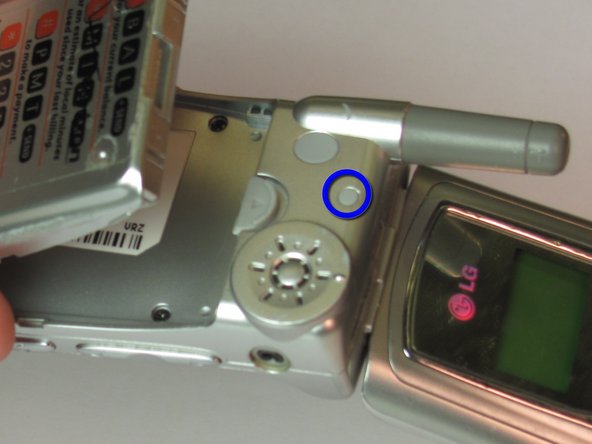
    • The fifth screw will be more difficult to get out because the plastic port has much higher sides.

  5. LG VX4500 Disassembly: шаг 5, изображение 1 из 3 LG VX4500 Disassembly: шаг 5, изображение 2 из 3 LG VX4500 Disassembly: шаг 5, изображение 3 из 3
    • Run a plastic opening tool along the seam to seperate the keyboard cover and the back panel

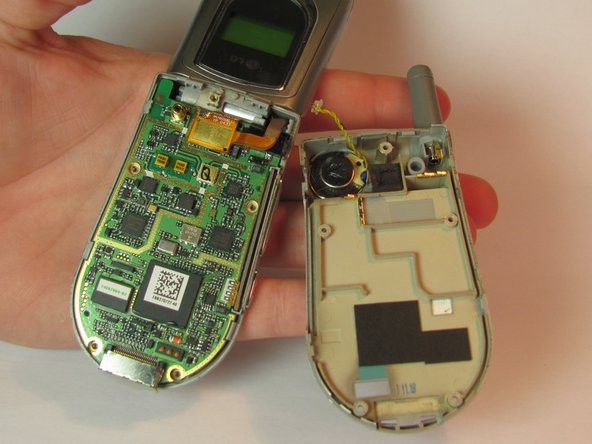
    • Remove the back panel, now the logic board, keyboard and microphone are exposed.

Заключение

To reassemble your device, follow these instructions in reverse order.

iDeleted

Участник с: 07/07/10

2 101 Репутация

Автор 39 руководств

0 Комментариев

Добавить комментарий

Просмотр статистики:

За последние 24часов: 0

За последние 7 дней: 0

За последние 30 дней: 1

За всё время: 4,410