Перейти к основному содержанию

LG VX6000 Keyboard Replacement

Выберете то, что вам нужно

  1. LG VX6000 Keyboard Replacement, Battery: шаг 1, изображение 1 из 1
    • Locate the dark gray tab on the back of the phone towards the top. Push the tab towards the top of the phone to release the battery.

  2. LG VX6000 Keyboard Replacement: шаг 2, изображение 1 из 1
    • Remove the battery by lifting up and rotating the battery away from the bottom edge.

  3. LG VX6000 Keyboard Replacement, Body: шаг 3, изображение 1 из 1
    • Pull out the two rubber cushions located on the top of the phone using tweezers.

    • Only remove the two cushions that are circled!

  4. LG VX6000 Keyboard Replacement: шаг 4, изображение 1 из 1
    • Unscrew the six screws seen on the back using a Phillips 00 Screwdriver.

    • Remove screws and carefully place on an uncluttered surface or in a small container.

  5. LG VX6000 Keyboard Replacement: шаг 5, изображение 1 из 1
    • Carefully remove the back of the phone gently using your fingernails or tweezers.

    • There are a pair of red and blue wires that plugs into the motherboard. These wires will snap if you force the pieces apart.

    • To reattach the back, you must plug these wires back in.

  6. LG VX6000 Keyboard Replacement, Logic Board: шаг 6, изображение 1 из 1
    • Carefully peel off the adhesive tab as shown in the photo

    • The tab should not fully separate from the phone.

  7. LG VX6000 Keyboard Replacement: шаг 7, изображение 1 из 2 LG VX6000 Keyboard Replacement: шаг 7, изображение 2 из 2
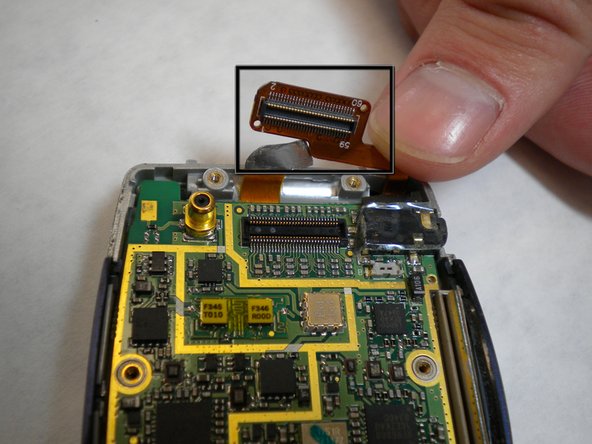
    • Locate the yellow connection towards the top of the phone. This is directly connected to the screen.

    • Remove the connector by carefully prying it away from the motherboard and lifting it away from the phone

    • Do not pull too hard on the connector.

  8. LG VX6000 Keyboard Replacement: шаг 8, изображение 1 из 1
    • Gently lift a corner of the motherboard away from the casing to remove.

  9. LG VX6000 Keyboard Replacement, Keyboard: шаг 9, изображение 1 из 1
    • Peel the white keypad off the casing.

Заключение

To reassemble your device, follow these instructions in reverse order.

Adam Altman

Участник с: 01/14/10

1 Репутация

Автор 3 руководств

Команда

Cal Poly, Team 4-11, Forte Winter 2010 Участник Cal Poly, Team 4-11, Forte Winter 2010

CPSU-FORTE-W10S4G11

5 членов

Автор 11 руководств

0 Комментариев

Добавить комментарий

Просмотр статистики:

За последние 24часов: 0

За последние 7 дней: 0

За последние 30 дней: 1

За всё время: 2,753