Перейти к основному содержанию

LG VX8350R Keypad Replacement

Выберете то, что вам нужно

  1. LG VX8350R Keypad Replacement, Keypad: шаг 1, изображение 1 из 3 LG VX8350R Keypad Replacement, Keypad: шаг 1, изображение 2 из 3 LG VX8350R Keypad Replacement, Keypad: шаг 1, изображение 3 из 3
    • Using your thumb, slide battery cover off in a downward direction.

  2. LG VX8350R Keypad Replacement: шаг 2, изображение 1 из 2 LG VX8350R Keypad Replacement: шаг 2, изображение 2 из 2
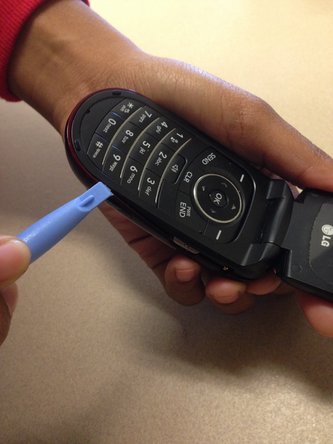
    • Place the plastic opening tool at the top of the battery and pry it out to remove. Set the battery aside.

  3. LG VX8350R Keypad Replacement: шаг 3, изображение 1 из 1
    • With a Phillips #00 Screwdriver, remove the four screws in a counter-clockwise direction from the back cover. Set them aside on a surface where they won't roll away; these screws will be used in reassembly.

  4. LG VX8350R Keypad Replacement: шаг 4, изображение 1 из 3 LG VX8350R Keypad Replacement: шаг 4, изображение 2 из 3 LG VX8350R Keypad Replacement: шаг 4, изображение 3 из 3
    • Using the plastic opening tool, carefully pry off the back cover. You may need to use the opening tool around the entire edge of the back cover to remove completely.

    • You will have to use some force to remove the upper part of the back cover. Apply enough force to separate the pieces without cracking the back cover.

  5. LG VX8350R Keypad Replacement: шаг 5, изображение 1 из 2 LG VX8350R Keypad Replacement: шаг 5, изображение 2 из 2
    • Gently lift the green computer chip plate out of the way to expose the keypad.

    • The green computer chip plate cannot be completely removed. It is attached to the phone by a ribbon. Be careful not to break this ribbon when moving the green computer chip plate.

  6. LG VX8350R Keypad Replacement: шаг 6, изображение 1 из 3 LG VX8350R Keypad Replacement: шаг 6, изображение 2 из 3 LG VX8350R Keypad Replacement: шаг 6, изображение 3 из 3
    • Remove the keypad using your fingers and set aside.

  7. LG VX8350R Keypad Replacement: шаг 7, изображение 1 из 3 LG VX8350R Keypad Replacement: шаг 7, изображение 2 из 3 LG VX8350R Keypad Replacement: шаг 7, изображение 3 из 3
    • Align the small holes in the new keypad with the posts on the phone.

  8. LG VX8350R Keypad Replacement: шаг 8, изображение 1 из 3 LG VX8350R Keypad Replacement: шаг 8, изображение 2 из 3 LG VX8350R Keypad Replacement: шаг 8, изображение 3 из 3
    • When replacing the computer chip, the sensor bar for the volume button may pop out of place. If this occurs, gently push the bars back into place behind the buttons with your fingers.

Заключение

To reassemble your device, follow these instructions in reverse order.

Еще один человек закончил это руководство.

Alex Goots

Участник с: 09/24/13

117 Репутация

1 руководство автора

0 Комментариев

Добавить комментарий

Просмотр статистики:

За последние 24часов: 0

За последние 7 дней: 0

За последние 30 дней: 1

За всё время: 402