Перейти к основному содержанию

Lenovo 100e Chromebook 2nd Gen Display Replacement

Выберете то, что вам нужно

  1. Lenovo 100e Chromebook 2nd Gen Display Replacement, Keyboard: шаг 1, изображение 1 из 1
    • Remove the nine 6 mm screws from the back of the laptop using a Phillips #0 screwdriver.

  2. Lenovo 100e Chromebook 2nd Gen Display Replacement: шаг 2, изображение 1 из 2 Lenovo 100e Chromebook 2nd Gen Display Replacement: шаг 2, изображение 2 из 2
    • Open the laptop and lay it flat.

    • Go along the edge of the keyboard with an opening tool until it pops loose.

    • Potential for device damage: Make sure that the keyboard does not fall away from the laptop, as it is still connected to the internal components

  3. Lenovo 100e Chromebook 2nd Gen Display Replacement: шаг 3, изображение 1 из 2 Lenovo 100e Chromebook 2nd Gen Display Replacement: шаг 3, изображение 2 из 2
    • Lift the keyboard connectors up using an opening pick.

    • Remove the connectors from their sockets.

  4. Lenovo 100e Chromebook 2nd Gen Display Replacement, Battery: шаг 4, изображение 1 из 1
    • Remove the four 4 mm Phillips #0 screws holding the battery in.

  5. Lenovo 100e Chromebook 2nd Gen Display Replacement: шаг 5, изображение 1 из 1
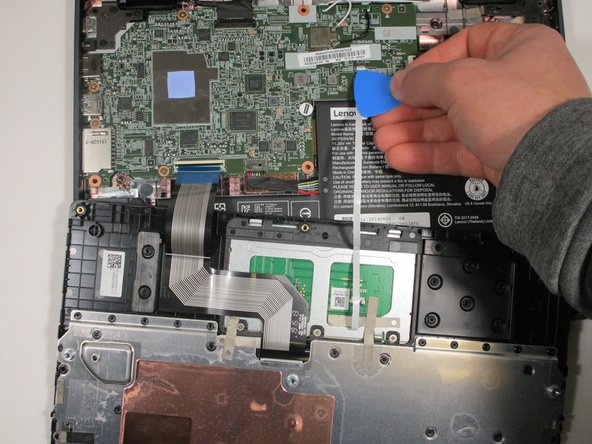
    • Using an opening pick, push on the connection where the wires are connected to the motherboard.

    • Potential for device damage: This step takes some force to disconnect, but be careful to not pull the wires out of the battery.

  6. Lenovo 100e Chromebook 2nd Gen Display Replacement: шаг 6, изображение 1 из 1
    • The battery is now loose and can be removed from the laptop.

  7. Lenovo 100e Chromebook 2nd Gen Display Replacement, Screen Bezel: шаг 7, изображение 1 из 1
    • Using a spudger, go along the edge of the screen and pop the connections between the cover and the back side out.

  8. Lenovo 100e Chromebook 2nd Gen Display Replacement: шаг 8, изображение 1 из 1
    • Insert the spudger into the gap between the hinges and pull up to detach the connections.

  9. Lenovo 100e Chromebook 2nd Gen Display Replacement: шаг 9, изображение 1 из 1
    • Remove the screen bezel from the laptop.

  10. Lenovo 100e Chromebook 2nd Gen Display Replacement, Display: шаг 10, изображение 1 из 1
    • Remove the four 3.4 mm screws holding the screen in place using the Phillips #00 screwdriver.

  11. Lenovo 100e Chromebook 2nd Gen Display Replacement: шаг 11, изображение 1 из 1
    • Carefully pull the screen back onto the lower assembly.

  12. Lenovo 100e Chromebook 2nd Gen Display Replacement: шаг 12, изображение 1 из 3 Lenovo 100e Chromebook 2nd Gen Display Replacement: шаг 12, изображение 2 из 3 Lenovo 100e Chromebook 2nd Gen Display Replacement: шаг 12, изображение 3 из 3
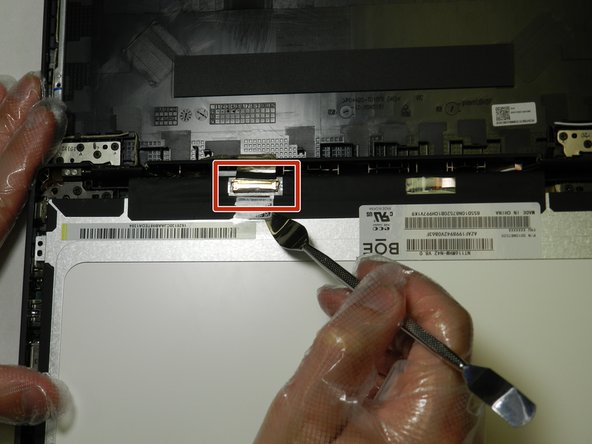
    • Peel back the protective tape over the display cable using the spudger.

    • Gently lift the black bar latch holding the cable in place, until the cable becomes loose.

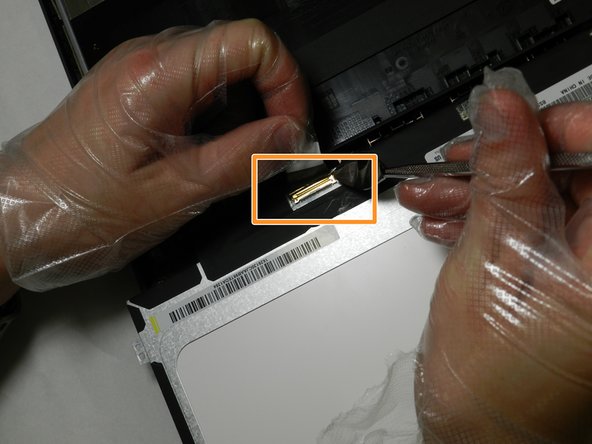
    • Pull the cable free and remove the display.

    • DO NOT pull on the cable before lifting the bar latch or the cable will break.

Заключение

To reassemble your device, follow these instructions in reverse order.

Matthew Unden

Участник с: 09/21/21

100 Репутация

1 руководство автора

Команда

0 Комментариев

Добавить комментарий

Просмотр статистики:

За последние 24часов: 3

За последние 7 дней: 28

За последние 30 дней: 95

За всё время: 1,894