Перейти к основному содержанию

Lenovo G40-30 LCD Screen Replacement

Выберете то, что вам нужно

  1. Lenovo G40-30 LCD Screen Replacement, Battery: шаг 1, изображение 1 из 3 Lenovo G40-30 LCD Screen Replacement, Battery: шаг 1, изображение 2 из 3 Lenovo G40-30 LCD Screen Replacement, Battery: шаг 1, изображение 3 из 3
    • At the top of the laptop you will see two switches, like in image one and two.

    • Pull the switches outwards with your thumb, towards the unlocked lock.

  2. Lenovo G40-30 LCD Screen Replacement: шаг 2, изображение 1 из 3 Lenovo G40-30 LCD Screen Replacement: шаг 2, изображение 2 из 3 Lenovo G40-30 LCD Screen Replacement: шаг 2, изображение 3 из 3
    • Once both switches are pulled, the battery should pop out.

  3. Lenovo G40-30 LCD Screen Replacement: шаг 3, изображение 1 из 1
    • Now you are ready to insert your new battery.

  4. Lenovo G40-30 LCD Screen Replacement, LCD Screen: шаг 4, изображение 1 из 2 Lenovo G40-30 LCD Screen Replacement, LCD Screen: шаг 4, изображение 2 из 2
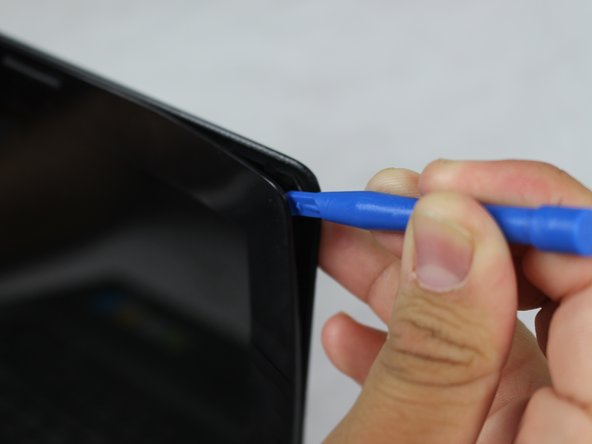
    • Use the plastic opening tool to pry the plastic away from the screen.

  5. Lenovo G40-30 LCD Screen Replacement: шаг 5, изображение 1 из 2 Lenovo G40-30 LCD Screen Replacement: шаг 5, изображение 2 из 2
    • Carefully unsnap the front plastic piece to expose the frame of the screen.

  6. Lenovo G40-30 LCD Screen Replacement: шаг 6, изображение 1 из 3 Lenovo G40-30 LCD Screen Replacement: шаг 6, изображение 2 из 3 Lenovo G40-30 LCD Screen Replacement: шаг 6, изображение 3 из 3
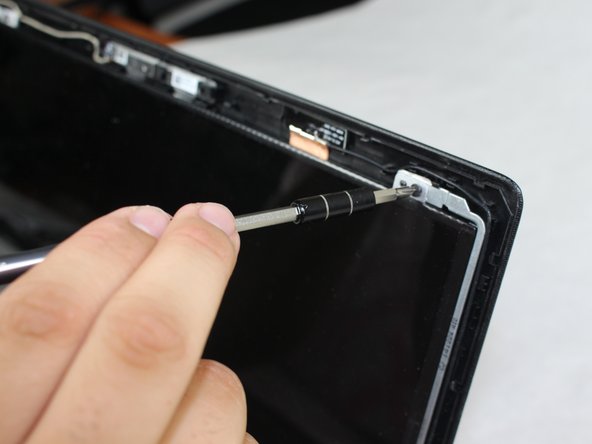
    • Unscrew the four 7mm screws located on all four corners of the frame using a JIS #0 screwdriver.

    • Carefully lift the screen from the base so as to not damage it.

  7. Lenovo G40-30 LCD Screen Replacement: шаг 7, изображение 1 из 2 Lenovo G40-30 LCD Screen Replacement: шаг 7, изображение 2 из 2
    • Slowly remove the sticker connected to the rear of the screen using a spudger.

    • Carefully disconnect the screen from the base of the laptop.

  8. Lenovo G40-30 LCD Screen Replacement: шаг 8, изображение 1 из 1
    • Now you have removed the screen and are ready to install a new one.

Заключение

To reassemble your device, follow these instructions in reverse order.

2 участников успешно повторили данное руководство.

Jimmy McClenan

Участник с: 02/08/18

156 Репутация

1 руководство автора

Команда

Sam Houston State, Team S16-G4, Nardone Spring 2018 Участник Sam Houston State, Team S16-G4, Nardone Spring 2018

SHSU-NARDONE-S18S16G4

5 членов

Автор 5 руководств

2 Комментариев

Thanks alot…..I just fixed my screen by God's grace.

Nnaemeka Okechukwu - Ответить

Hi! Is it possible to replace the screen with 1080p LCD?

Chin Yau Chia - Ответить

Добавить комментарий

Просмотр статистики:

За последние 24часов: 1

За последние 7 дней: 9

За последние 30 дней: 15

За всё время: 2,464