Введение
The charging port is likely the port you use most, so it experiences more wear than the others. This guide will help you replace that port if it every breaks so that you can continue to use your Lenovo IdeaPad Flex 3 Chromebook (11M735).
Выберете то, что вам нужно
-
-
Use a T6 Torx screwdriver to unscrew the nine M2 x 6.5mm screws.
-
-
-
-
Start with your PH00 screwdriver and remove all of the 7x(M2x4.5mm) indicated screws. These screws keep the screen in place.
-
The marked cord needs to be disconnected too, this is the screen cord to the motherboard.
-
-
-
There are a total of 9x(M2x4) more screws that connect the motherboard into its place that needs to be removed.orange. Opening it will show that this device's motherboard had to be repaired.
-
One of these screws is hidden under a small Lenovo sticker which is marked orange. Opening it will show that this device's motherboard had to be repaired.
-
The two rectangles are two cords that attach the main motherboard to the side motherboards. The blue rectangle needs to be disconnected for our purpose.
-
-
-
As you can see, after the last step, you can easily remove the motherboard.
-
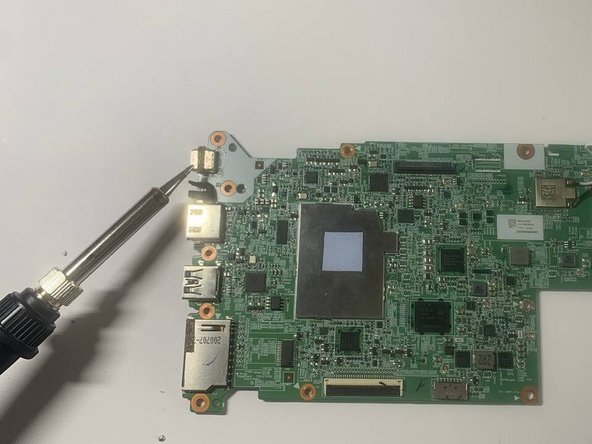
Plug your soldering device and set it to around 350°F.
-
Flip the motherboard and start desoldering the little wholes with the tip of your hot soldering device. This will melt the solder and let you remove the USB-C.
-
Put your new USB 3.1 Type-C 16pin Femalein place, and melt down the solder so it attaches to the motherboard.
-


To reassemble your device, follow the instruction.
To reassemble your device, follow the instruction.
Команда

University of North Texas, Team 3-2, Saru Jimmy Spring 2023 Участник University of North Texas, Team 3-2, Saru Jimmy Spring 2023
UNT-SARU JIMMY-S23S3G2
2 членов
Автор 6 руководств