Введение
Use this guide to replace the fan inside of the Lenovo IdeaPad S340-15IWL laptop.
If your device is overheating, the fan is loud, or the computer is overheating it may indicate that your fan needs to be replaced or cleaned.
Make sure that you view the troubleshooting page before you begin your replacement as there is a possibility that your device may be running too large of a program load or has been running for too long with improper ventilation.
Ensure that there is no food or liquid near the computer while completing the repair as the computer’s internal components will be exposed.
Выберете то, что вам нужно
-
-
Power off the laptop and place it face-down on a non-scratching surface.
-
Using a Torx T5 screwdriver head, remove all ten 6 mm screws holding the back panel in place.
-
-
-
Slide a plastic opening tool underneath the back case near the screen hinges.
-
Gently pry up on either side of the case.
-
-
-
-
Remove the two 3 mm screws connecting the fan to the casing using a Phillips #0 screwdriver.
-
-
-
Carefully unwind the black cable that runs between the top of the battery and the bottom of the fan from the grooves along the side of the fan.
-
In order to do so, you will need to pull up the metallic tape that holds the cable in place using either your fingers or a plastic prying tool to lift up the edge.
-
-
-
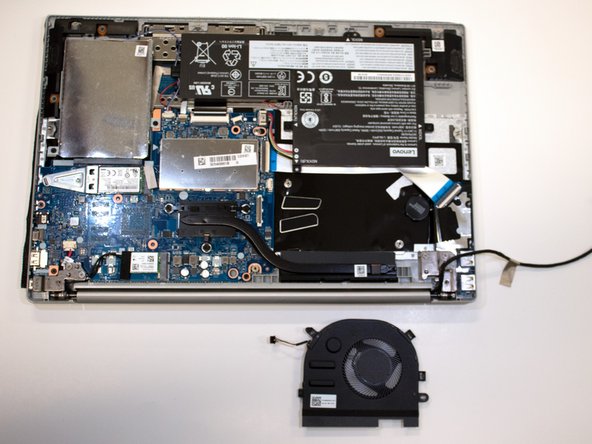
Carefully pick up the fan by the corners and detach the small connector wire by pulling parallel to the device.
-
Remove the fan from the laptop.
-


To reassemble your device, follow these instructions in reverse order.
To reassemble your device, follow these instructions in reverse order.
Отменить: Я не выполнил это руководство.
Еще один человек закончил это руководство.
Команда

Western Carolina University, Team 1-3, Virtue Fall 2021 Участник Western Carolina University, Team 1-3, Virtue Fall 2021
WCU-VIRTUE-F21S1G3
4 членов
Автор 9 руководств