Введение
If you want to listen to music, or watch netflix with sound again, follow these steps to replace your dysfunctional headphone jack.
Выберете то, что вам нужно
-
-
Locate the small tab, marked with the lock symbol on the upper right hand of your IdeaTab above the volume control buttons. Use your fingernail to gently loosen this tab.
-
Use your Phillips #000 screwdriver and remove the 3.5mm screw and put it aside.
-
Using your blue, plastic opening tool, begin to gently pry the back panel away from the front panel starting by where the screw was.
-
-
-
Locate the black back plate, above the battery.
-
Using a Phillips #000 screwdriver remove the 7 silver 3.5mm screws from the back plate.
-
Next, with the same screwdriver, remove the black 4.1mm screw.
-
Gently remove the back plate from the device.
-
-
-
Use the plastic opening tool to disconnect the battery wires from the system board. Slide your opening tool under the white plastic piece and pry it up.
-
Again, use the plastic opening tool to loosen the battery from the device by lifting up on the battery on all sides. This will detach the battery from the adhesive.
-
Gently place the battery aside.
-
-
-
Locate the volume button mechanism.
-
The volume button mechanism is called an FPC, it is adhered to the device frame. Remove it by prying it off using a tweezer or plastic opening tool.
-
Remove the FPC to the left of the volume button mechanism the same way.
-
-
-
-
Locate the power button mechanism.
-
Remove the power button mechanism by prying it off using a tweezer or plastic opening tool.
-
-
-
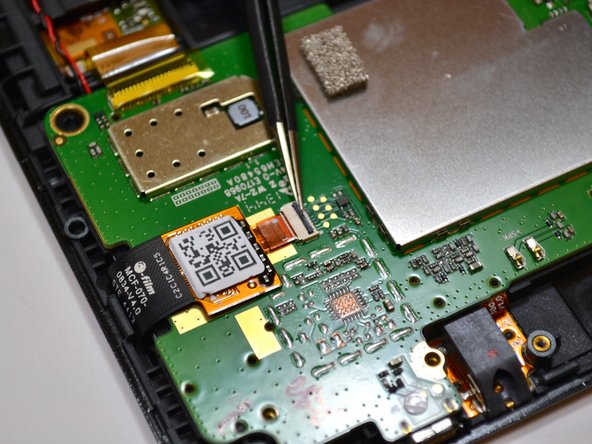
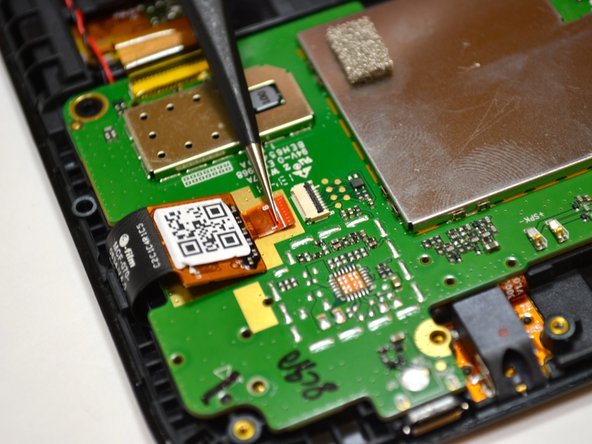
Locate the component with a QR code printed on it.
-
To disconnect this component you must first detach it from the white connector.
-
To detach it from the connector, use a tweezer to gently rotate the black piece 90 degrees so it is pointing up.
-
Once the black piece is pointing up the orange wires can be removed from the connectors. Using a tweezer pull the orange wires horizontally outwards from the white connector.
-
-
-
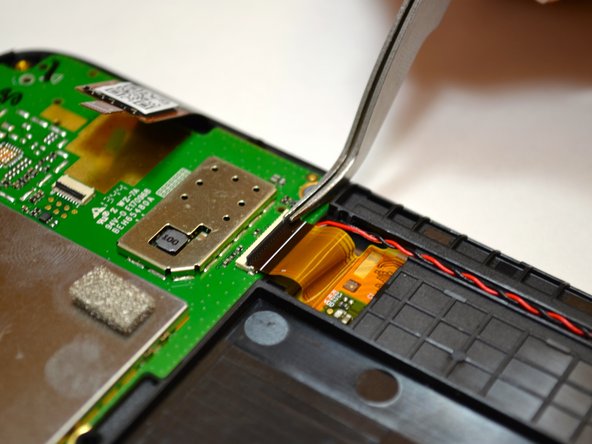
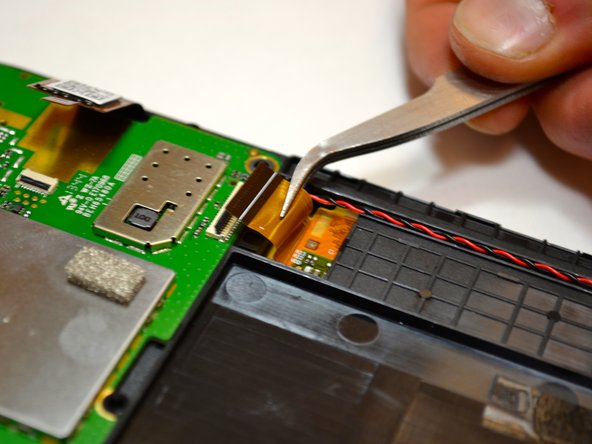
Locate the orange cable to the right of the battery tray.
-
To disconnect this component you must first detach it from the white connector. Using a tweezer, pry the black piece upwards and rotate it 90 degrees so it points up.
-
Once the black piece is pointing up the orange wires can be removed from the connectors. Using a tweezer pull the orange wire horizontally outwards from the white connector.
-
-
-
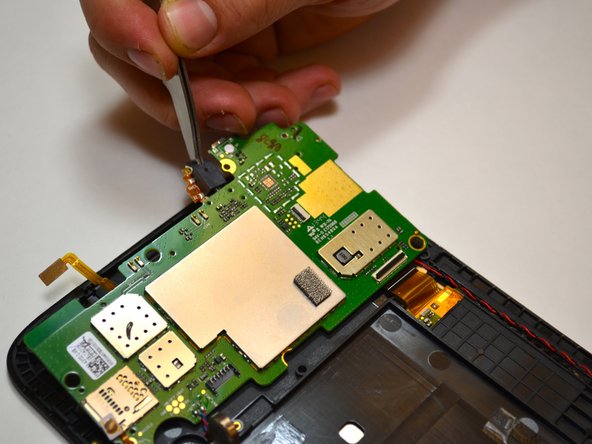
Using a #000 Phillips screwdriver, remove the two M1.4 3.5mm screws from the system board and set them aside.
-
-
-
Locate the audio assembly near the top-right of the device.
-
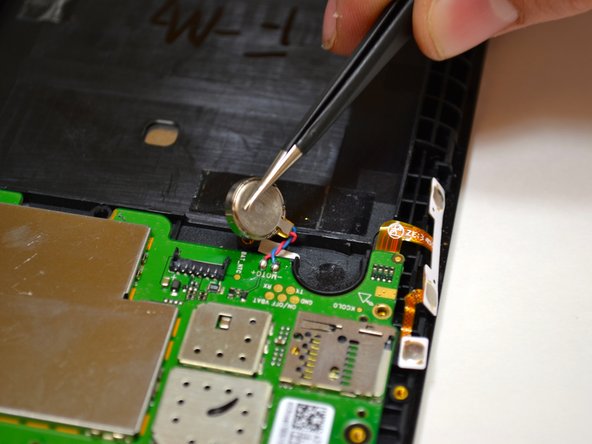
Remove the audio assembly by inserting the tweezers in the circular hole in the black plastic box and pulling upwards.
-
Set the component aside and you are finished.
-


To reassemble your device, follow these instructions in reverse order.
To reassemble your device, follow these instructions in reverse order.
Команда

Cal Poly, Team 7-21, Regan Spring 2014 Участник Cal Poly, Team 7-21, Regan Spring 2014
CPSU-REGAN-S14S7G21
4 членов
Автор 6 руководств