Введение
This guide will assist you in removing and replacing the touchpad for the Lenovo Ideapad 120s-14IAP. The touch pad is a common issue with this model, and will fix problems with a mouse pointer that will not move or becomes jumpy on the screen.
Выберете то, что вам нужно
-
-
Orient the laptop so the top is laying flat on your work surface.
-
Remove ten 1.5mm Torx T5 screws from the back of the laptop.
-
-
-
Insert the plastic opening tool or a Jimmy along the edge of the back cover and gently pry.
-
Run the tool all the way around the edge of the back cover and remove the back cover once it is no longer secure.
-
Remove the back cover.
-
-
-
Use a spudger to lift the black fastener and disconnect the ribbon cable from the USB daughterboard.
-
-
-
Using tweezers, disconnect the speaker on the left from the USB daugterboard.
-
Remove two 2.5 mm Phillips #0 screws from the daughterboard.
-
Remove the daughterboard from the laptop.
-
-
-
Using a spudger, disconnect the keyboard ribbon cable from the motherboard.
-
Pull on the plastic film to remove the display connection cable.
-
-
-
-
Using tweezers, disconnect the connections for the right speaker.
-
Using tweezers, disconnect the connections for the battery.
-
Using tweezers, disconnect the connections for the CMOS battery.
-
-
-
Remove the wireless card by disconnecting the two antenna cables and removing the 2.5 mm Phillips #0 screw.
-
-
-
Remove seven 2.5 mm Phillips #0 screws from the motherboard.
-
Slide the motherboard out of the laptop chassis.
-
-
-
Remove five 2.5 mm Phillips #0 screws from around the battery.
-
Lift the battery out of the laptop.
-
-
-
Remove four 2.0 mm Phillips #0 screws from the speaker assemblies.
-
The speakers can now be lifted up.
-
-
-
Remove six 2.5 mm Phillips #0 screws from the battery bracket.
-
Lift the battery bracket out of the laptop.
-
-
-
Remove six 5.0 mm Phillips #0 screws from the screen hinges.
-
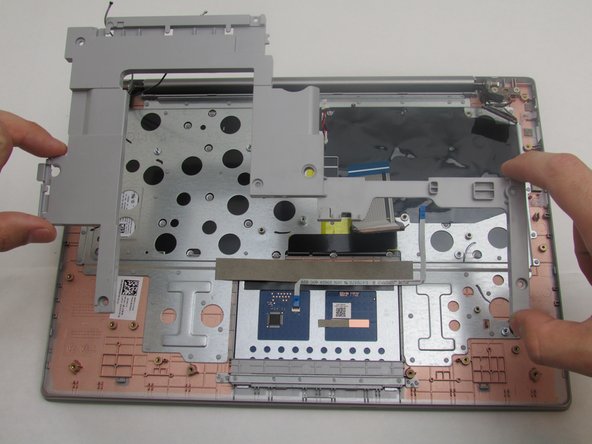
You can now lift the bottom cover and separate each half of the laptop.
-
-
-
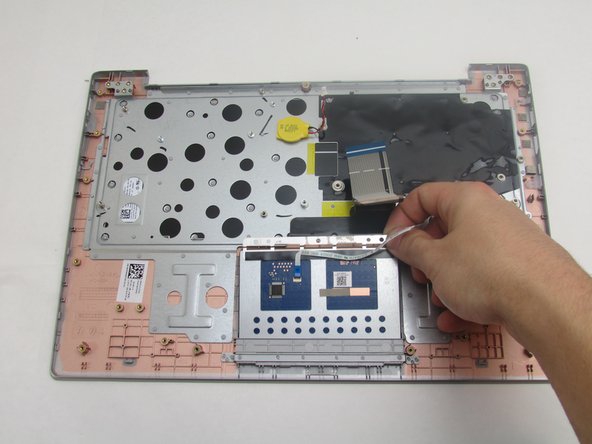
Remove three 2.0 mm Phillips #0 screws from the touchpad retention bracket.
-
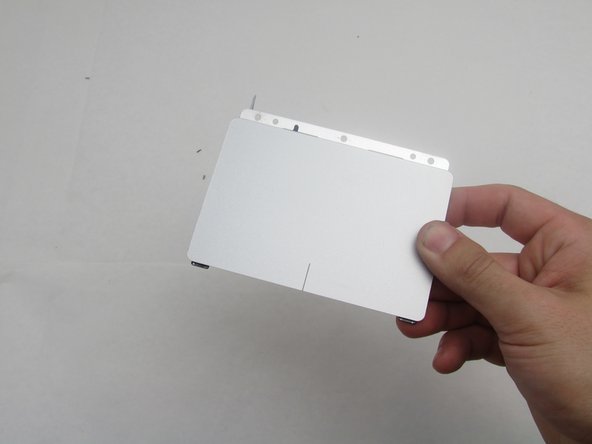
The touchpad now slides up and can be removed.
-


To reassemble your device, follow these instructions in reverse order.
To reassemble your device, follow these instructions in reverse order.
Отменить: Я не выполнил это руководство.
Еще один человек закончил это руководство.
Команда

Embry-Riddle Aeronautical University, Team S22-G4, Branham Fall 2019 Участник Embry-Riddle Aeronautical University, Team S22-G4, Branham Fall 2019
ERAU-BRANHAM-F19S22G4
4 членов
Автор 6 руководств