Введение
The laptop touchpad is a built-in mouse. If there is any dirt or debris in the crevices. the touchpad might be unresponsive. The touchpad could have been accidentally locked. Try cleaning and checking your settings, before removing your touchpad. If the touchpad is still unresponsive, this guide can help you replace the touchpad on your Lenovo IdeaPad 320-15IAP.
Выберете то, что вам нужно
-
-
Unscrew thirteen 6.5mm screws from the back panel with the Phillips #0 screwdriver.
-
Pull the CD tray out with the opening tool once all screws are removed.
-
Use the opening tool to pull the case off the laptop by prying up the back panel along the edges of the computer.
-
-
-
Unscrew four 4.5mm screws from the screen brackets using a Phillips #0 screwdriver.
-
Gently pull the wire protector from the back of the computer. You may hear cracking sounds but this is normal, as the locks are disengaging as you pull.
-
-
-
Disconnect the display cable by lifting the black tab of the ZIF connector with the opening tool and gently pulling out the cable.
-
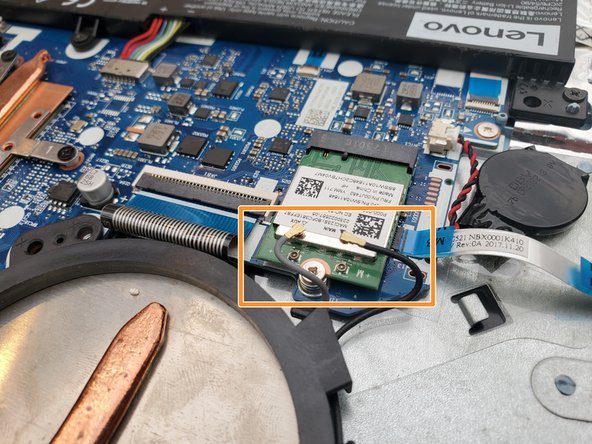
Disconnect the two coaxial cables on the WiFi card by gently pulling up on the wires.
-
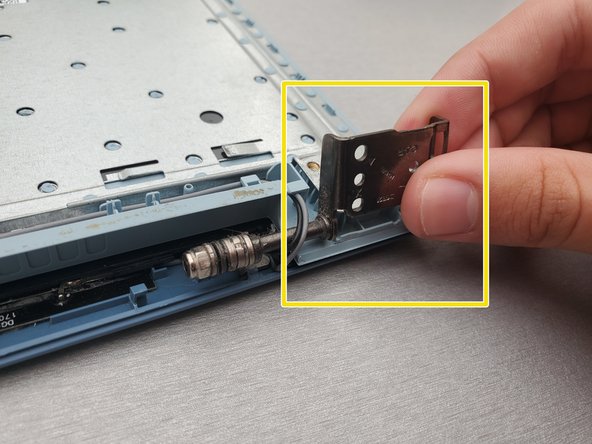
Lift up the screen brackets by prying upwards on them with an opening tool.
-
-
-
-
Unscrew four 3mm silver screws on the motherboard using the Phillips #0 screwdriver.
-
Unscrew the single 6mm black screw with a Phillips #0 screwdriver.
-
-
-
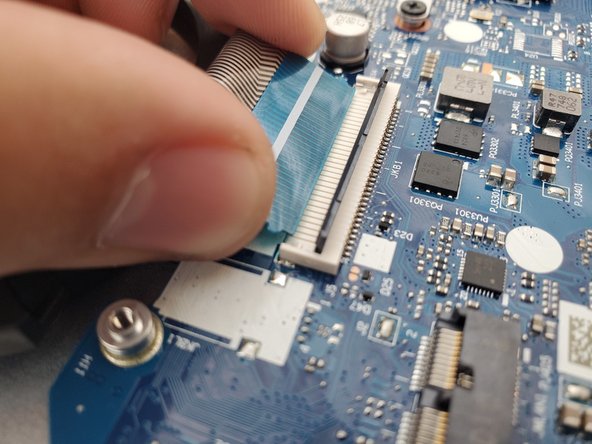
Remove the six ribbon cables by lifting up the locking black tabs from their ZIF connectors with a spudger, then gently pulling out the cables.
-
-
-
Gently remove the motherboard, being sure that no cables are being pulled or snagged in the process.
-
-
-
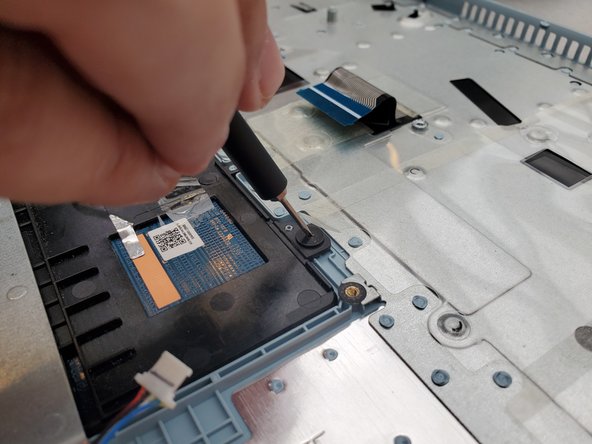
Remove the two 2.5mm Phillips #0 screws from the upper edge of the trackpad.
-
-
-
Lift the trackpad from its bay from the upper edge to remove it from the laptop.
-


To reassemble your device, follow these instructions in reverse order.
To reassemble your device, follow these instructions in reverse order.
Отменить: Я не выполнил это руководство.
Еще один человек закончил это руководство.
Команда

Embry-Riddle Aeronautical University, Team S17-G11, Lamothe Spring 2020 Участник Embry-Riddle Aeronautical University, Team S17-G11, Lamothe Spring 2020
ERAU-LAMOTHE-S20S17G11
4 членов
Автор 10 руководств