Перейти к основному содержанию

Lenovo Ideapad 330-15ARR Fan Assembly Replacement

Выберете то, что вам нужно

  1. Lenovo Ideapad 330-15ARR Fan Assembly Replacement, Lower Case: шаг 1, изображение 1 из 1
    • Remove all Phillips #0 screws securing the case to the laptop.

  2. Lenovo Ideapad 330-15ARR Fan Assembly Replacement: шаг 2, изображение 1 из 2 Lenovo Ideapad 330-15ARR Fan Assembly Replacement: шаг 2, изображение 2 из 2
    • Pry all edges off of the laptop with the opening tool until the lower case releases.

    • Remove the lower case.

  3. Lenovo Ideapad 330-15ARR Fan Assembly Replacement, Fan Assembly: шаг 3, изображение 1 из 2 Lenovo Ideapad 330-15ARR Fan Assembly Replacement, Fan Assembly: шаг 3, изображение 2 из 2
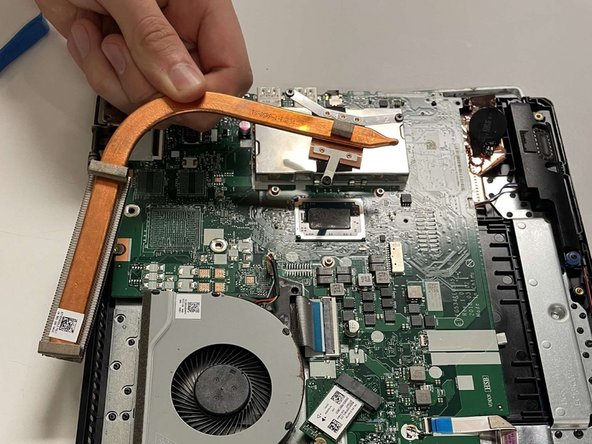
    • Unscrew all three captive screws attaching the heat sink to the motherboard with a Phillips #0 screwdriver.

    • These screws stay attached to the heatsink, so do not attempt to remove them.

  4. Lenovo Ideapad 330-15ARR Fan Assembly Replacement: шаг 4, изображение 1 из 2 Lenovo Ideapad 330-15ARR Fan Assembly Replacement: шаг 4, изображение 2 из 2
    • Remove the three Phillips #0 screws securing the fan assembly.

  5. Lenovo Ideapad 330-15ARR Fan Assembly Replacement: шаг 5, изображение 1 из 3 Lenovo Ideapad 330-15ARR Fan Assembly Replacement: шаг 5, изображение 2 из 3 Lenovo Ideapad 330-15ARR Fan Assembly Replacement: шаг 5, изображение 3 из 3
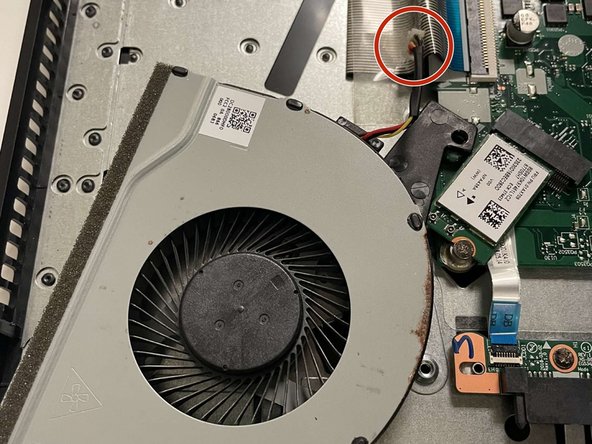
    • Take the wires in your hand, and firmly but gently pull it out of its port.

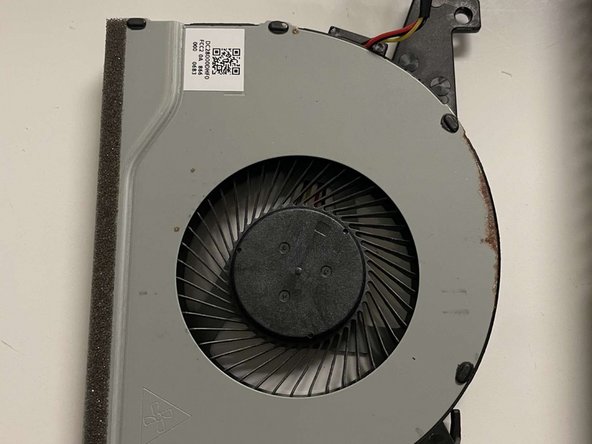
    • Lift the fan assembly out of the device.

Заключение

To reassemble your device, follow these instructions in reverse order.

Brayden Fleming

Участник с: 09/22/22

479 Репутация

Автор 3 руководств

Команда

University of North Texas, Team 3-2, Saru Jimmy Fall 2022 Участник University of North Texas, Team 3-2, Saru Jimmy Fall 2022

UNT-SARU JIMMY-F22S3G2

4 членов

Автор 3 руководств

0 Комментариев

Добавить комментарий

Просмотр статистики:

За последние 24часов: 0

За последние 7 дней: 1

За последние 30 дней: 23

За всё время: 350