Введение
The battery can possibly die quickly although the laptop can turn on when the charging cord is connected. This issue is the result of needing a battery replacement. This guide will show how to remove and replace your battery.
Выберете то, что вам нужно
-
-
Begin by turning your closed laptop so that you are looking at the bottom panel.
-
-
-
Locate the 10 screws (6mm) around the border of the panel.
-
Using the Torx T5 Screwdriver, remove the screws.
-
-
-
Now that the screws are removed, gently lift the back panel upwards to detach it from the rest of your laptop.
-
-
-
-
Locate the battery in the bottom right corner.
-
Using a Phillips #000, remove the 6 screws (3.5mm) on the border of the battery and the 7th screw (6.5mm) that is in the center of the battery.
-
-
-
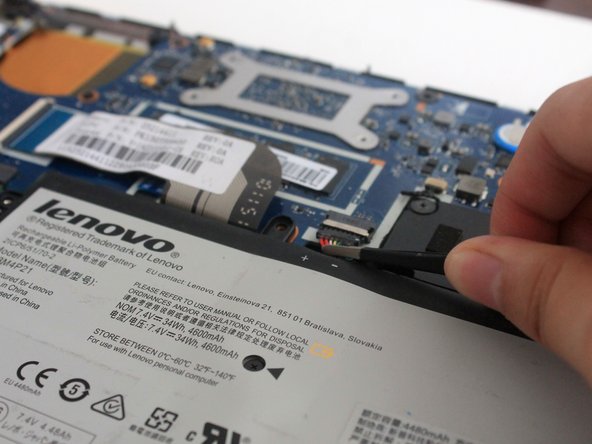
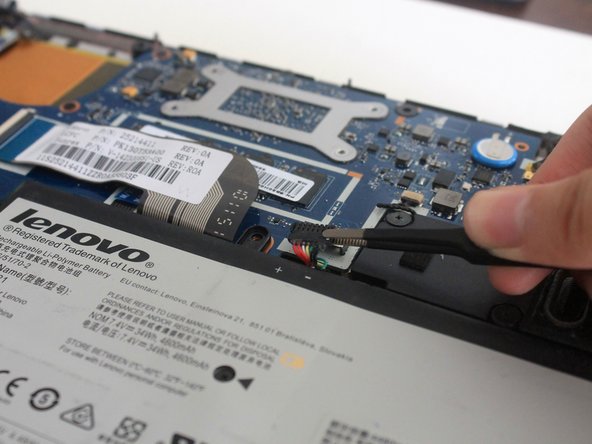
Locate the cable connecting to the battery. It is located at the top-center of the battery.
-
Use a pair of tweezers and place it so that the tweezer is around the cables. Gently pull the cables towards the battery to disconnect the cable.
-
-
-
There may be tape around the edge of the battery to secure some wires. Use a pair of tweezers to remove the tape so that the wires are no longer attached to the battery.
-
-
-
After you have unscrewed the screws, unplugged the cable, and removed the tape and wires, you can remove the battery from your laptop.
-


To reassemble your device, follow these instructions in reverse order.
To reassemble your device, follow these instructions in reverse order.
Отменить: Я не выполнил это руководство.
2 участников успешно повторили данное руководство.
Команда

UC Santa Barbara, Team S1-G5, Weedon Fall 2017 Участник UC Santa Barbara, Team S1-G5, Weedon Fall 2017
UCSB-WEEDON-F17S1G5
5 членов
Автор 5 руководств