Перейти к основному содержанию

Lenovo Legion 5 17ACH6H RAM Replacement

Выберете то, что вам нужно

  1. Lenovo Legion 5 17ACH6H RAM Replacement, RAM: шаг 1, изображение 1 из 3 Lenovo Legion 5 17ACH6H RAM Replacement, RAM: шаг 1, изображение 2 из 3 Lenovo Legion 5 17ACH6H RAM Replacement, RAM: шаг 1, изображение 3 из 3
    • Use the Phillips #1 screwdriver to remove the ten screws on the back panel.

    • Four 4.6 mm PH1 screws

    • Six 12.8 mm PH1 screws

  2. Lenovo Legion 5 17ACH6H RAM Replacement: шаг 2, изображение 1 из 3 Lenovo Legion 5 17ACH6H RAM Replacement: шаг 2, изображение 2 из 3 Lenovo Legion 5 17ACH6H RAM Replacement: шаг 2, изображение 3 из 3
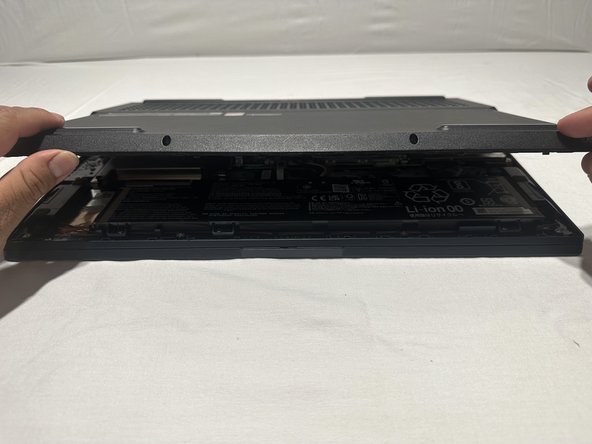
    • Insert the rounded side of the opening pick on the lower right of the back panel.

    • Apply light pressure downwards to release the clip.

    • Slide the opening pick along the lower back side of the panel to release the remaining clips.

  3. Lenovo Legion 5 17ACH6H RAM Replacement: шаг 3, изображение 1 из 3 Lenovo Legion 5 17ACH6H RAM Replacement: шаг 3, изображение 2 из 3 Lenovo Legion 5 17ACH6H RAM Replacement: шаг 3, изображение 3 из 3
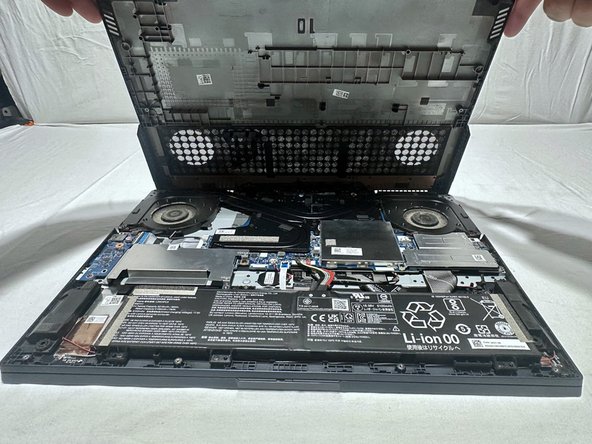
    • Insert the opening pick on the right side of the panel (along the ports) and slide it across to release the pins.

    • Repeat this step on the left side of the panel.

  4. Lenovo Legion 5 17ACH6H RAM Replacement: шаг 4, изображение 1 из 3 Lenovo Legion 5 17ACH6H RAM Replacement: шаг 4, изображение 2 из 3 Lenovo Legion 5 17ACH6H RAM Replacement: шаг 4, изображение 3 из 3
    • Slide the pick in the vent near the USB C port.

    • Rotate the pick so it is on the top part of the vent.

    • Slide the pick across the top side of the vent

    • The laptop can be held vertically, so the process is much easier.

    • Repeat this step on the other side vent near the USB A port.

  5. Lenovo Legion 5 17ACH6H RAM Replacement: шаг 5, изображение 1 из 3 Lenovo Legion 5 17ACH6H RAM Replacement: шаг 5, изображение 2 из 3 Lenovo Legion 5 17ACH6H RAM Replacement: шаг 5, изображение 3 из 3
    • Grab the back panel and lift it to remove it from the chassis.

    • Before completely lifting the back panel, the panel should be pushed a little bit away from you. This is to prevent the panel from getting stuck with the IO ports.

  6. Lenovo Legion 5 17ACH6H RAM Replacement: шаг 6, изображение 1 из 3 Lenovo Legion 5 17ACH6H RAM Replacement: шаг 6, изображение 2 из 3 Lenovo Legion 5 17ACH6H RAM Replacement: шаг 6, изображение 3 из 3
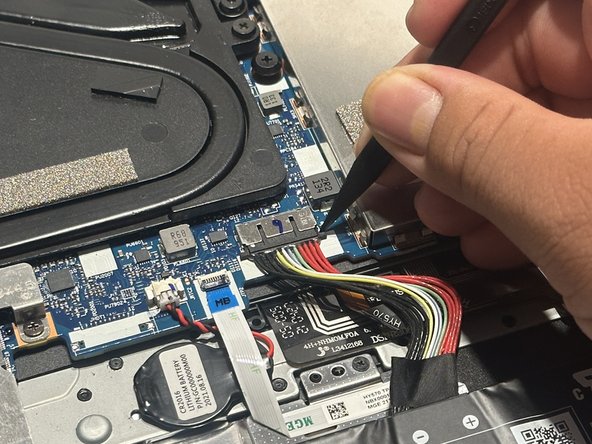
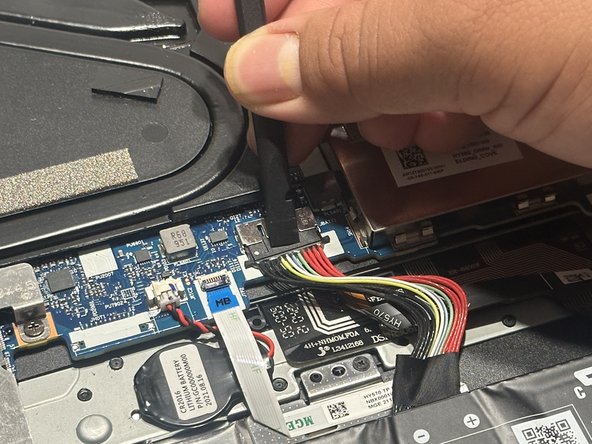
    • Use the pointed tip of a spudger to carefully push on each side of the connector.

    • Use the flat side of the spudger at the top of the battery connector to completely push it out.

    • Pull the cable by the connector and not the wires to move it out of the way.

    • It is important to disconnect the battery since touching the components with the battery connected can short-circuit the device. This could cause damage to the components and yourself.

  7. Lenovo Legion 5 17ACH6H RAM Replacement: шаг 7, изображение 1 из 3 Lenovo Legion 5 17ACH6H RAM Replacement: шаг 7, изображение 2 из 3 Lenovo Legion 5 17ACH6H RAM Replacement: шаг 7, изображение 3 из 3
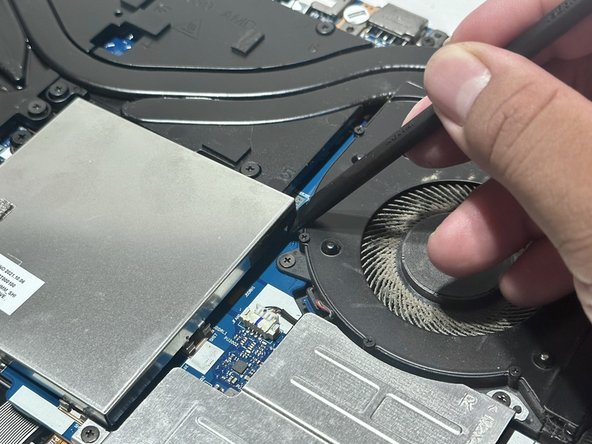
    • Place the flat side of the spudger between the RAM shield (right) and the metal plate (left) at a 45-degree angle.

    • Pry open the bottom part of the metal plate by moving the spudger toward the RAM shield.

  8. Lenovo Legion 5 17ACH6H RAM Replacement: шаг 8, изображение 1 из 3 Lenovo Legion 5 17ACH6H RAM Replacement: шаг 8, изображение 2 из 3 Lenovo Legion 5 17ACH6H RAM Replacement: шаг 8, изображение 3 из 3
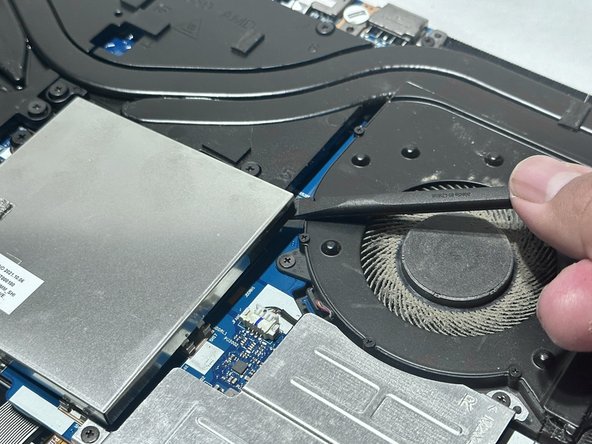
    • Place the flat side of the spudger between the fan (right) and the metal plate (left).

    • Pry open the top part of the metal plate by moving the spudger toward the fan.

  9. Lenovo Legion 5 17ACH6H RAM Replacement: шаг 9, изображение 1 из 3 Lenovo Legion 5 17ACH6H RAM Replacement: шаг 9, изображение 2 из 3 Lenovo Legion 5 17ACH6H RAM Replacement: шаг 9, изображение 3 из 3
    • Grab both sides of the metal plate to lift it off the clips.

  10. Lenovo Legion 5 17ACH6H RAM Replacement: шаг 10, изображение 1 из 3 Lenovo Legion 5 17ACH6H RAM Replacement: шаг 10, изображение 2 из 3 Lenovo Legion 5 17ACH6H RAM Replacement: шаг 10, изображение 3 из 3
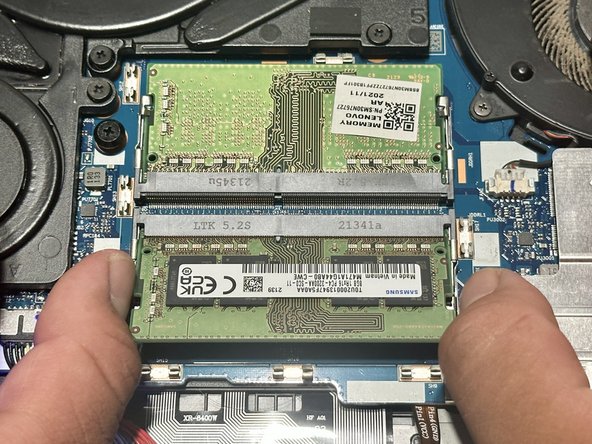
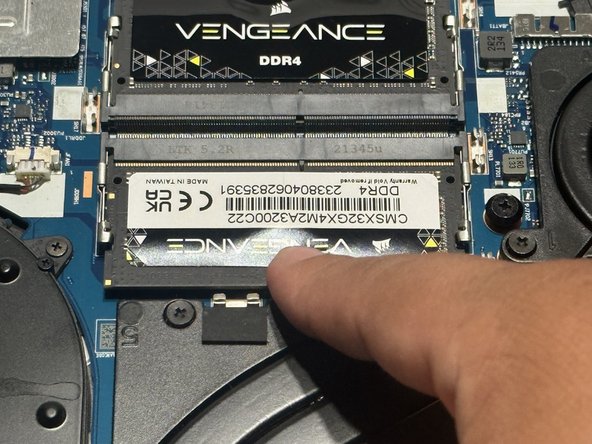
    • With both thumbs, push the clips outward.

    • Gently slide the RAM module out of the socket to remove it.

  11. Lenovo Legion 5 17ACH6H RAM Replacement: шаг 11, изображение 1 из 3 Lenovo Legion 5 17ACH6H RAM Replacement: шаг 11, изображение 2 из 3 Lenovo Legion 5 17ACH6H RAM Replacement: шаг 11, изображение 3 из 3
    • Repeat step 10 to remove the top module.

    • The laptop was rotated 180 degrees, which is why it is facing the camera.

  12. Lenovo Legion 5 17ACH6H RAM Replacement: шаг 12, изображение 1 из 3 Lenovo Legion 5 17ACH6H RAM Replacement: шаг 12, изображение 2 из 3 Lenovo Legion 5 17ACH6H RAM Replacement: шаг 12, изображение 3 из 3
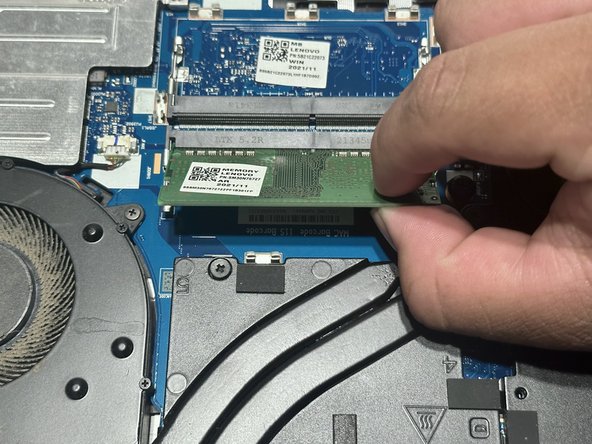
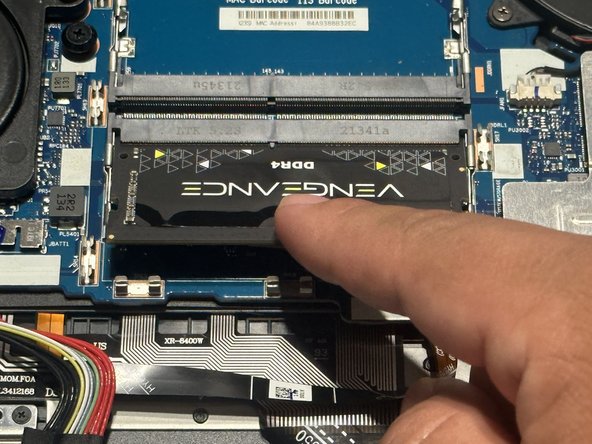
    • Insert the RAM module at a 45-degree angle.

    • Make sure the module aligns with the slot. You can check by making sure the module pins' holes align with the slot.

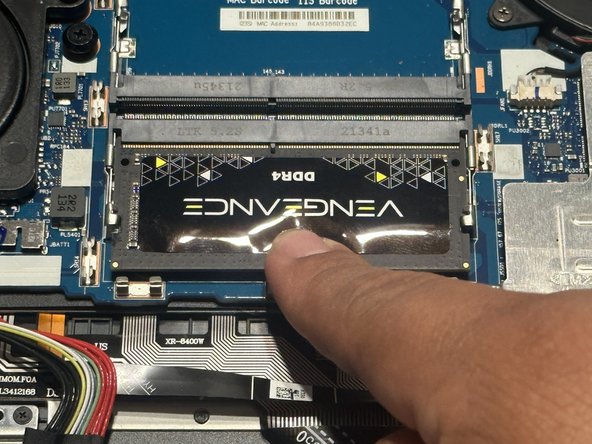
    • With a finger on the top part of the module, push the RAM stick downward.

    • A click indicates that the module has been inserted successfully.

  13. Lenovo Legion 5 17ACH6H RAM Replacement: шаг 13, изображение 1 из 3 Lenovo Legion 5 17ACH6H RAM Replacement: шаг 13, изображение 2 из 3 Lenovo Legion 5 17ACH6H RAM Replacement: шаг 13, изображение 3 из 3
    • Repeat step 12 to insert the top RAM module.

    • The laptop was rotated 180 degrees, which is why it is facing the camera.

Заключение

To reassemble your device, follow these instructions in reverse order.

Еще один человек закончил это руководство.

Arturo Moreno

Участник с: 10/24/23

253 Репутация

1 руководство автора

Команда

CSU Los Angeles, Team 12-4, Ribeiro Fall 2023 Участник CSU Los Angeles, Team 12-4, Ribeiro Fall 2023

CSULA-RIBEIRO-F23S12G4

2 членов

Автор 1 руководств

0 Комментариев

Добавить комментарий

Просмотр статистики:

За последние 24часов: 1

За последние 7 дней: 20

За последние 30 дней: 96

За всё время: 635