Введение
Once the keyboard and touch pad have been removed, the battery can be easily replaced by removing three screws and a connection cable.
Выберете то, что вам нужно
-
-
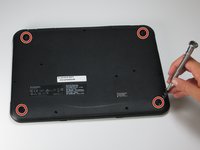
Use a screwdriver to remove the six 5.0mm Phillips screws from the bottom housing of the Chromebook.
-
-
-
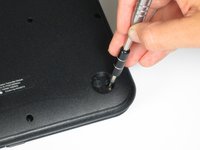
Use a plastic opening tool to pry off the four rubber pegs from the bottom housing.
-
-
-
Use a screwdriver to remove the four 5.0mm Phillips screws located under the rubber soles.
-
-
-
Flip the laptop over and open the screen.
-
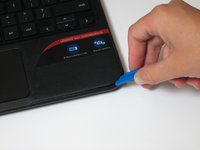
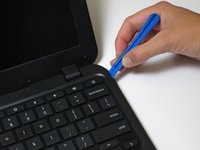
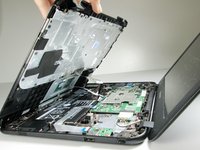
Gently pry the keyboard and trackpad panel away from the bottom housing using a plastic opening tool.
-
-
-
-
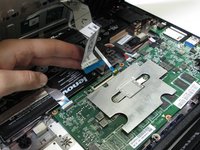
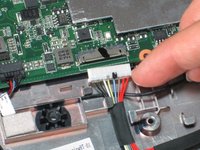
Disconnect the keyboard ribbon cable by lifting the ZIF connector lock with a plastic opening tool or fingernail and gently pulling the ribbon cable straight out of its socket.
-
-
-
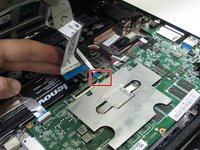
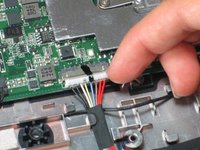
Disconnect the trackpad ribbon cable by lifting the ZIF connector lock with a small prying tool or fingernail and gently pulling the ribbon cable straight out of its socket.
-
-
-
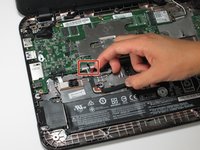
Disconnect the white charging cable connectors by pulling straight down on the connector.
-
-
-
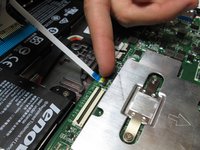
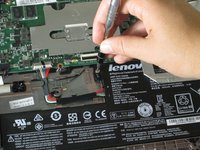
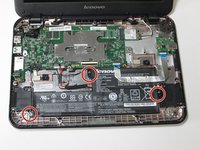
Use a Phillips screwdriver to remove the three 3mm screws located along the edge of the battery.
-


To reassemble your device, follow these instructions in reverse order.
To reassemble your device, follow these instructions in reverse order.
Отменить: Я не выполнил это руководство.
7 человек успешно провели ремонт по этому руководству.

Команду

Cal Poly, Team S21-G2, Livingston Spring 2017 Участник Cal Poly, Team S21-G2, Livingston Spring 2017
CPSU-LIVINGSTON-S17S21G2
4 членов
Автор 12 руководств